- What ChatGPT (OpenAI) Is, How It Works, and How It Relates to SEO - February 16, 2023
- Semantic SEO - December 1, 2022
- Localism and SEO - October 18, 2022
If you’ve been affected financially by the coronavirus (COVID-19) pandemic and find yourself wondering ‘how do I start a blog and make money on WordPress’, this article will walk you through the first phase of the blog setup process.
Don’t worry, even if you’re an absolute beginner to WordPress (or blogging in general), this article will show you how to create a blog in WordPress step-by-step.
Table of Contents
What Should I Blog About?
So, you’re probably wondering: ‘what should I blog about?’ Don’t worry, hundreds of other people like you want to start a WordPress blog, but have no idea about what topic(s) they want to write about.
My best advice is to think about what you’re truly passionate about. Even if you’re not a seasoned expert on the subject yet, that’s okay.
Just make sure to choose a topic that you truly love learning about so that you can provide your readers with valuable insights and information to keep them coming back for more.
Also, when choosing a topic don’t go too broad so that you can attract a more defined and marketable audience, but don’t be so specific that you severely limit the scope of your blog!
Here’s a quick list of blog topics to help get you brainstorming:
- Parenting
- Cooking/Recipes
- Fashion
- Politics
- Product/Service Reviews
- Fitness
- Family
- Gaming
- Travel
- Music
- Celebrities
- Diseases
- Healthcare
- History
- Sports
- Shopping
- Entertainment
- Home Decor
How to Choose a Domain Name
Once you’ve settled on a blog topic, the next step in the how to create a blog in WordPress process is to to choose a domain name. A domain name is simply an address that points users to a location where users can access and view your website.
Here’s some things to keep in mind when choosing a domain name:
- Decide if your website will be a personal or business brand. If your brand is personal, you may want to use your real name or some variation of it.
- Choose a name that’s topical. Make sure the name you choose makes sense for the type of topics you plan on covering.
- Make it easy to type and memorize. Don’t confuse people with overcomplicated and creative spellings!
- Keep it short and sweet. The fewer characters the better, so make sure to avoid using numbers, hyphens, dashes, etc. (unless absolutely necessary).
- Find a catchy name, but don’t overthink it. You’ll want to come up with something memorable, but don’t get so caught up that you never finish settling on a name.
- Do your research and protect yourself. Perform your due diligence to ensure you’re not infringing on another person’s brand or trademarks.
How Do I Create a Free WordPress Blog?
For those of you looking to create a free WordPress blog, the word ‘free’ might be a bit misleading.
You see, while WordPress software is in fact free for you to download and use for your own purposes, “the catch” is that you’ll need to pay for a hosting service to store your website and make it accessible to the public (more on that in step #2).
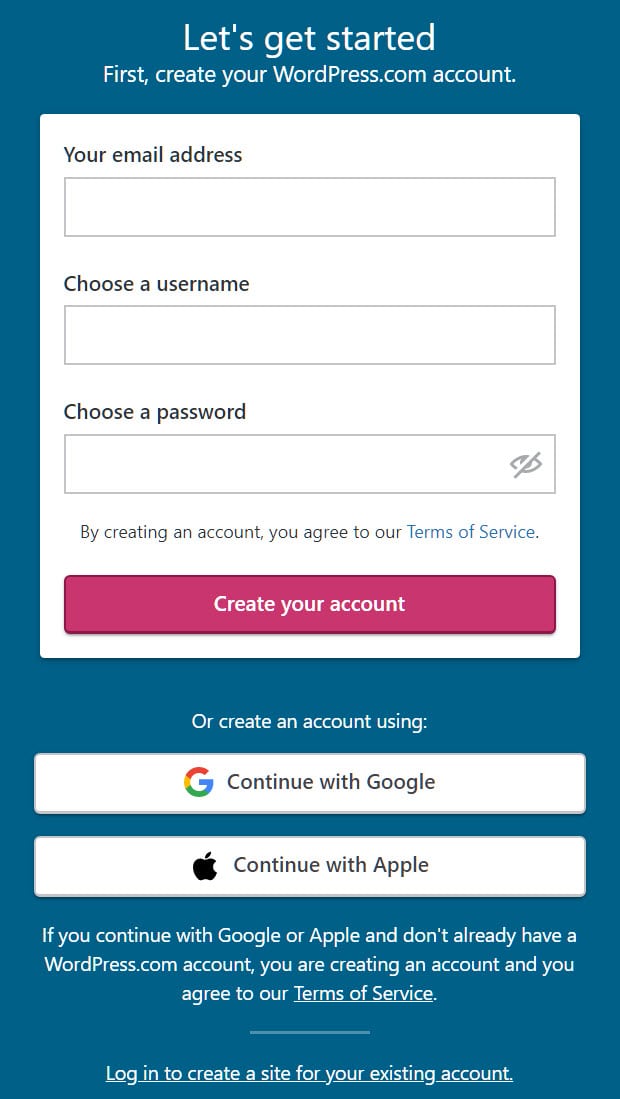
1.) To get started on creating a brand new WordPress blog, create a free WordPress account. Click on ‘Start your site’, then fill out the ‘Let’s get started’ section:
💡 We highly recommend using a password manager to safely store all of your login credentials.
2.) Once you’ve created and confirmed your new WordPress account, the next step is choosing your web hosting plan.
Here’s what we recommend when it comes to hosting your WordPress blog:
- WordPress Hosting. WordPress offers a range of affordable hosting options and includes a free 1-year domain registration with all of their paid plans.
- Shared Hosting. If you plan on putting out blog content as a business but you’re currently on a shoestring budget, try one of A2 Hosting’s shared hosting plans. Shared hosting (i.e. budget hosting) means that your website will stored alongside other people’s websites on the same server and sharing resources.
- Premium Hosting. As your website needs grow, you’ll need a hosting plan that can keep up. For that, we highly recommend going with one of the VPS plans from VELOCIREP as they provide one of the best VPS hosting experiences out there.
3.) After signing up for a hosting plan, it’s time to install WordPress. The ideal way to install WordPress is by downloading the latest software package from WordPress.org and performing the installation manually, but for the purposes of this tutorial we’ll keep it fast and easy for you.
Sign into your control panel using the credentials provided to you by your hosting provider.
For cPanel: Scroll down and click on the WordPress icon under the SOFTACULOUS APPS INSTALLER section.
If your cPanel looks different (and it probably will), simply search the page for the ‘Softaculous’ link (Ctrl+F).
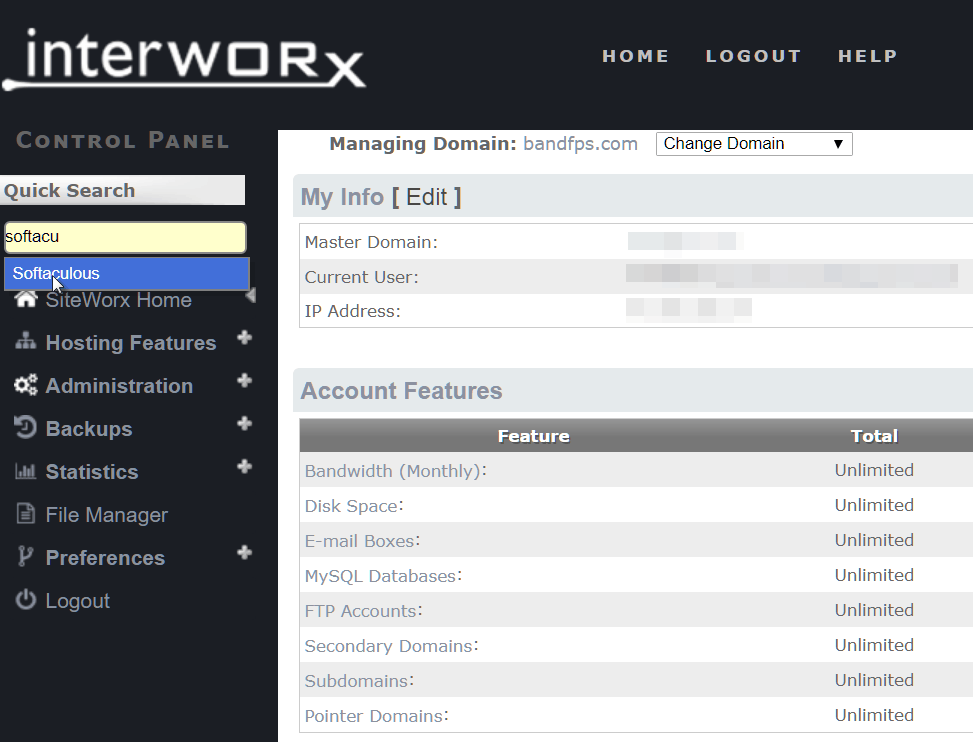
For InterWorx: Log into NodeWorx, then click on SiteWorx > Accounts > and click on the ‘SiteWorx’ link that appears next to the site you want to install WordPress on.
Type ‘Softaculous’ into the Quick Search bar and click on the link that appears underneath:
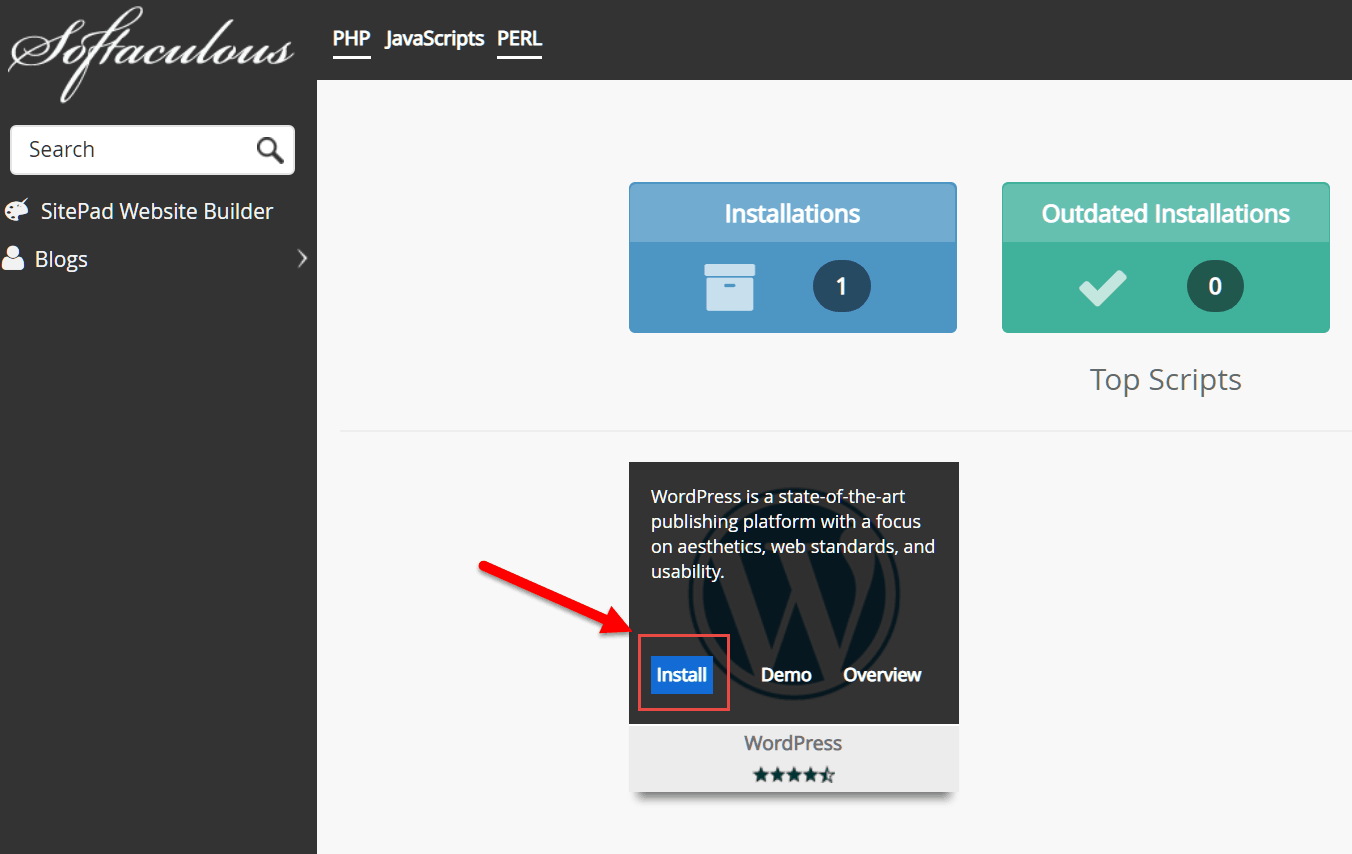
You should see a WordPress icon appear, but if not type ‘WordPress’ in the search bar. Hover your mouse over the WordPress icon that appears and click on ‘Install’:
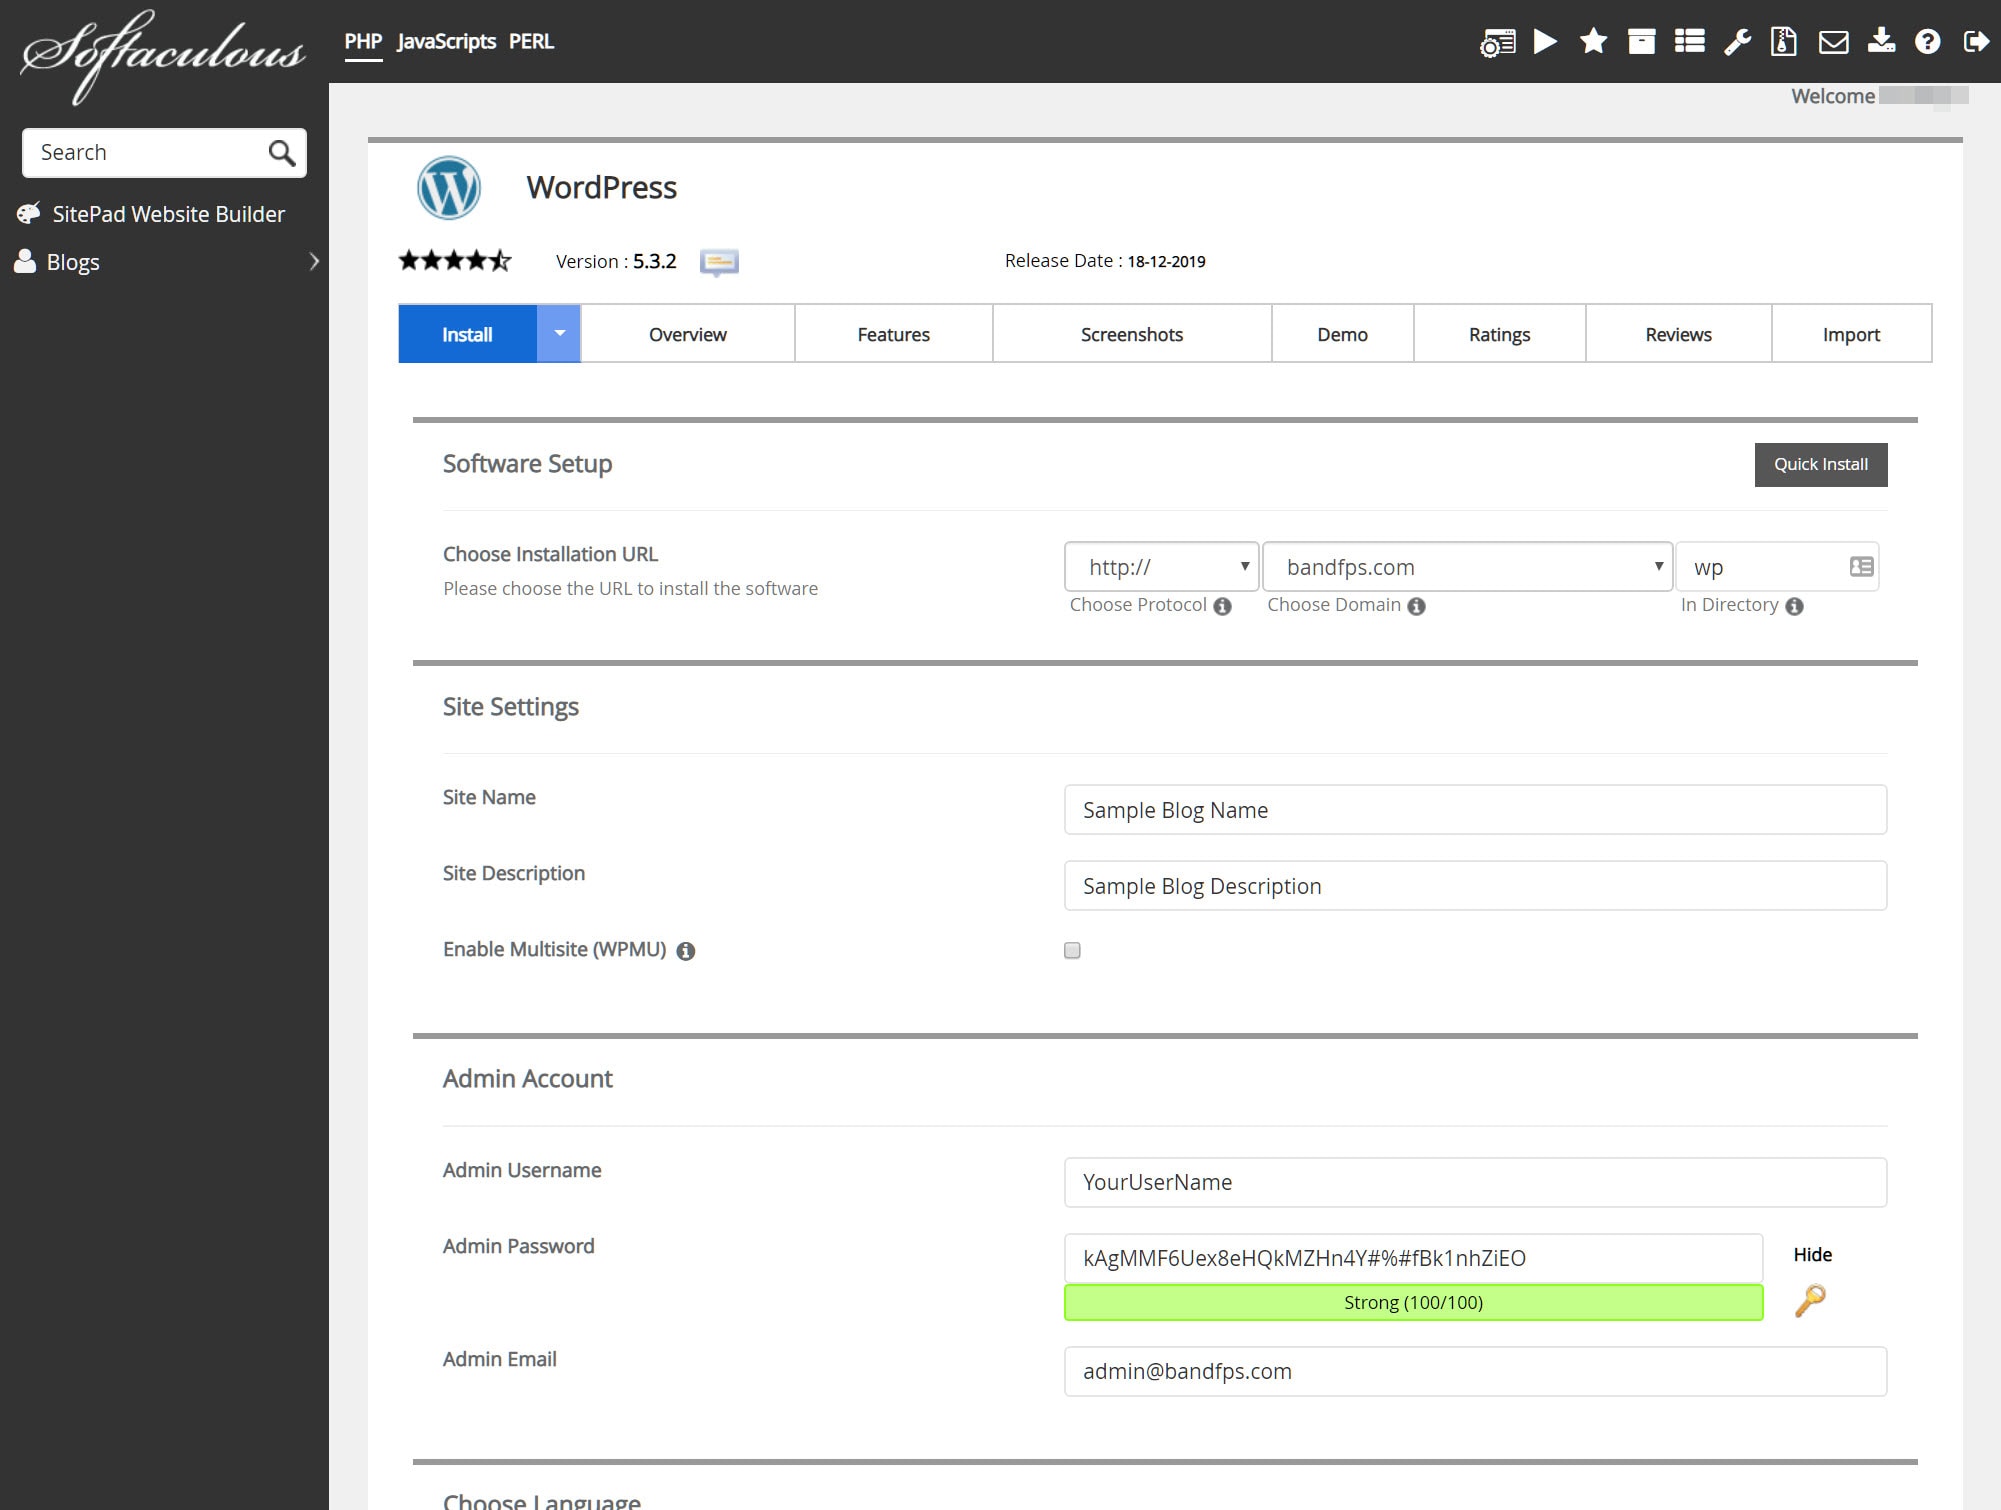
4.) You’ll then be presented with a software setup form that looks something like this:
– Under ‘Choose Installation URL’, leave it on ‘http://’ for now, then select the domain name you linked to your hosting account and choose a directory name (optional).
– For ‘Site Name/Description’, enter the name you want to use for your blog and a brief one-line description. If you’re not sure what to put here just yet, you can always enter some placeholder text and edit it later.
– Choose a unique username, a secure password, and enter your best email address.
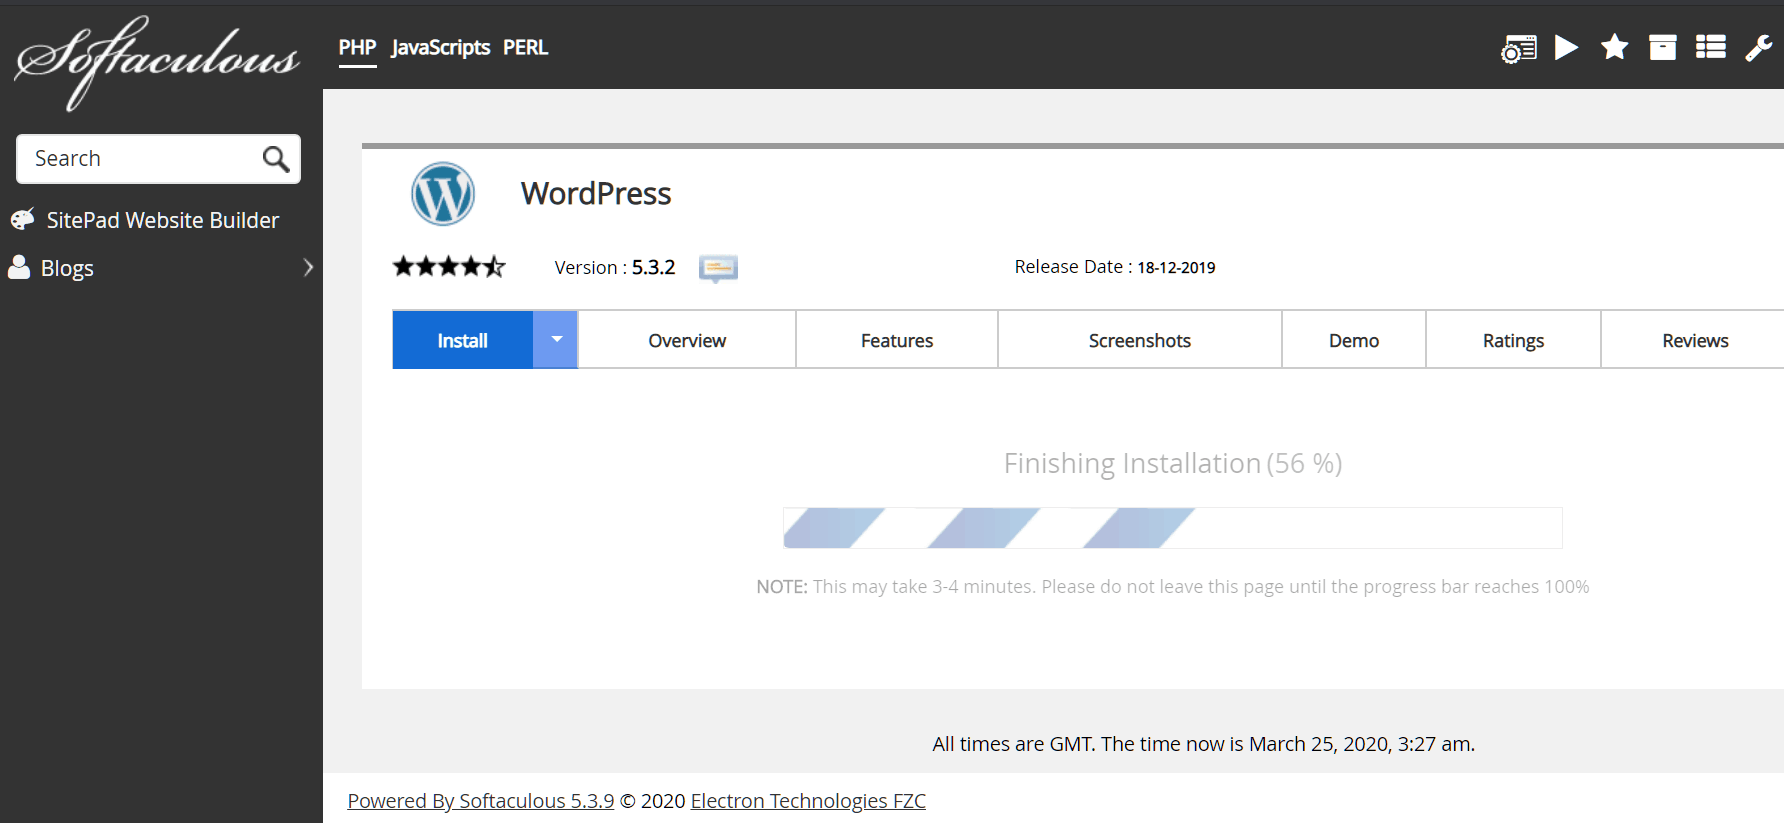
– Finally, choose your preferred language and leave the advanced/theme options at default. Then click on ‘Install’ and wait for the installation process to complete:
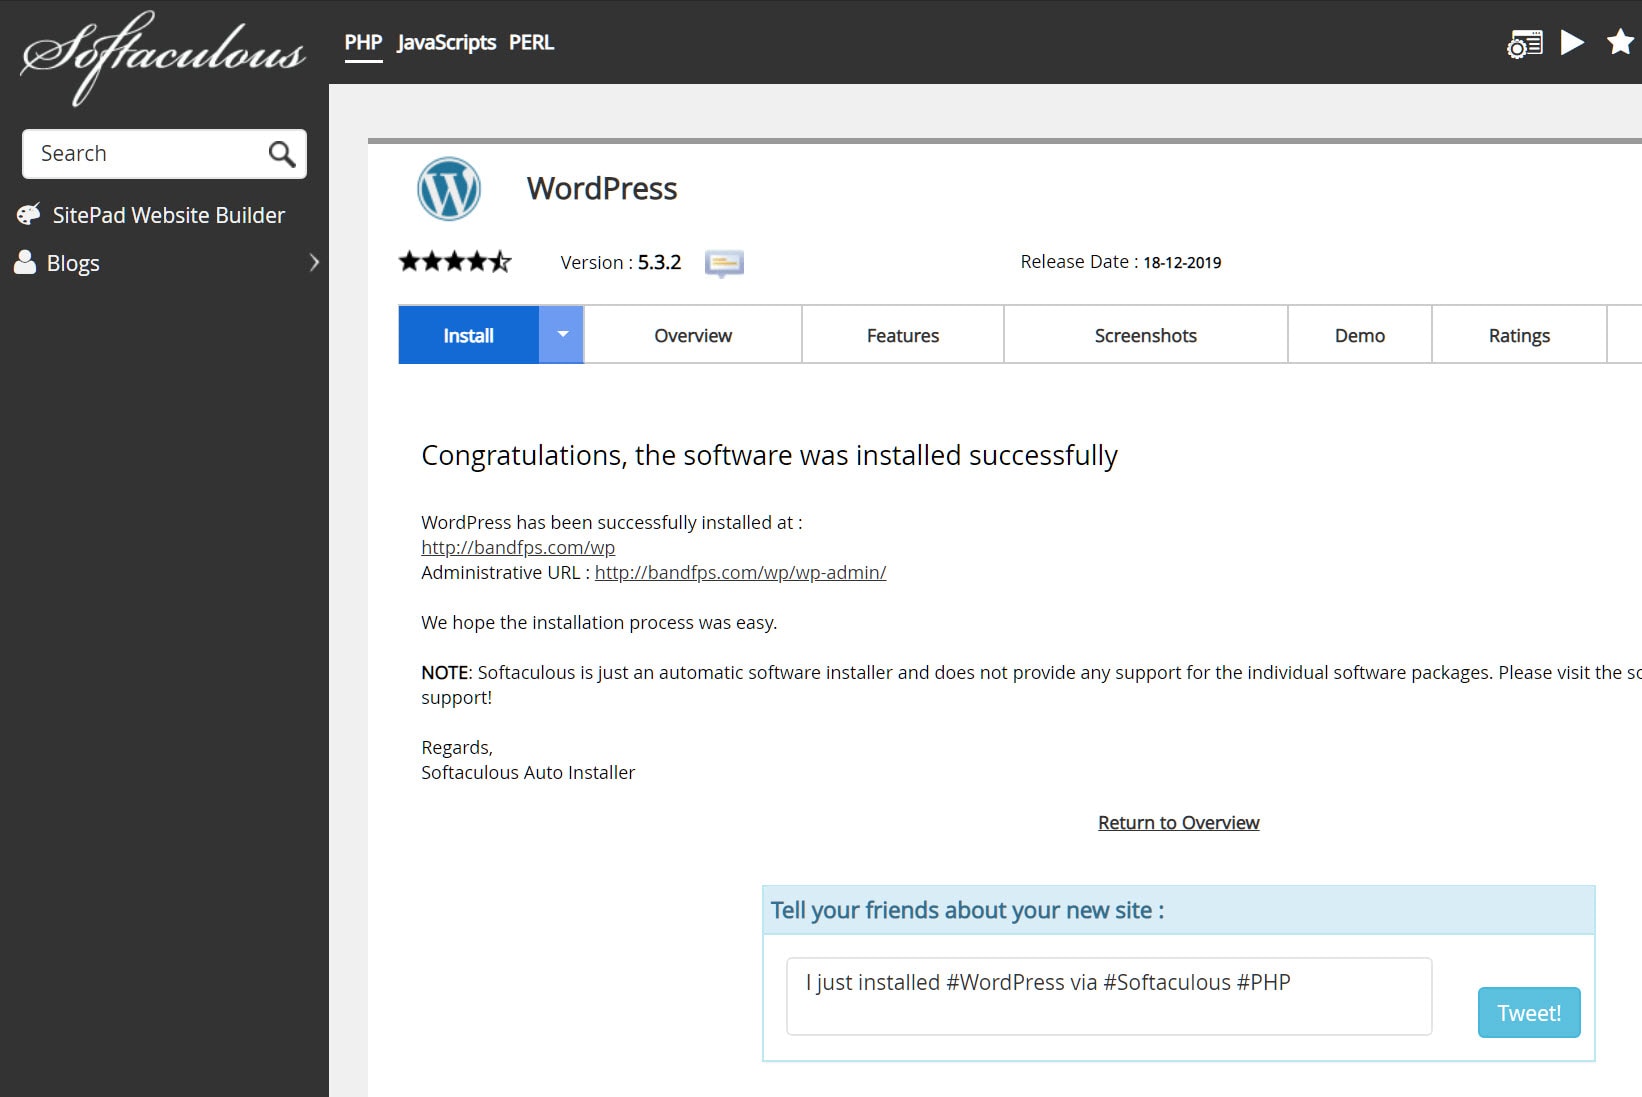
5.) Finally, visit the administrative URL on the confirmation page and log in with the username/password you created. Don’t forget to bookmark that URL (Ctrl+D) and save your login credentials!
Conclusion
We hope this tutorial taught you how to create a blog in WordPress in just a few short steps. If you intend on publishing and sharing a blog, this first step in the blog setup process is crucially important.
Our next tutorial will teach you how to best configure your WordPress settings. Don’t forget to subscribe below!
We hope you learned something today about using our how to create a blog in WordPress. Visit our blog for more articles and subscribe to learn more about search engine marketing!


