

His SEO, PPC, and AI-driven automation work has helped clients increase lead generation by as much as 187%. B&FPS has been named among the Best SEO Agencies, Best PPC Agencies, and Best Web Design Agencies in Miami by Expertise.com every year from 2023 through 2025, and holds a 5-star Google rating as a certified Google Partner.
Daniel holds a Master's in Interactive Technology from the University of Alabama and a Bachelor's in Public Administration from Barry University. He's completed specialized training in digital marketing through the University of Illinois at Urbana-Champaign and web development, coding, and business through the University of Michigan. He's a member of the Honor Society of Phi Kappa Phi and the Golden Key International Honour Society.
Now that you’ve learned how to create a blog in WordPress and set it up on your new web hosting account, it’s time to learn how to configure your WordPress settings.
This article will show you which WordPress settings need to be adjusted, which plugins to install, how to set up a Cloudflare account, and how to set up Google Analytics so you can track your website’s growth and progress.
How Do You Get to Your Dashboard on WordPress?
If you’re wondering how to get to your WordPress dashboard, simply log into your account using the administrative URL provided to you on the software installation confirmation page.
Your WordPress administrative URL should look something like this: http://yourdomain.com/wp/wp-admin or http://yourdomain.com/wp-admin (if you didn’t specify a directory).
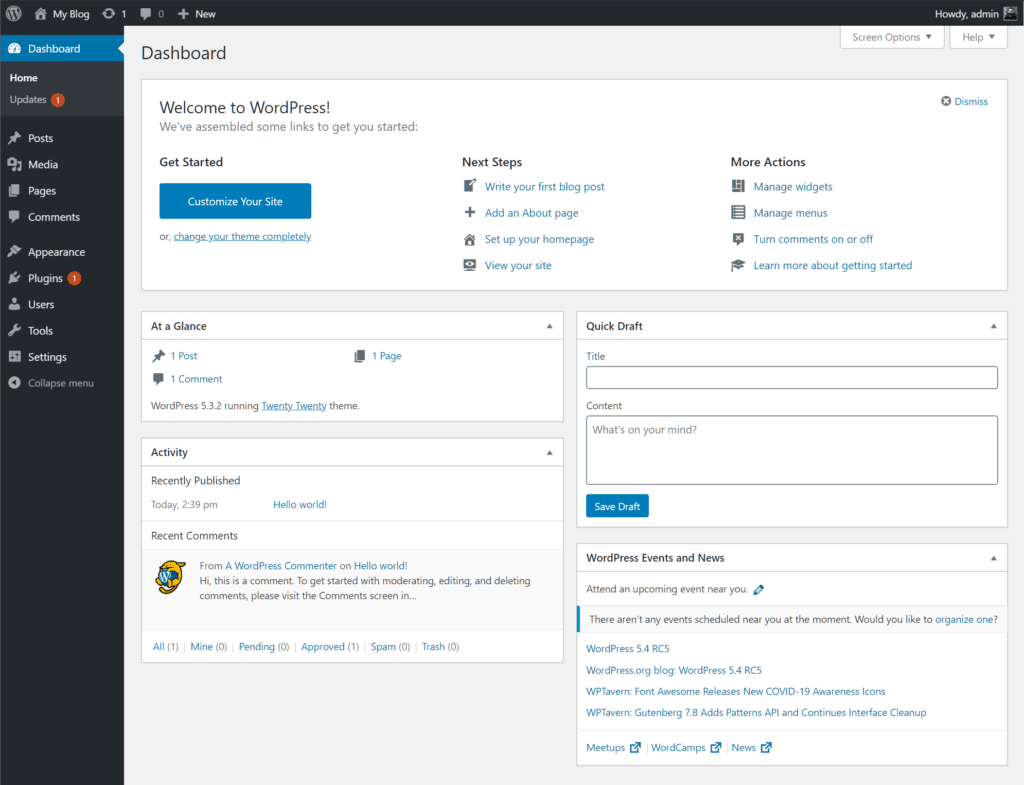
This is how your WordPress dashboard should look like by default:
How Do I Change My WordPress Dashboard?
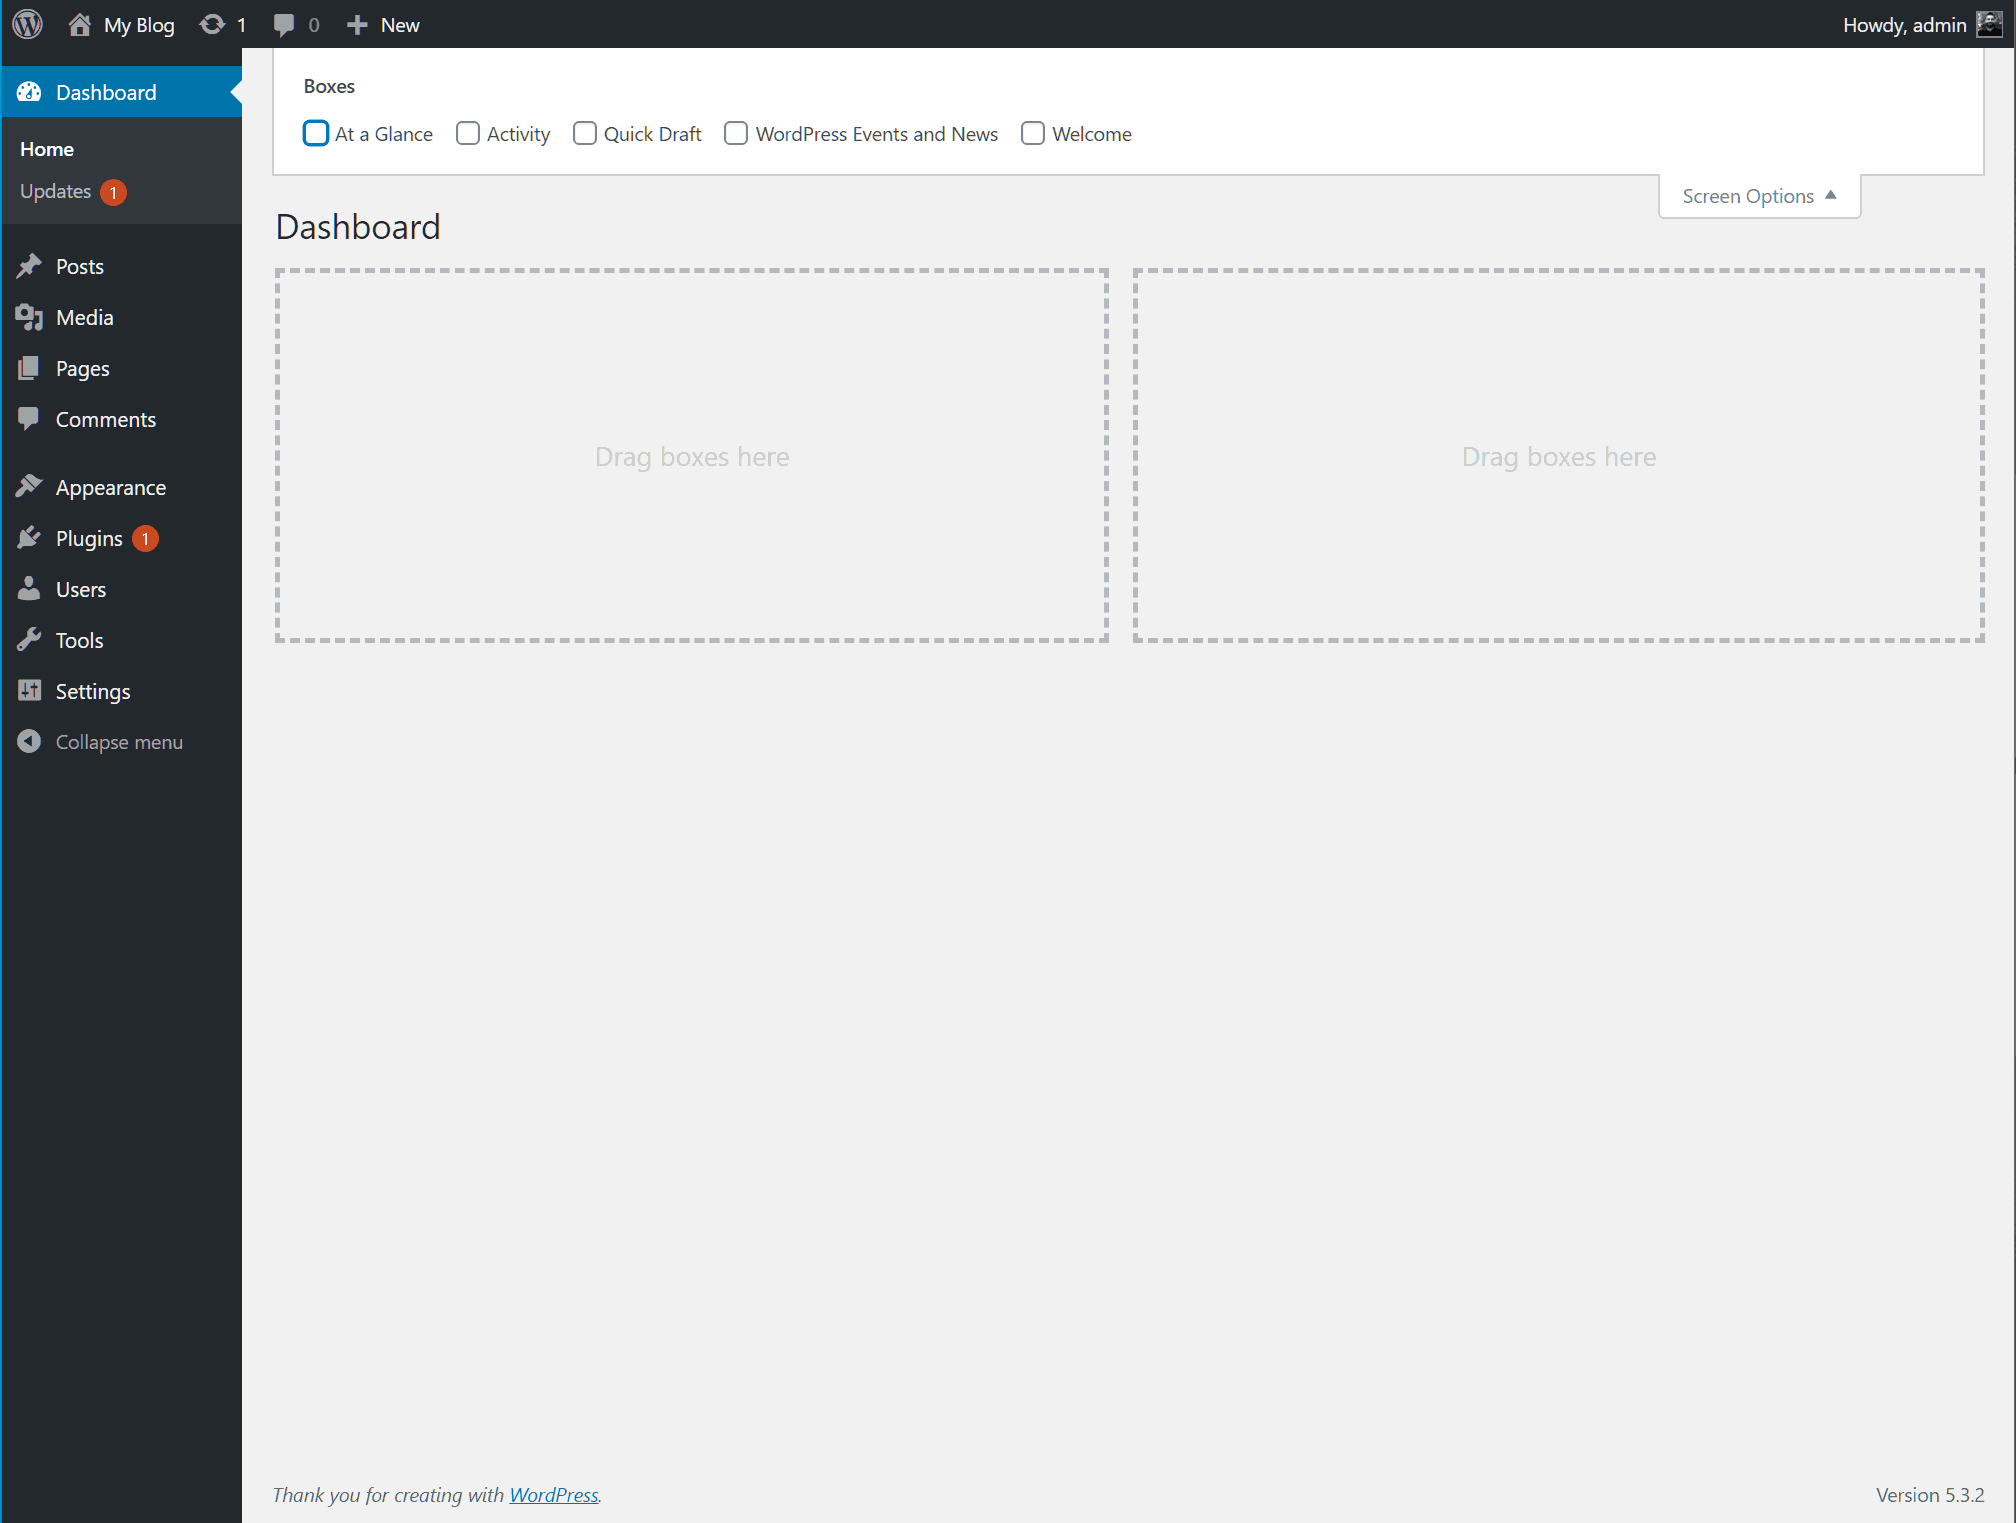
This step is entirely optional, but if you’re like me and prefer working with a clean, uncluttered WordPress dashboard, click on ‘Screen Options’ and uncheck all the items you don’t want to see.
You can also reorder and position these elements (i.e. ‘Boxes’) around by simply clicking and dragging them.
Where Is ‘Settings’ on WordPress?
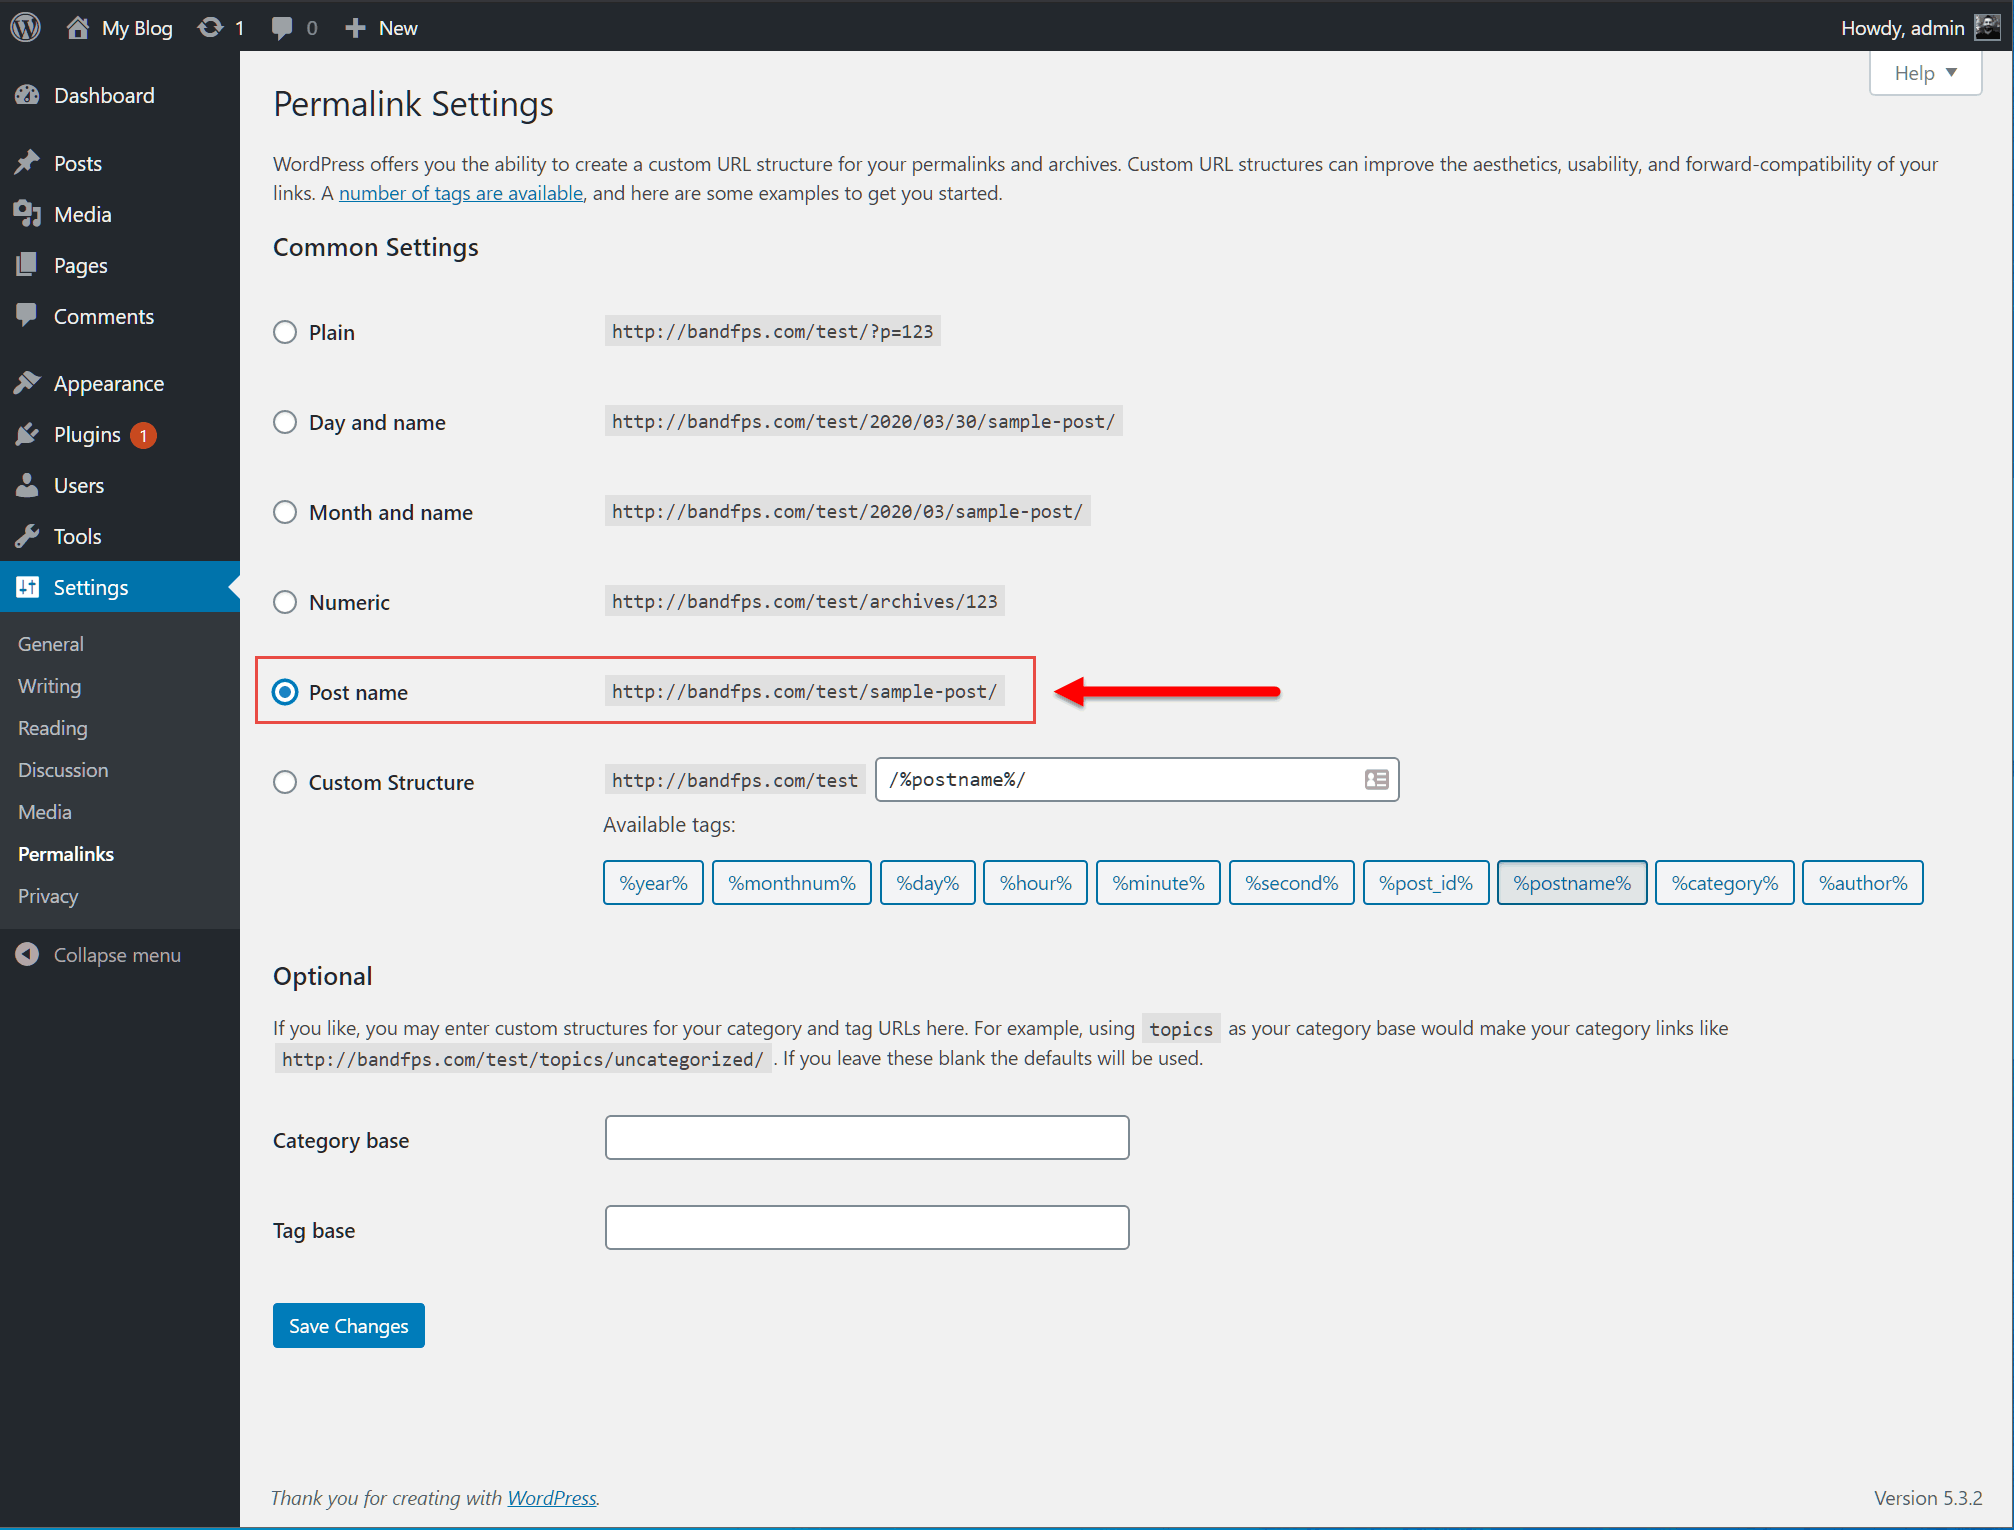
Finding where the settings are in WordPress is super easy. WordPress settings are located towards the bottom of the left side menu.
Go ahead and click on ‘Permalinks’ and then select ‘Post name’ to change the URL structure to choose the most SEO-friendly one.
How Do I Change Page Settings in WordPress?
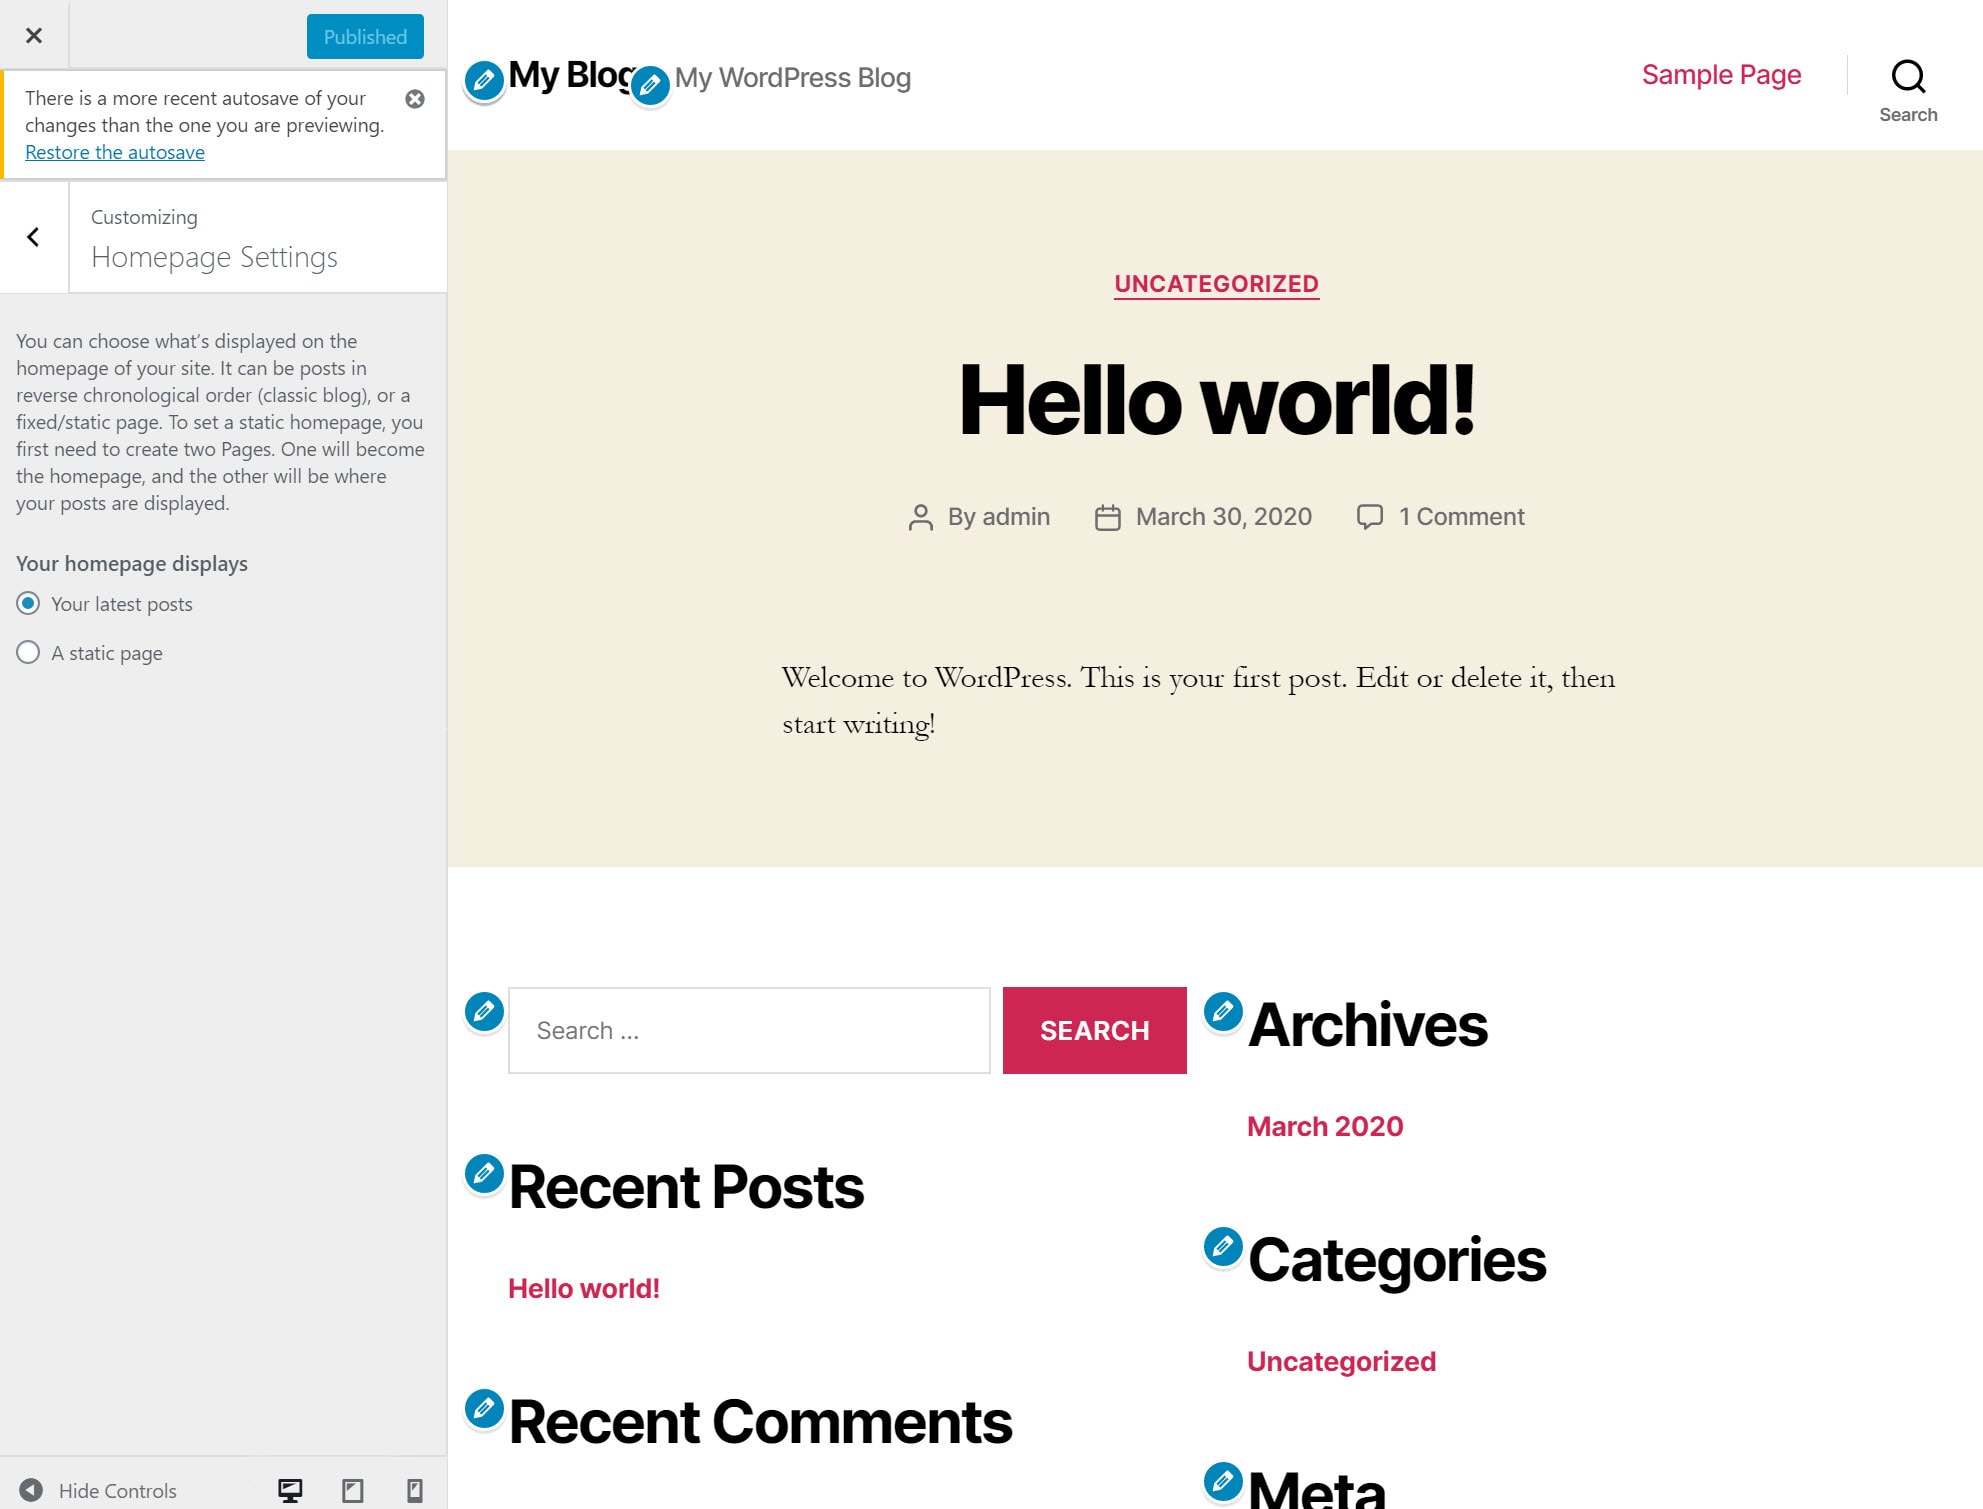
In our next article, we’ll dive a bit deeper into the page/post settings, but for now let’s edit the homepage settings by going to Appearance > Customize > Homepage Settings.
If you plan on creating a website where your blog isn’t the main focus, you’ll want to select ‘A static page’ and then choose the page you want to designate as your homepage. However, if you’re only interested in using your website solely as a blog, make sure it’s set to ‘Your latest posts’.
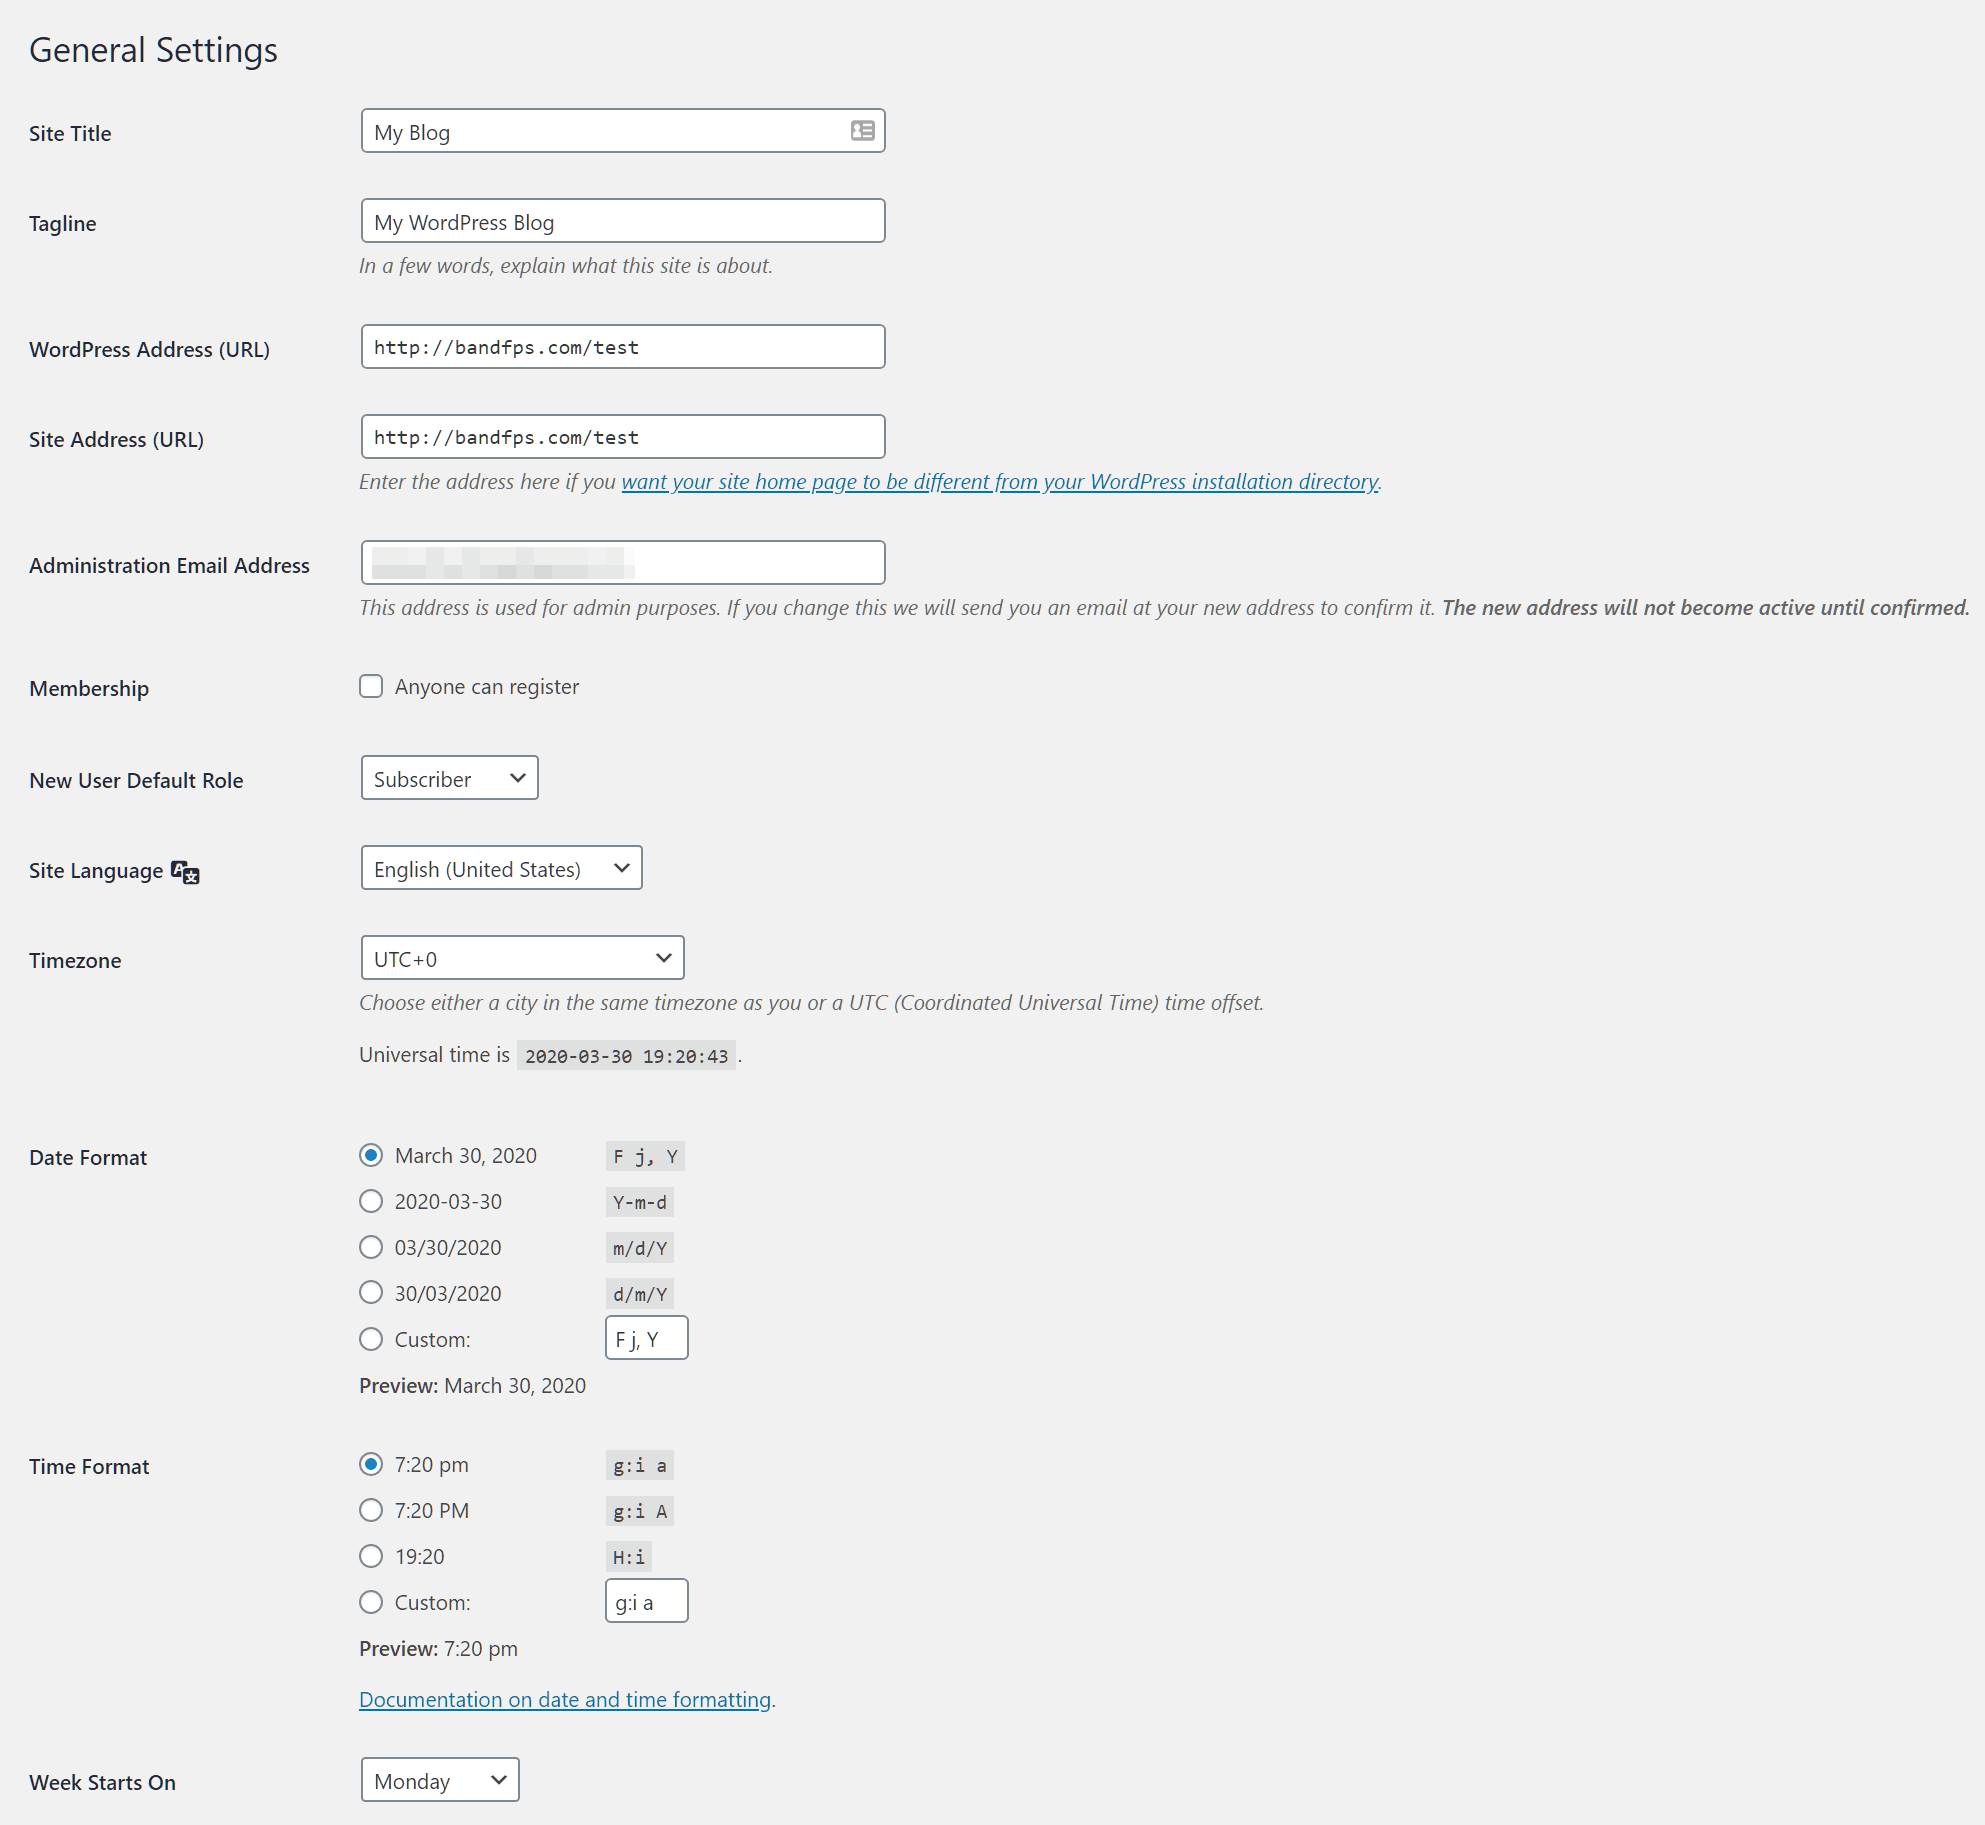
What Is ‘General Settings?’
The ‘General Settings’ in WordPress lets you edit your site’s title and tagline, WordPress/site addresses, administrator email address, language, time zone and the date/time formats.
How Do I Get to General Settings?
Get to ‘General Settings’ in WordPress by simply clicking on the ‘Settings’ link on the left side menu.
The general section should appear by default, but if not you may need to click on the ‘General’ link that appears directly underneath ‘Settings’.
What Is the Best Way to Configure Your WordPress Settings?
This section will show you the best way to configure your WordPress settings so that you can speed up/secure your installation, receive messages via contact form, and track your website’s overall progress.
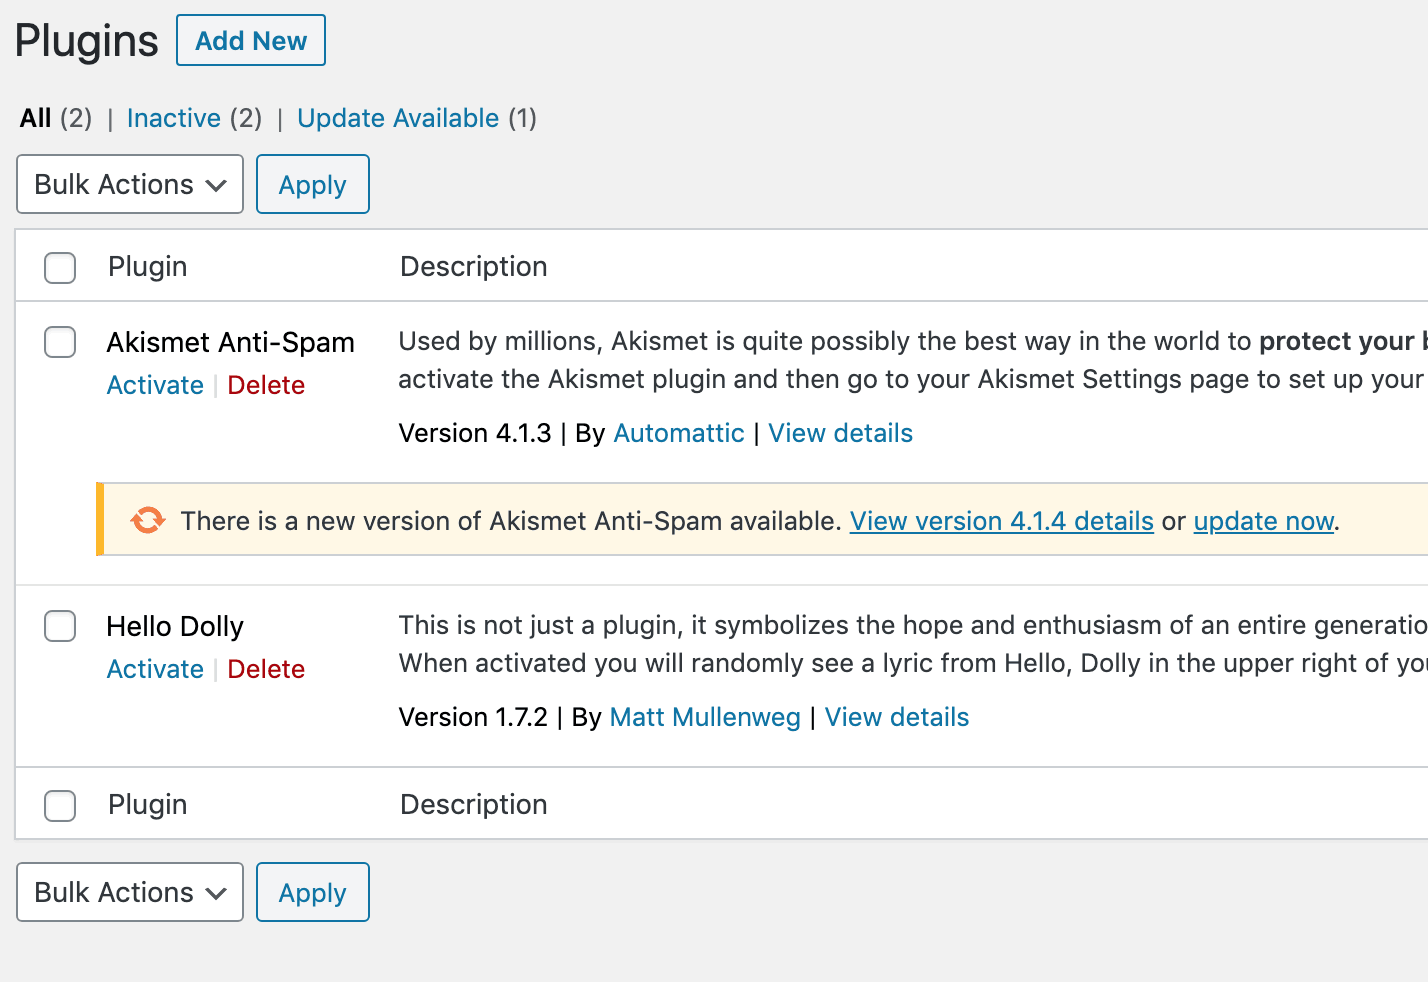
1.) Let’s start by activating ‘Akismet’, which is a powerful WordPress plugin designed to significantly reduce the amount of email and comment spam you receive.
Click on the ‘Plugins’ link on the left side menu, locate the ‘Akismet Anti-Spam’ plugin and click on ‘update now’ (as required):
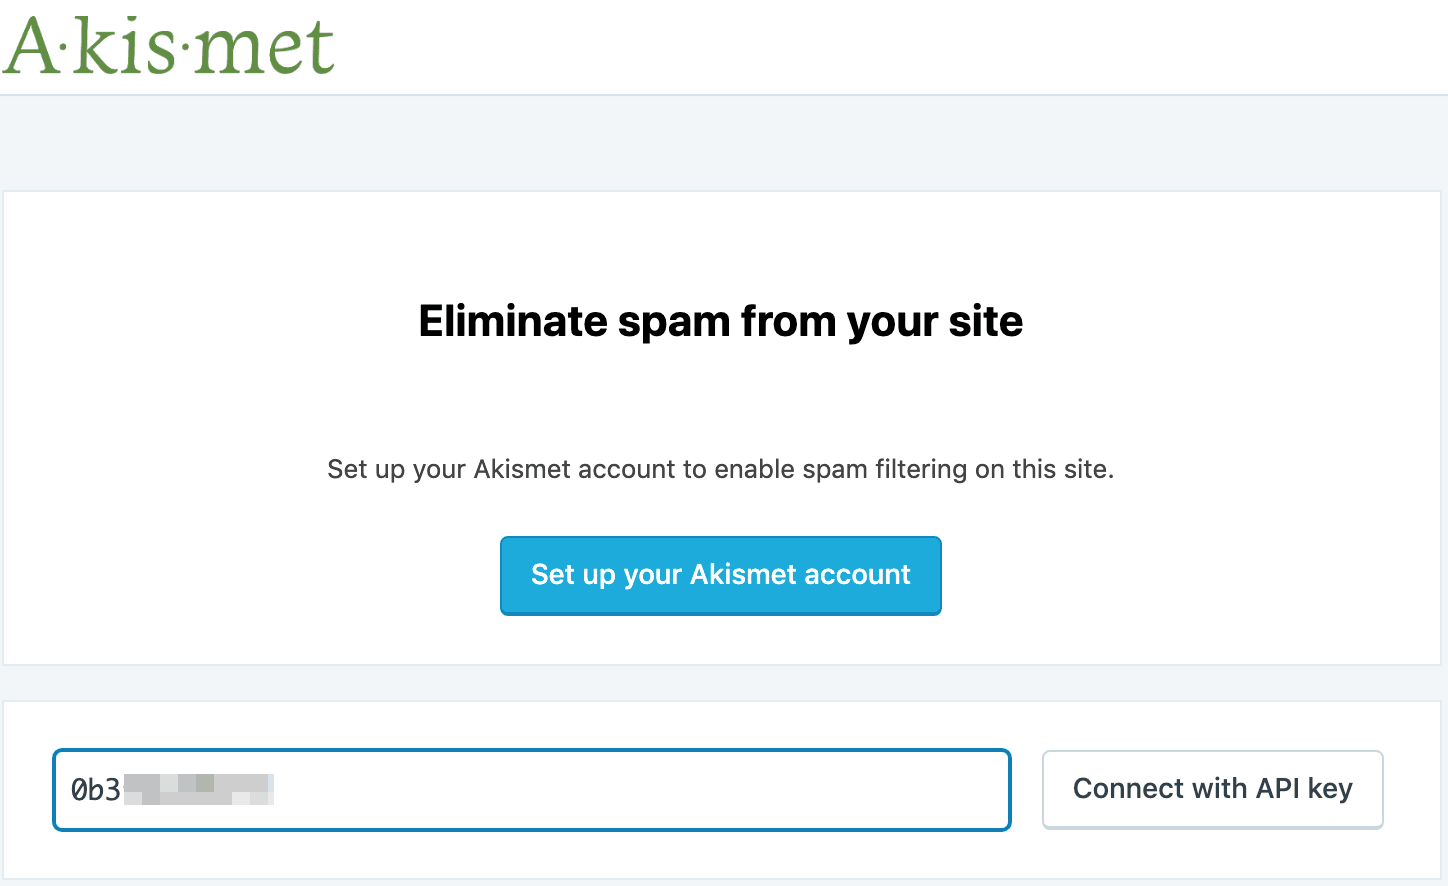
2.) Once the plugin has been activated and updated, visit the Akismet website and sign up for an account. They offer free plans for personal websites/blogs, as well as paid plans for professional, commercial and/or multisite installations.
After you’ve created your Akismet account, click on the account link (to the left of your account picture), then copy the API key and go back to your WordPress website.
Visit Settings > Akismet Anti-Spam > Manually enter an API key, then paste in the API key and click on ‘Connect with API key’.
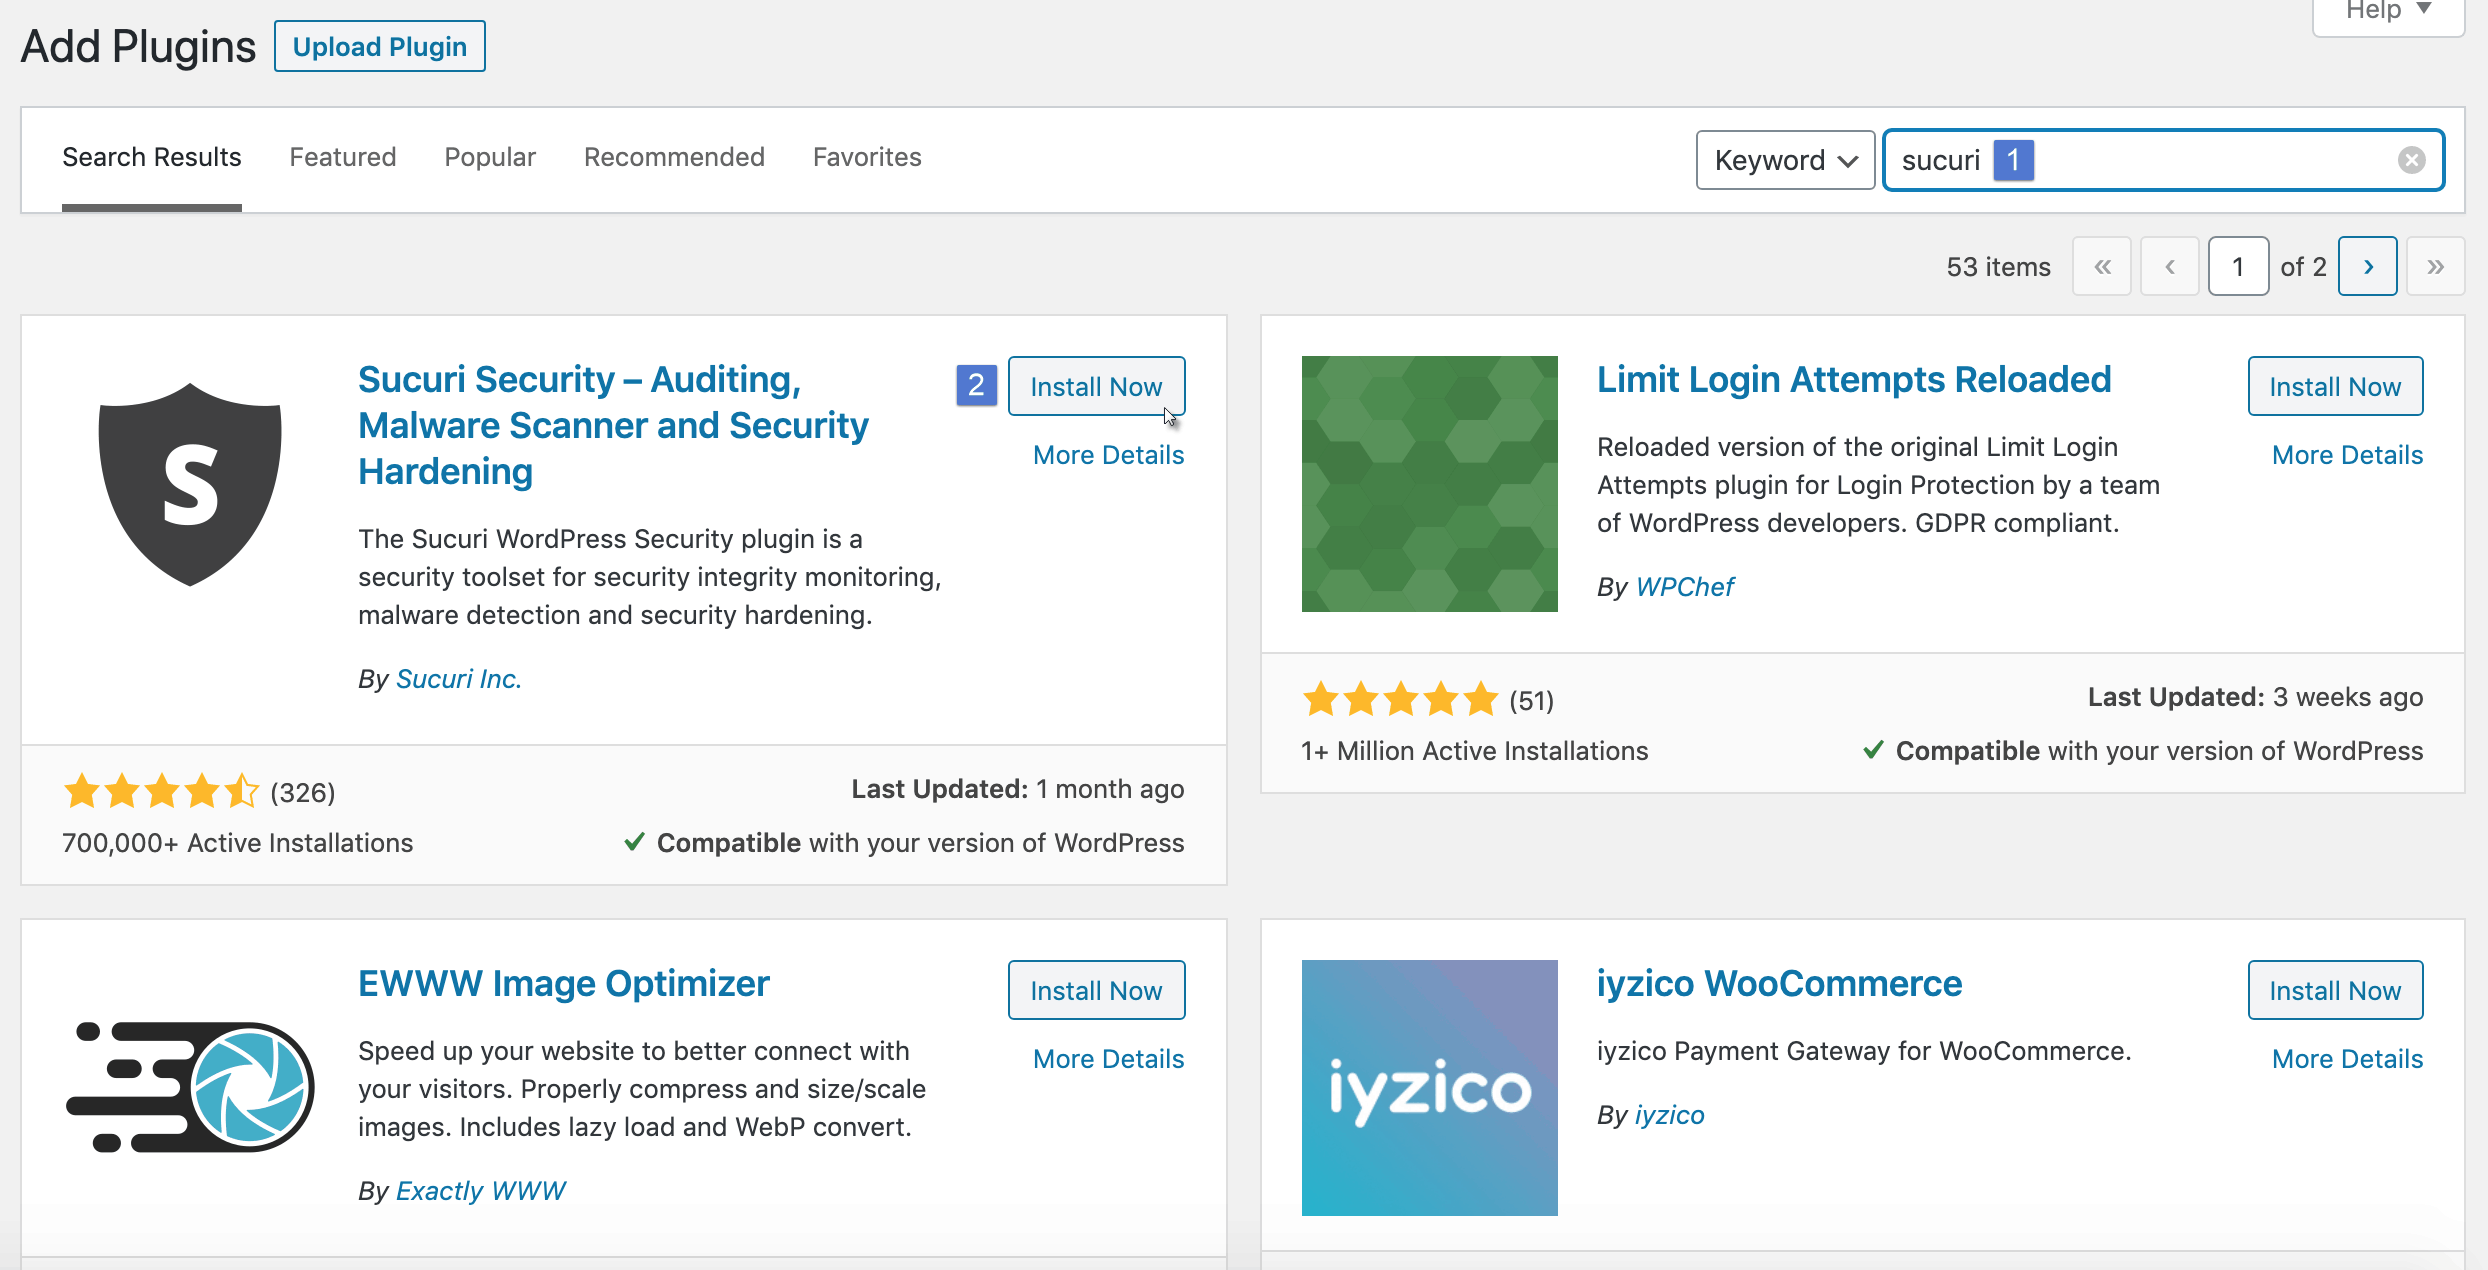
3.) Next, go back to ‘Plugins’ and click on ‘Add New’. In the search bar to the right, type in ‘Sucuri’, click on the ‘Install Now’ button that appears next to Sucuri in the search results below, and then click on ‘Activate’.
💡 Some plugins create stand-alone side menu links and/or may create a new link under 'Settings'.
4.) Before moving on to the next section, install and activate the ‘Yoast SEO’ plugin (don’t worry about setting it up for now, we’ll cover that in our next tutorial):
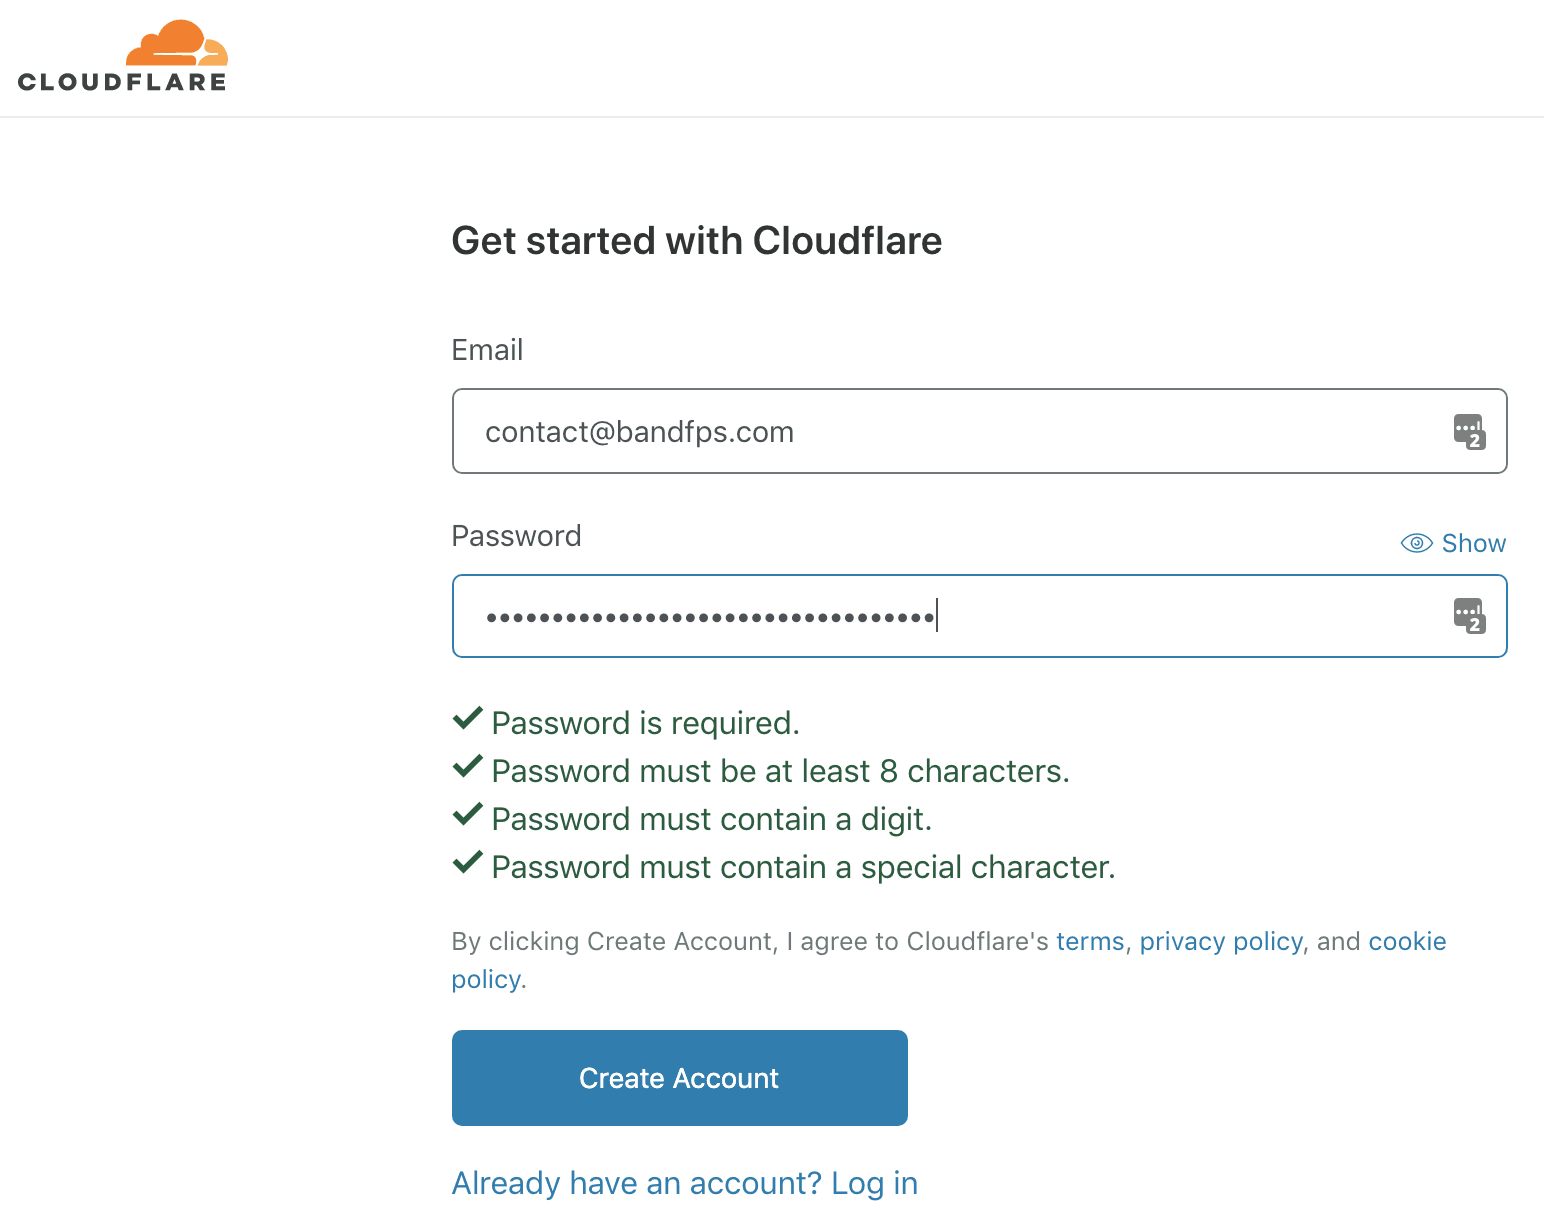
5.) Visit Cloudflare to create a new account:
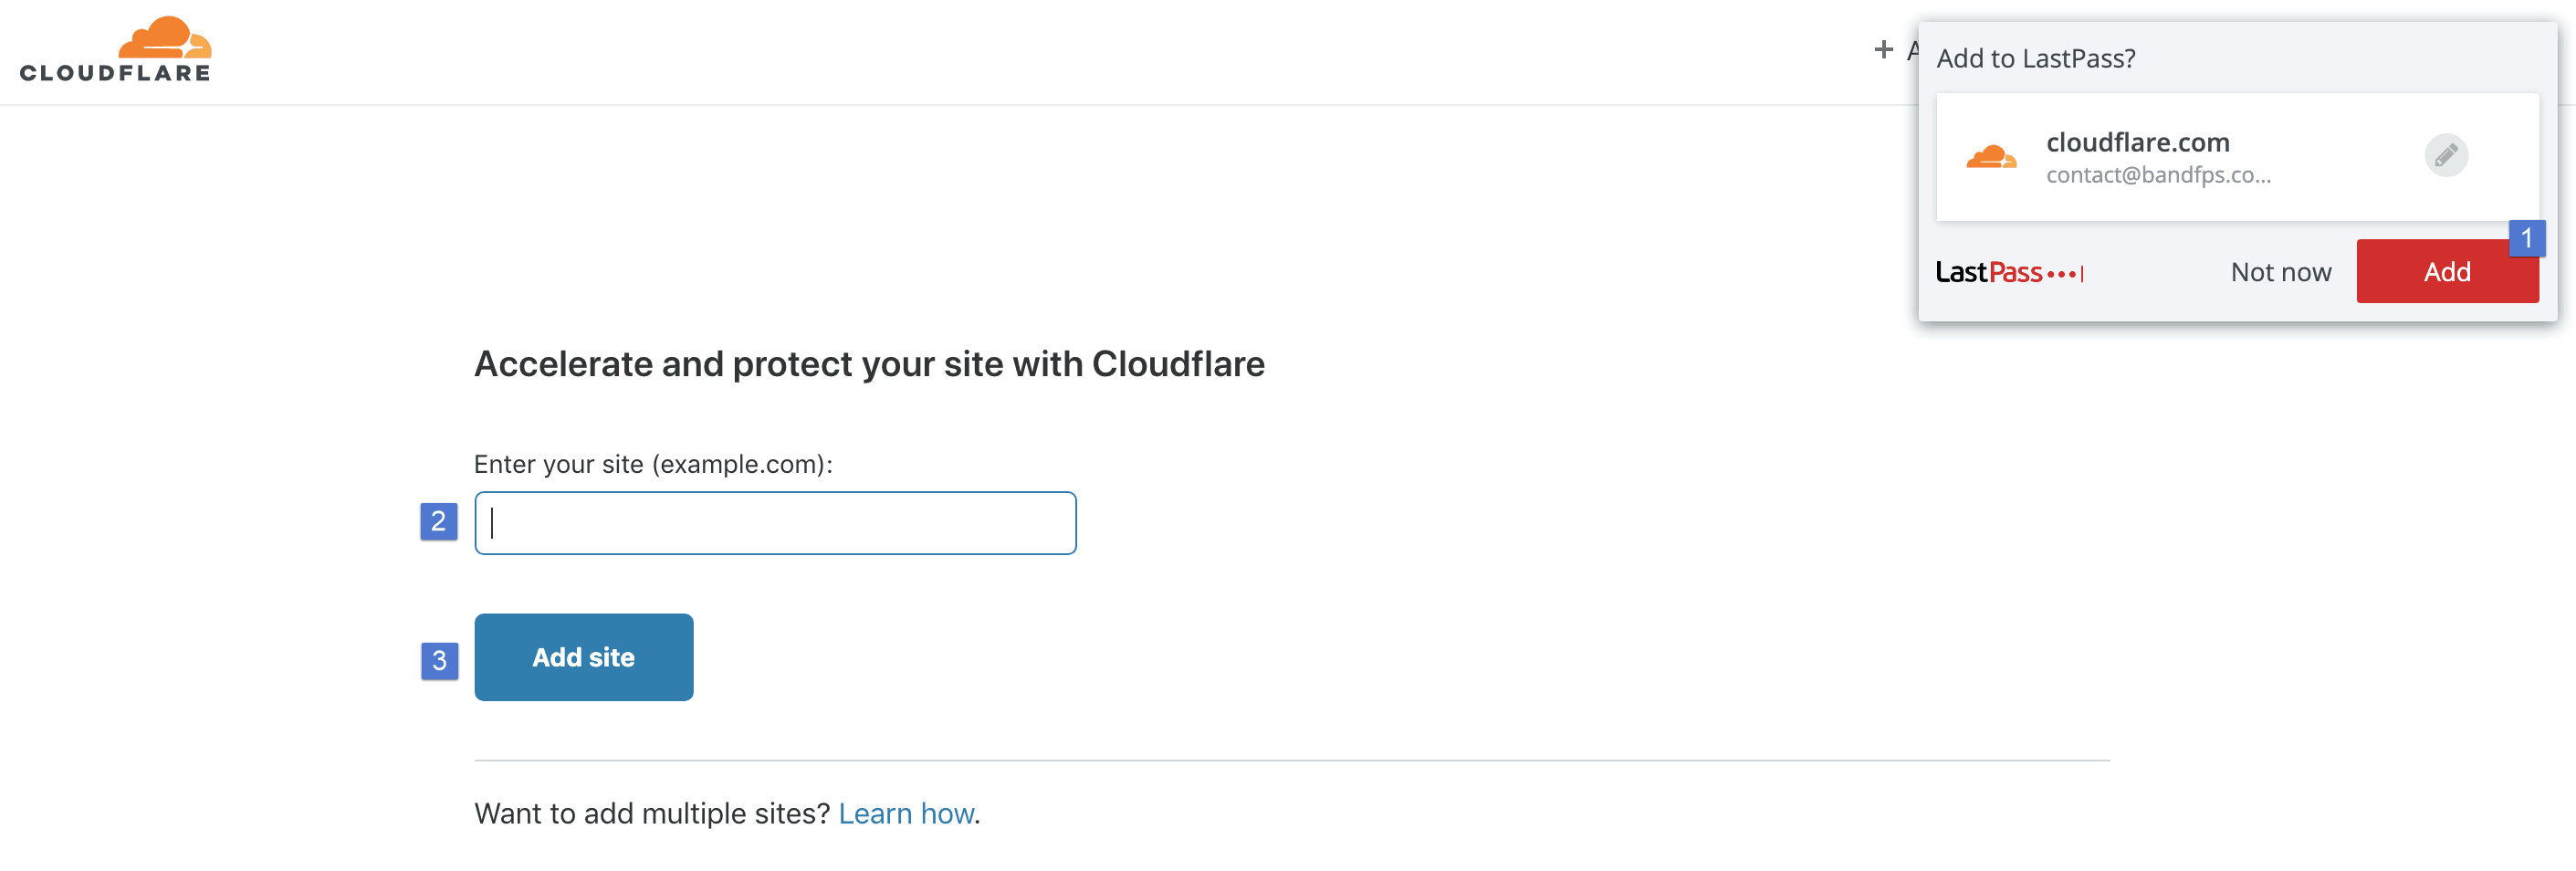
Save your new login credentials using your password manager, then enter your site URL under ‘Enter your site’ and click on ‘Add site’:
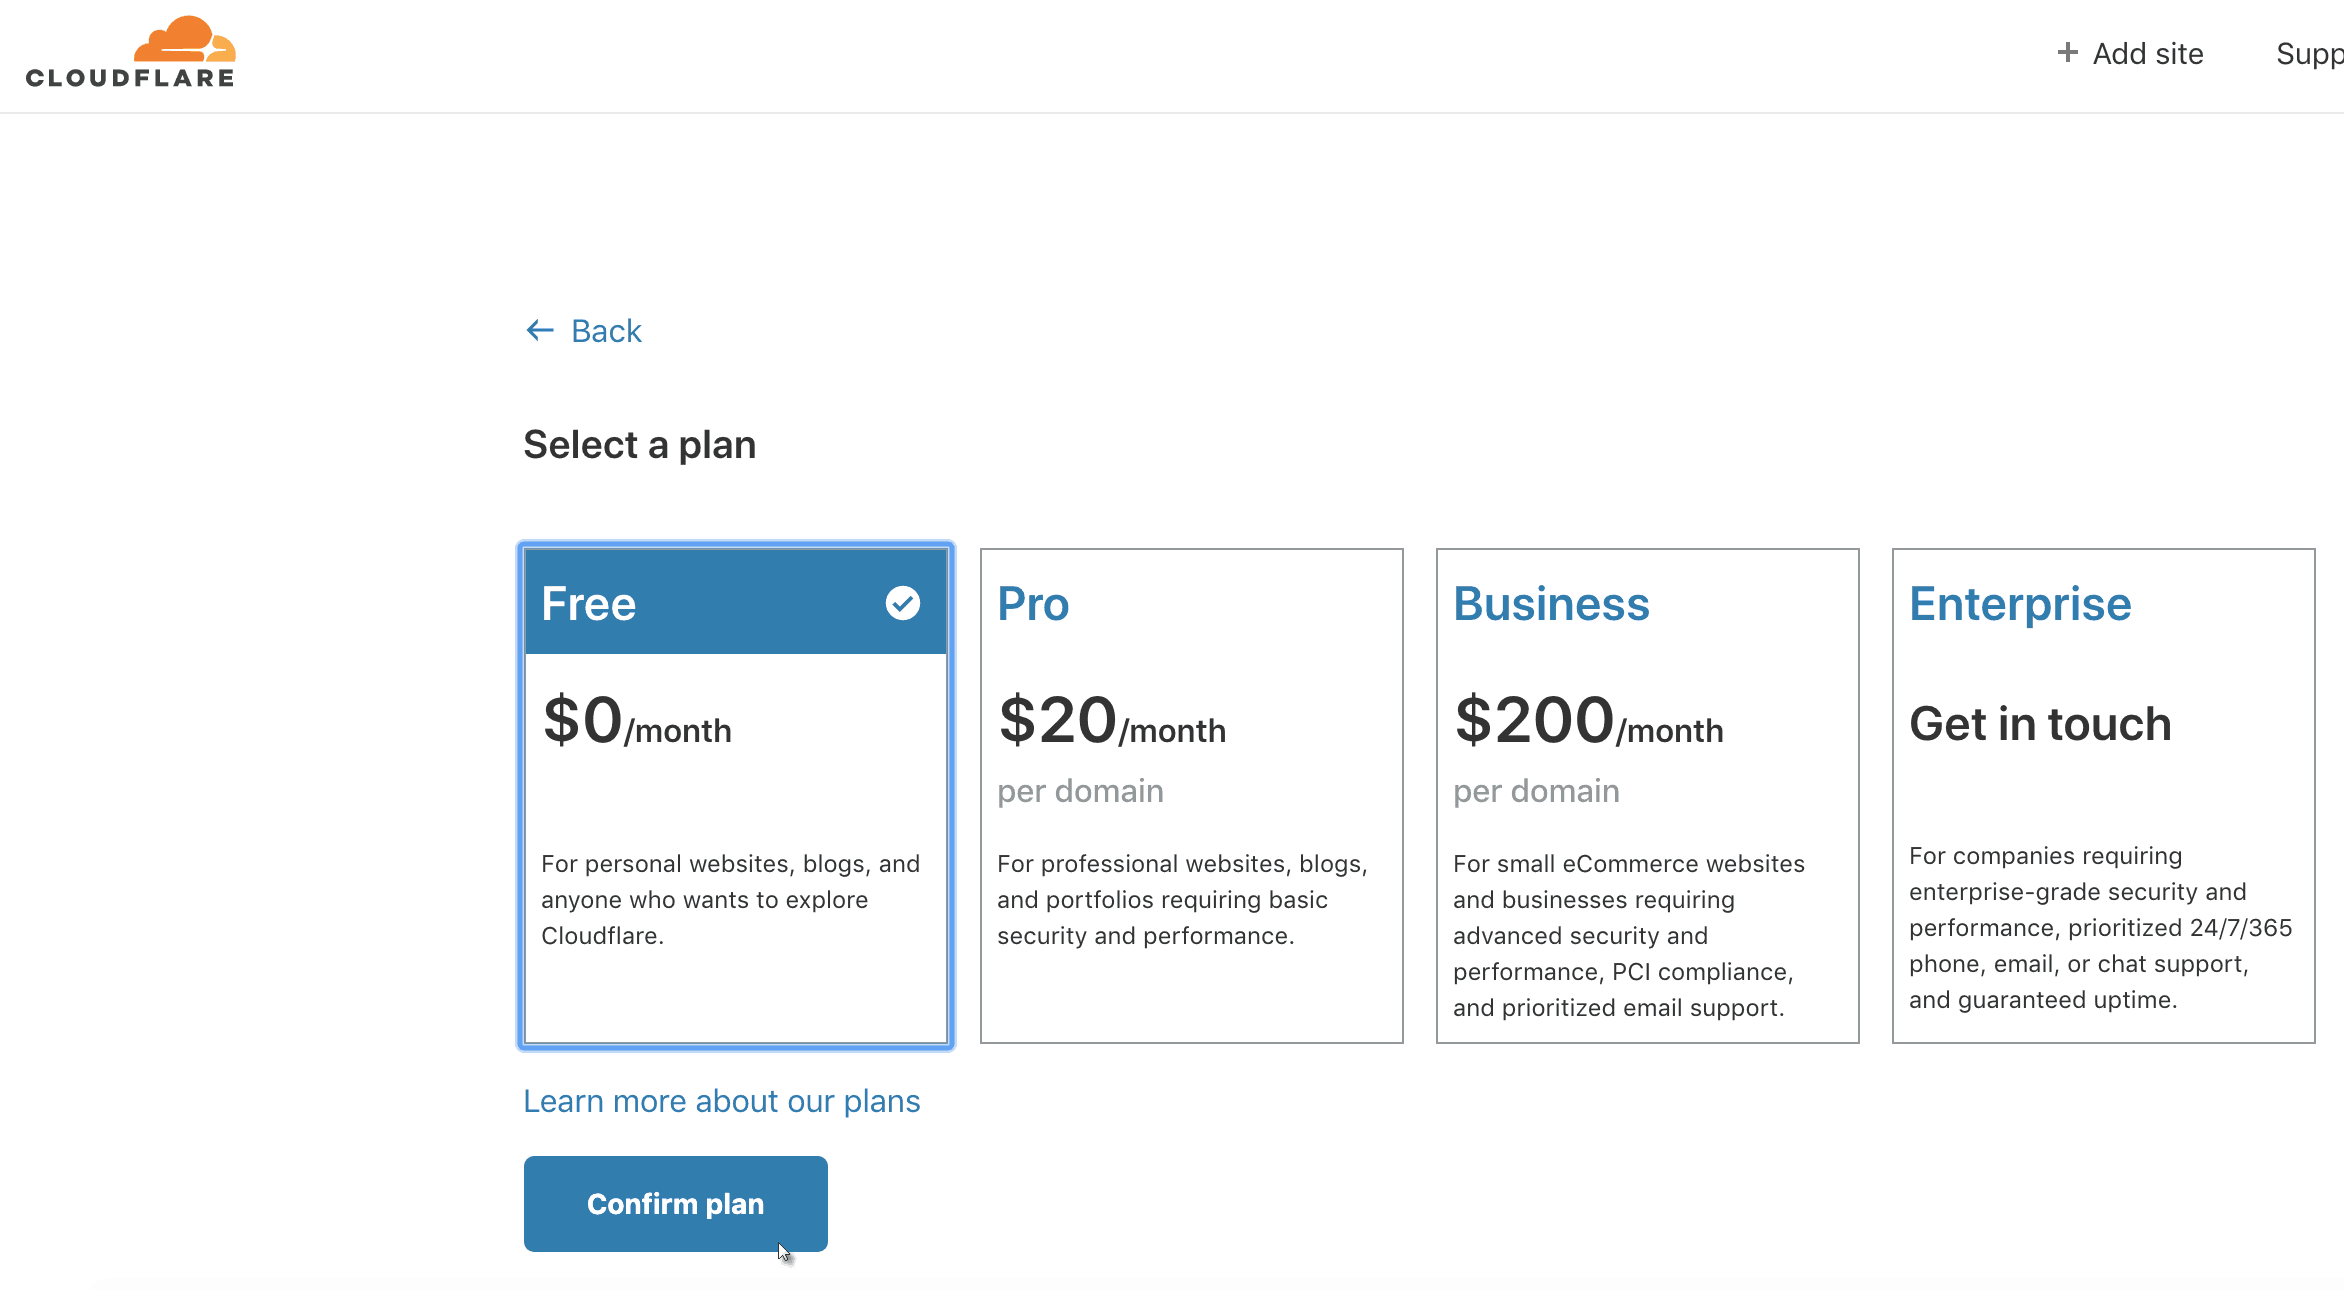
Select your plan, then click on ‘Confirm plan’:
Cloudflare will then display your current DNS records on the following page. Click on ‘Continue’:
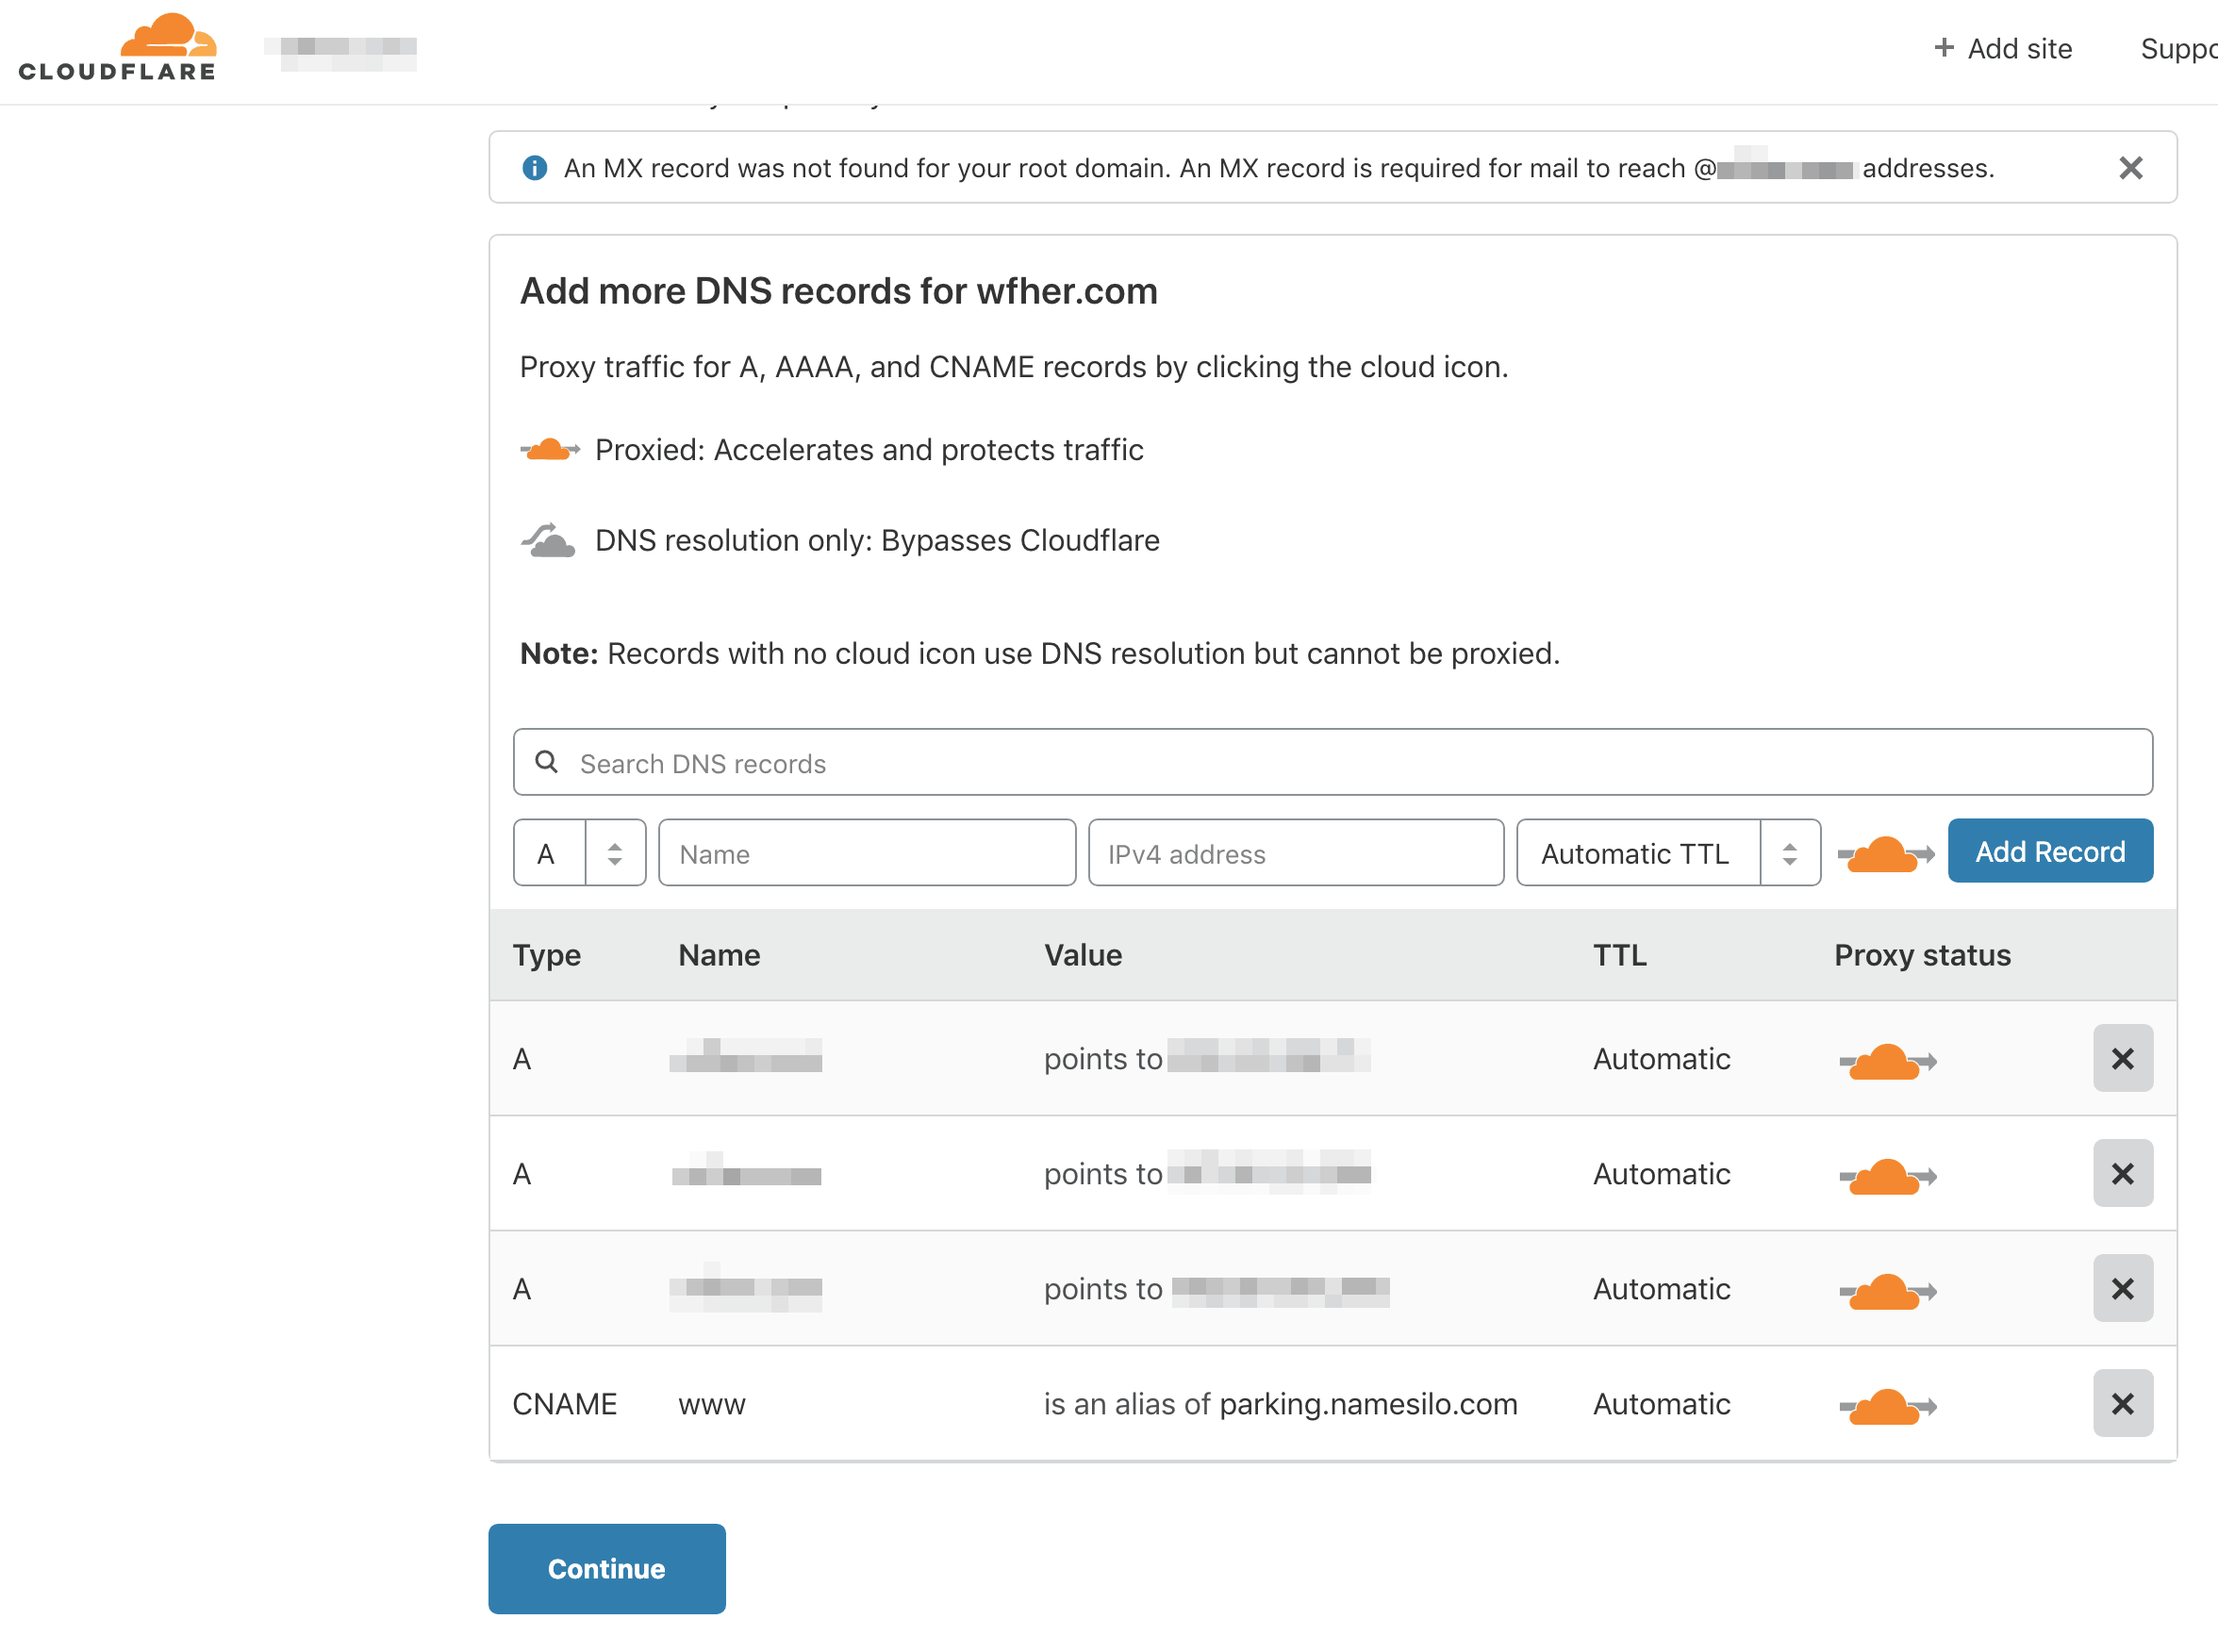
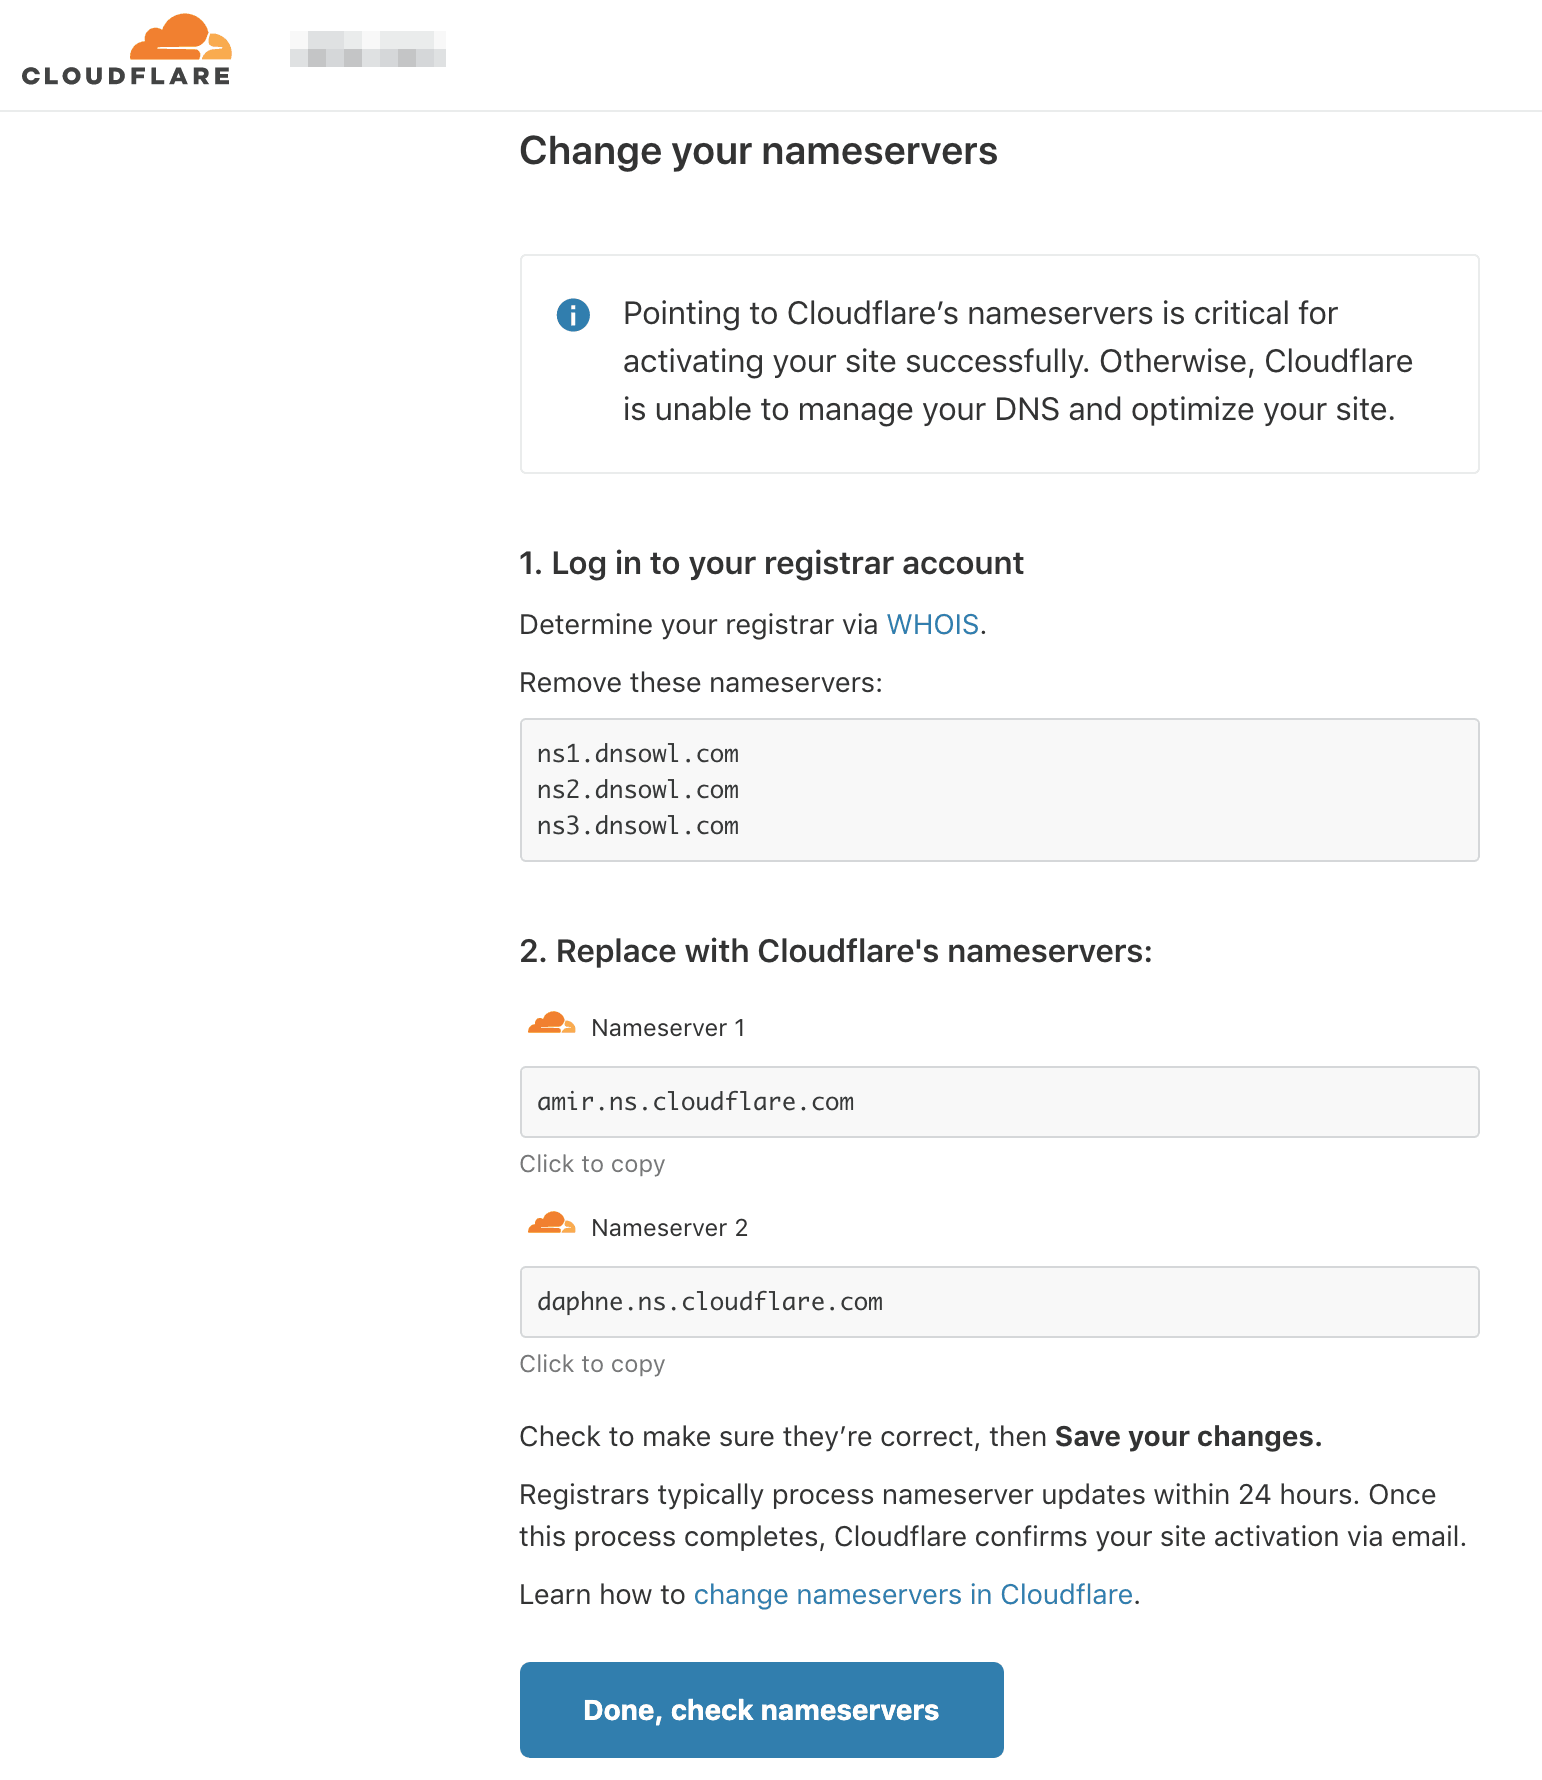
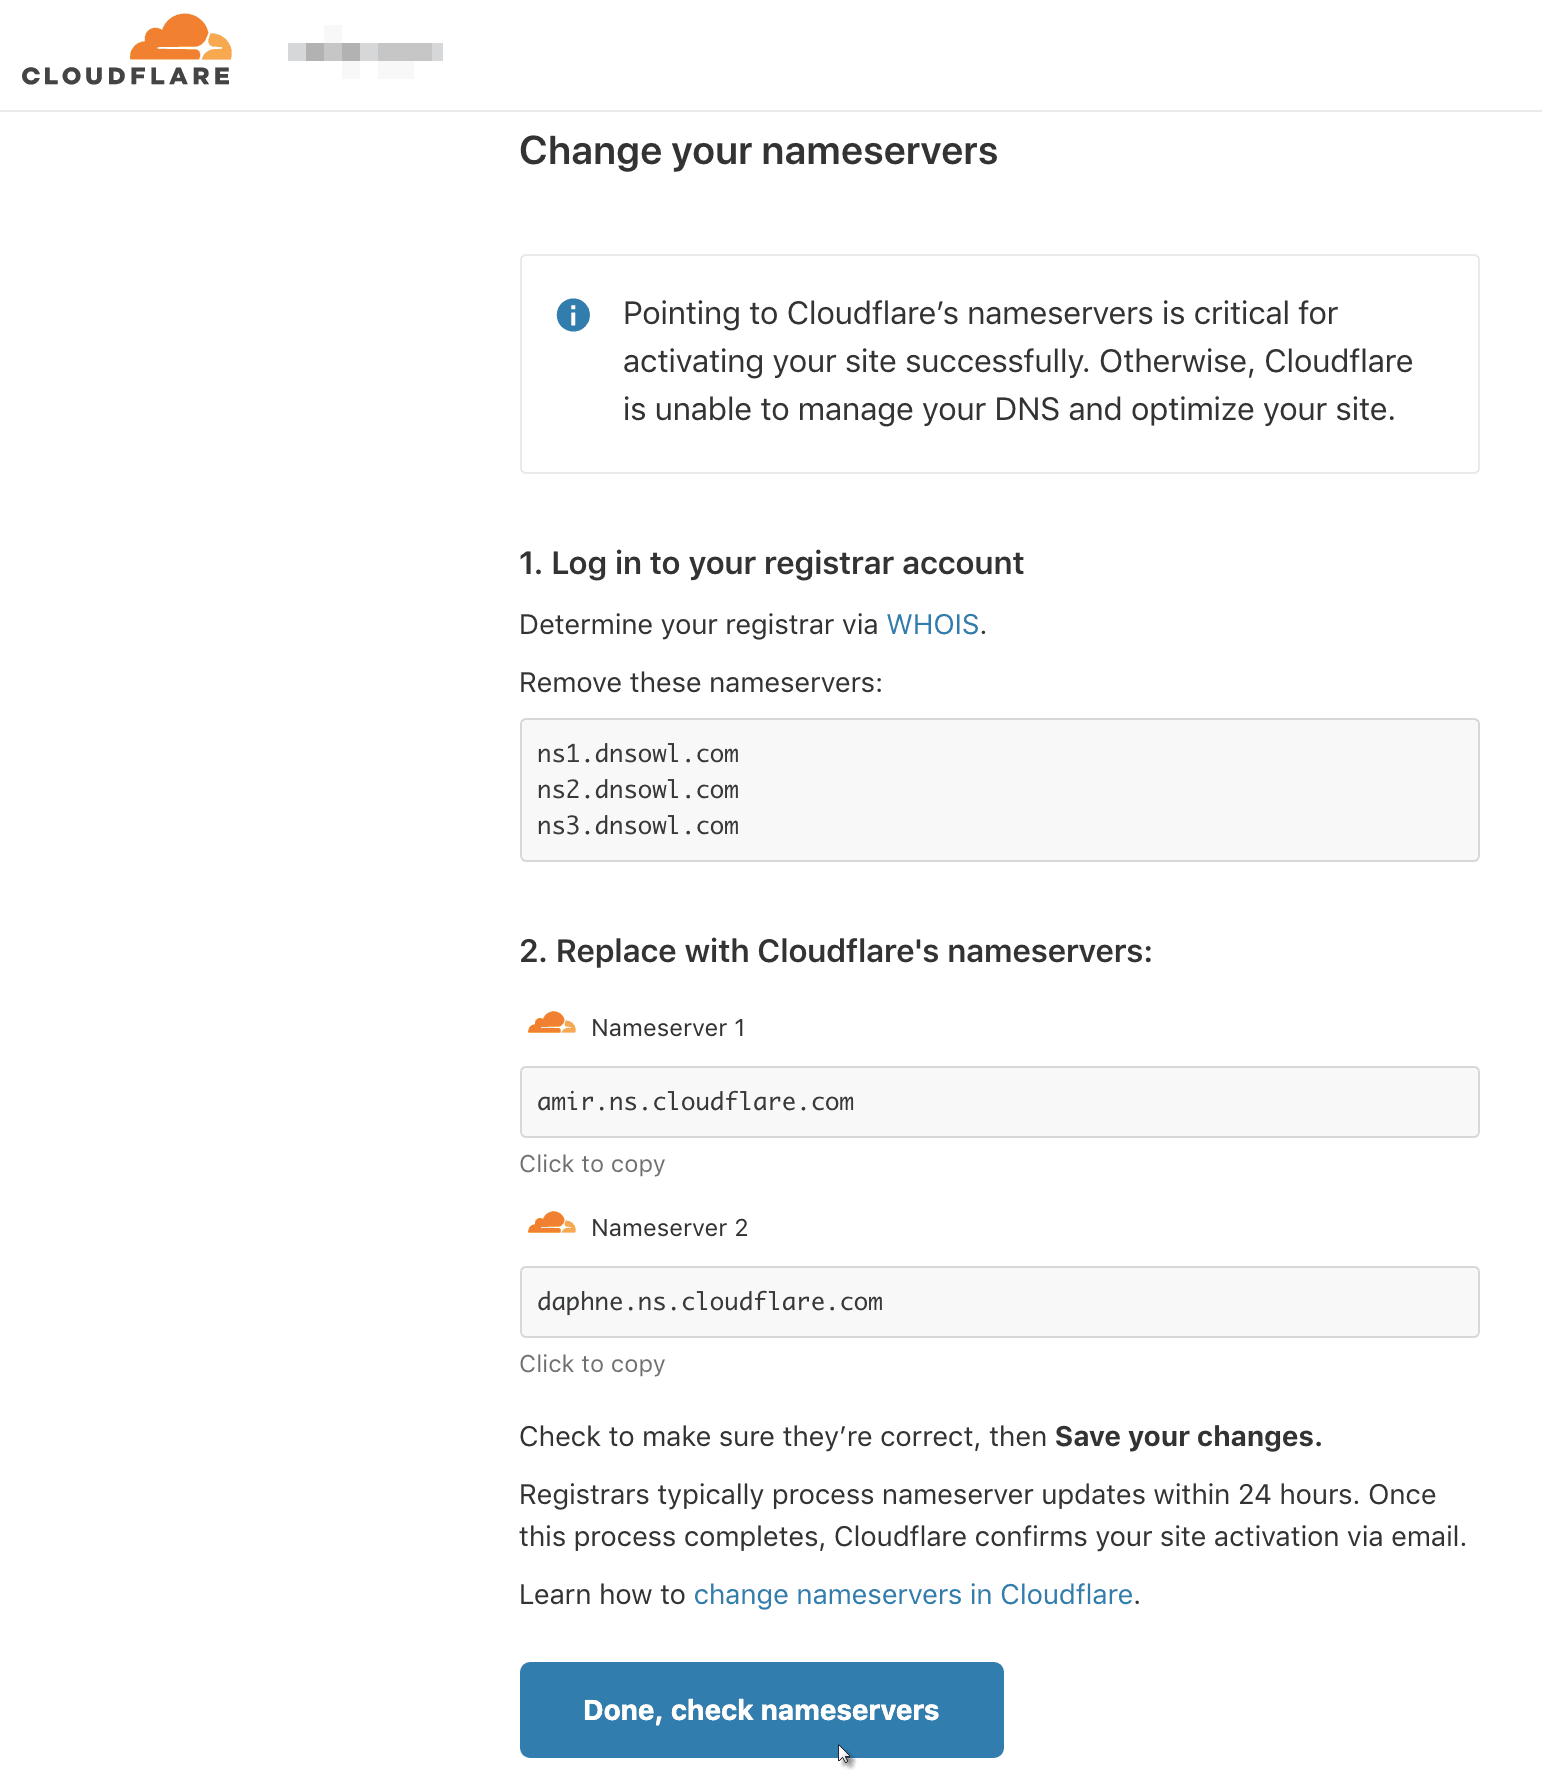
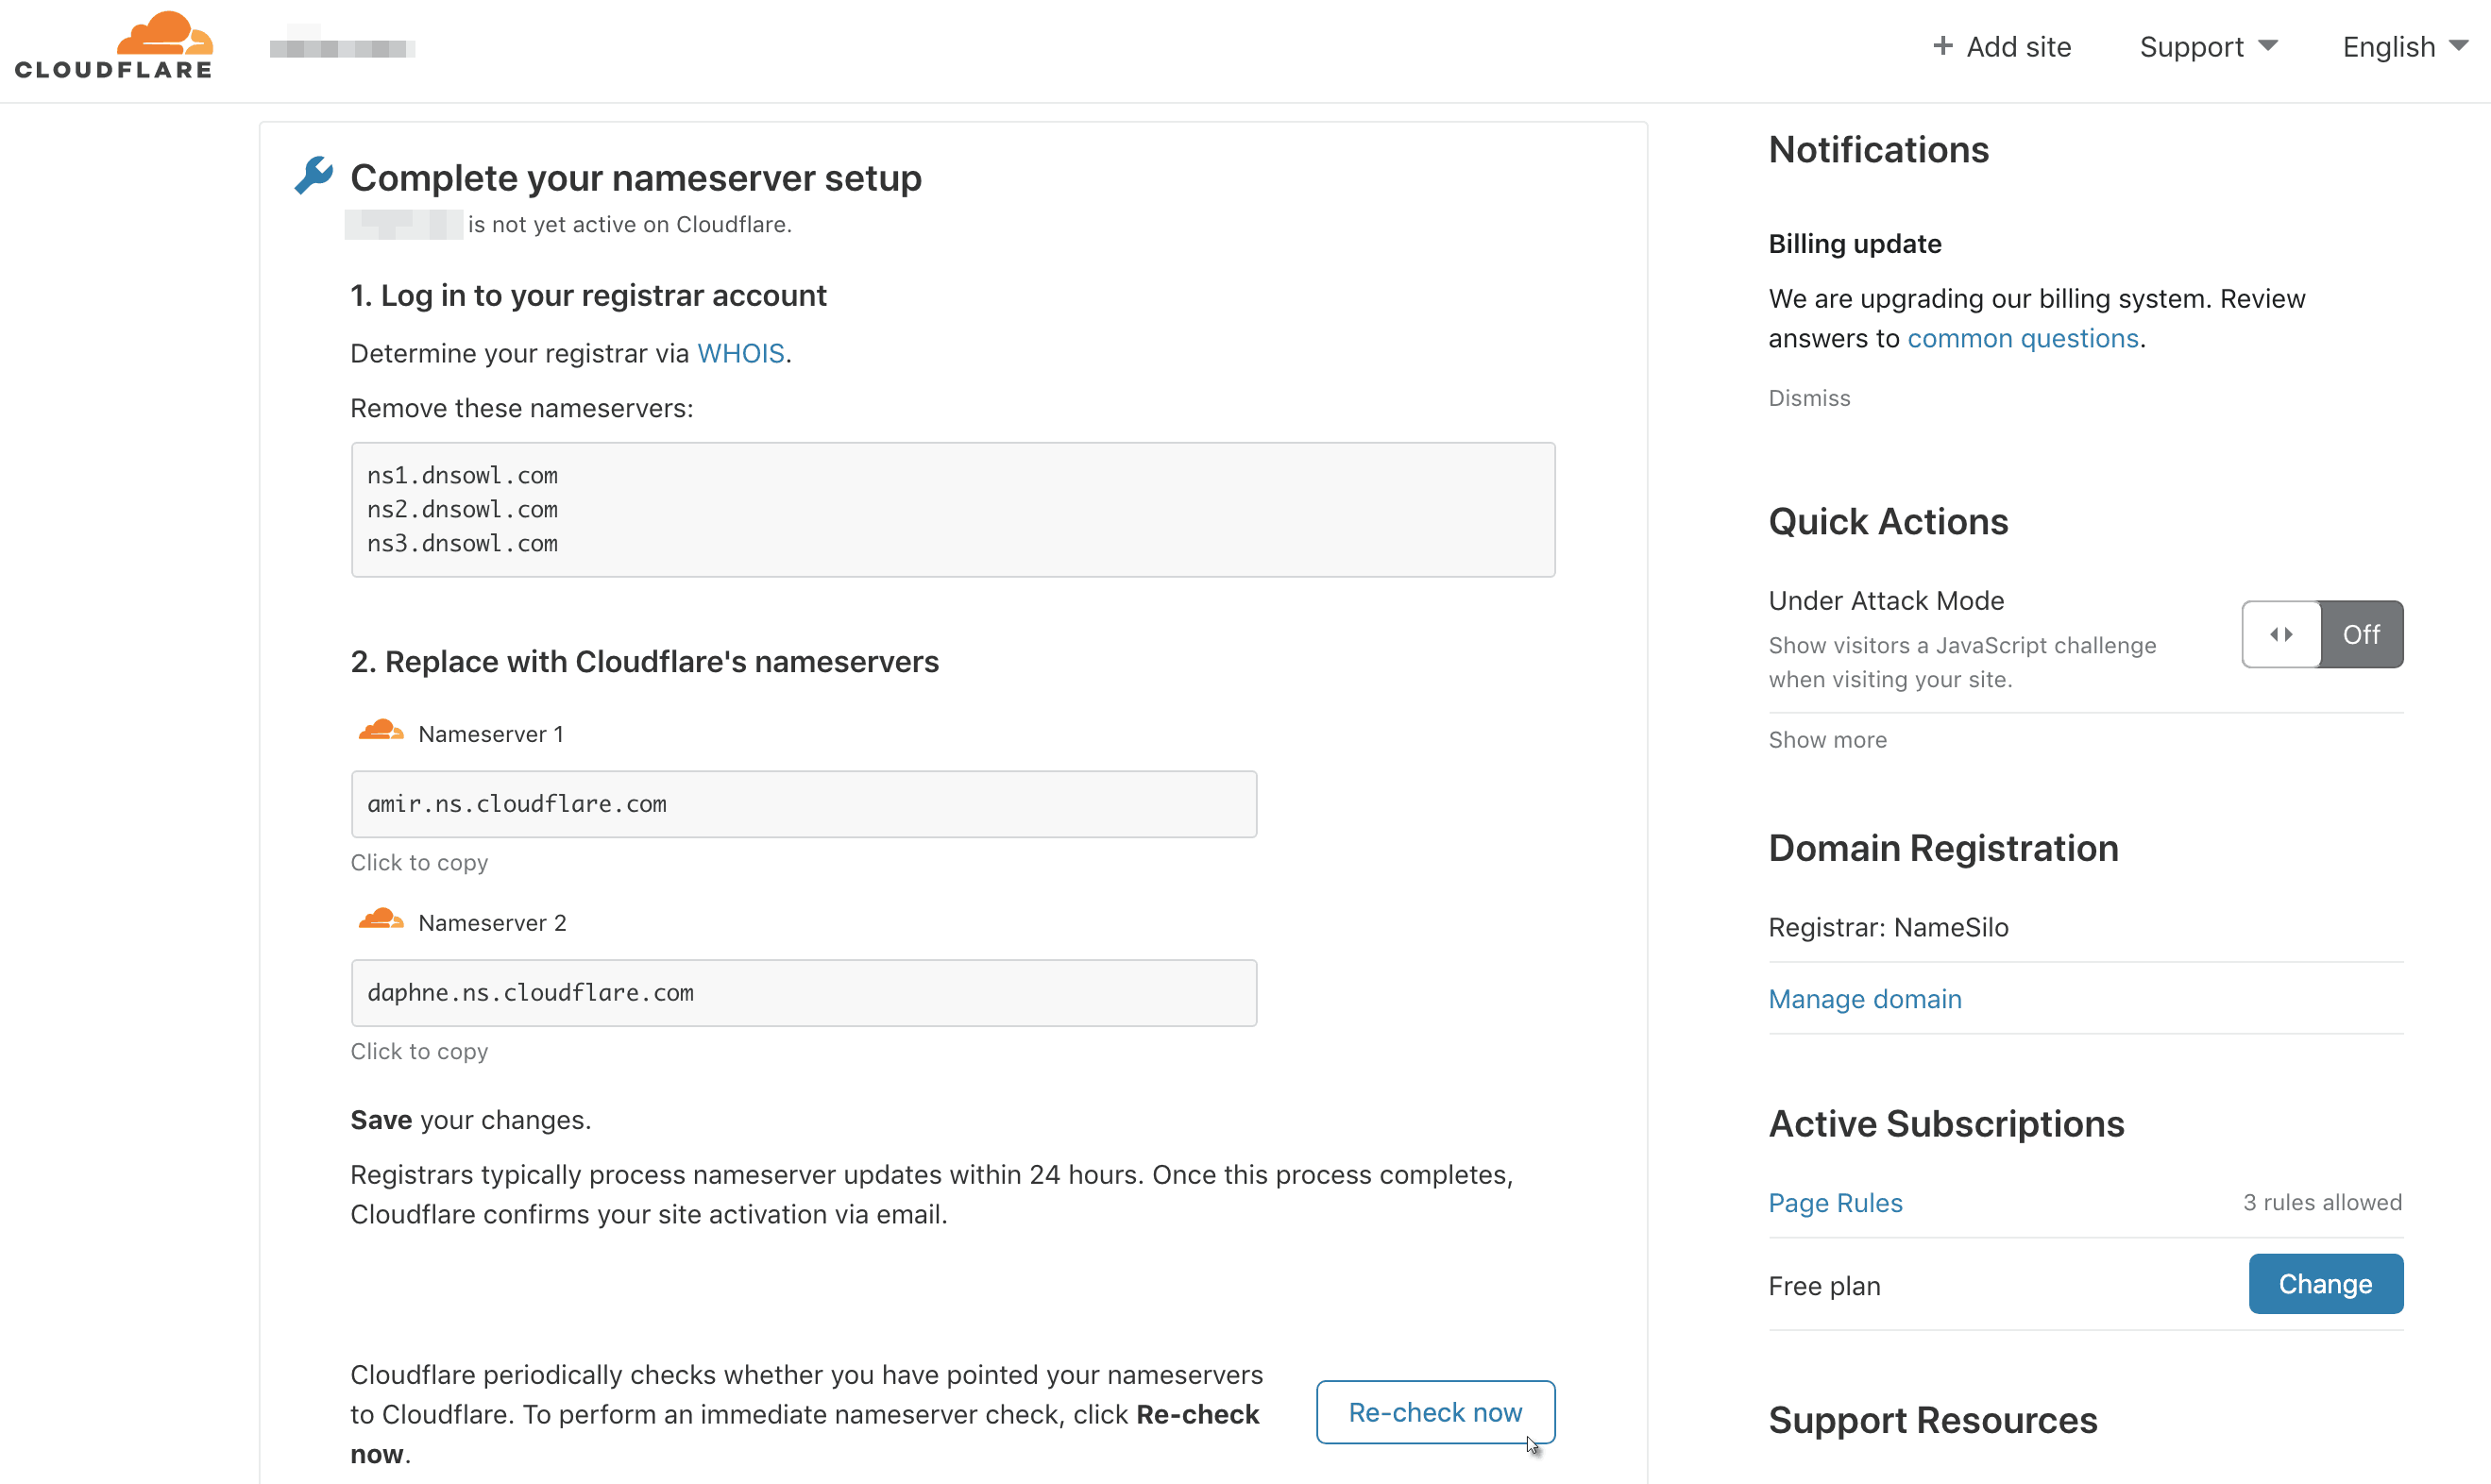
Cloudflare will then prompt you to replace your current nameservers (keep this page open!):
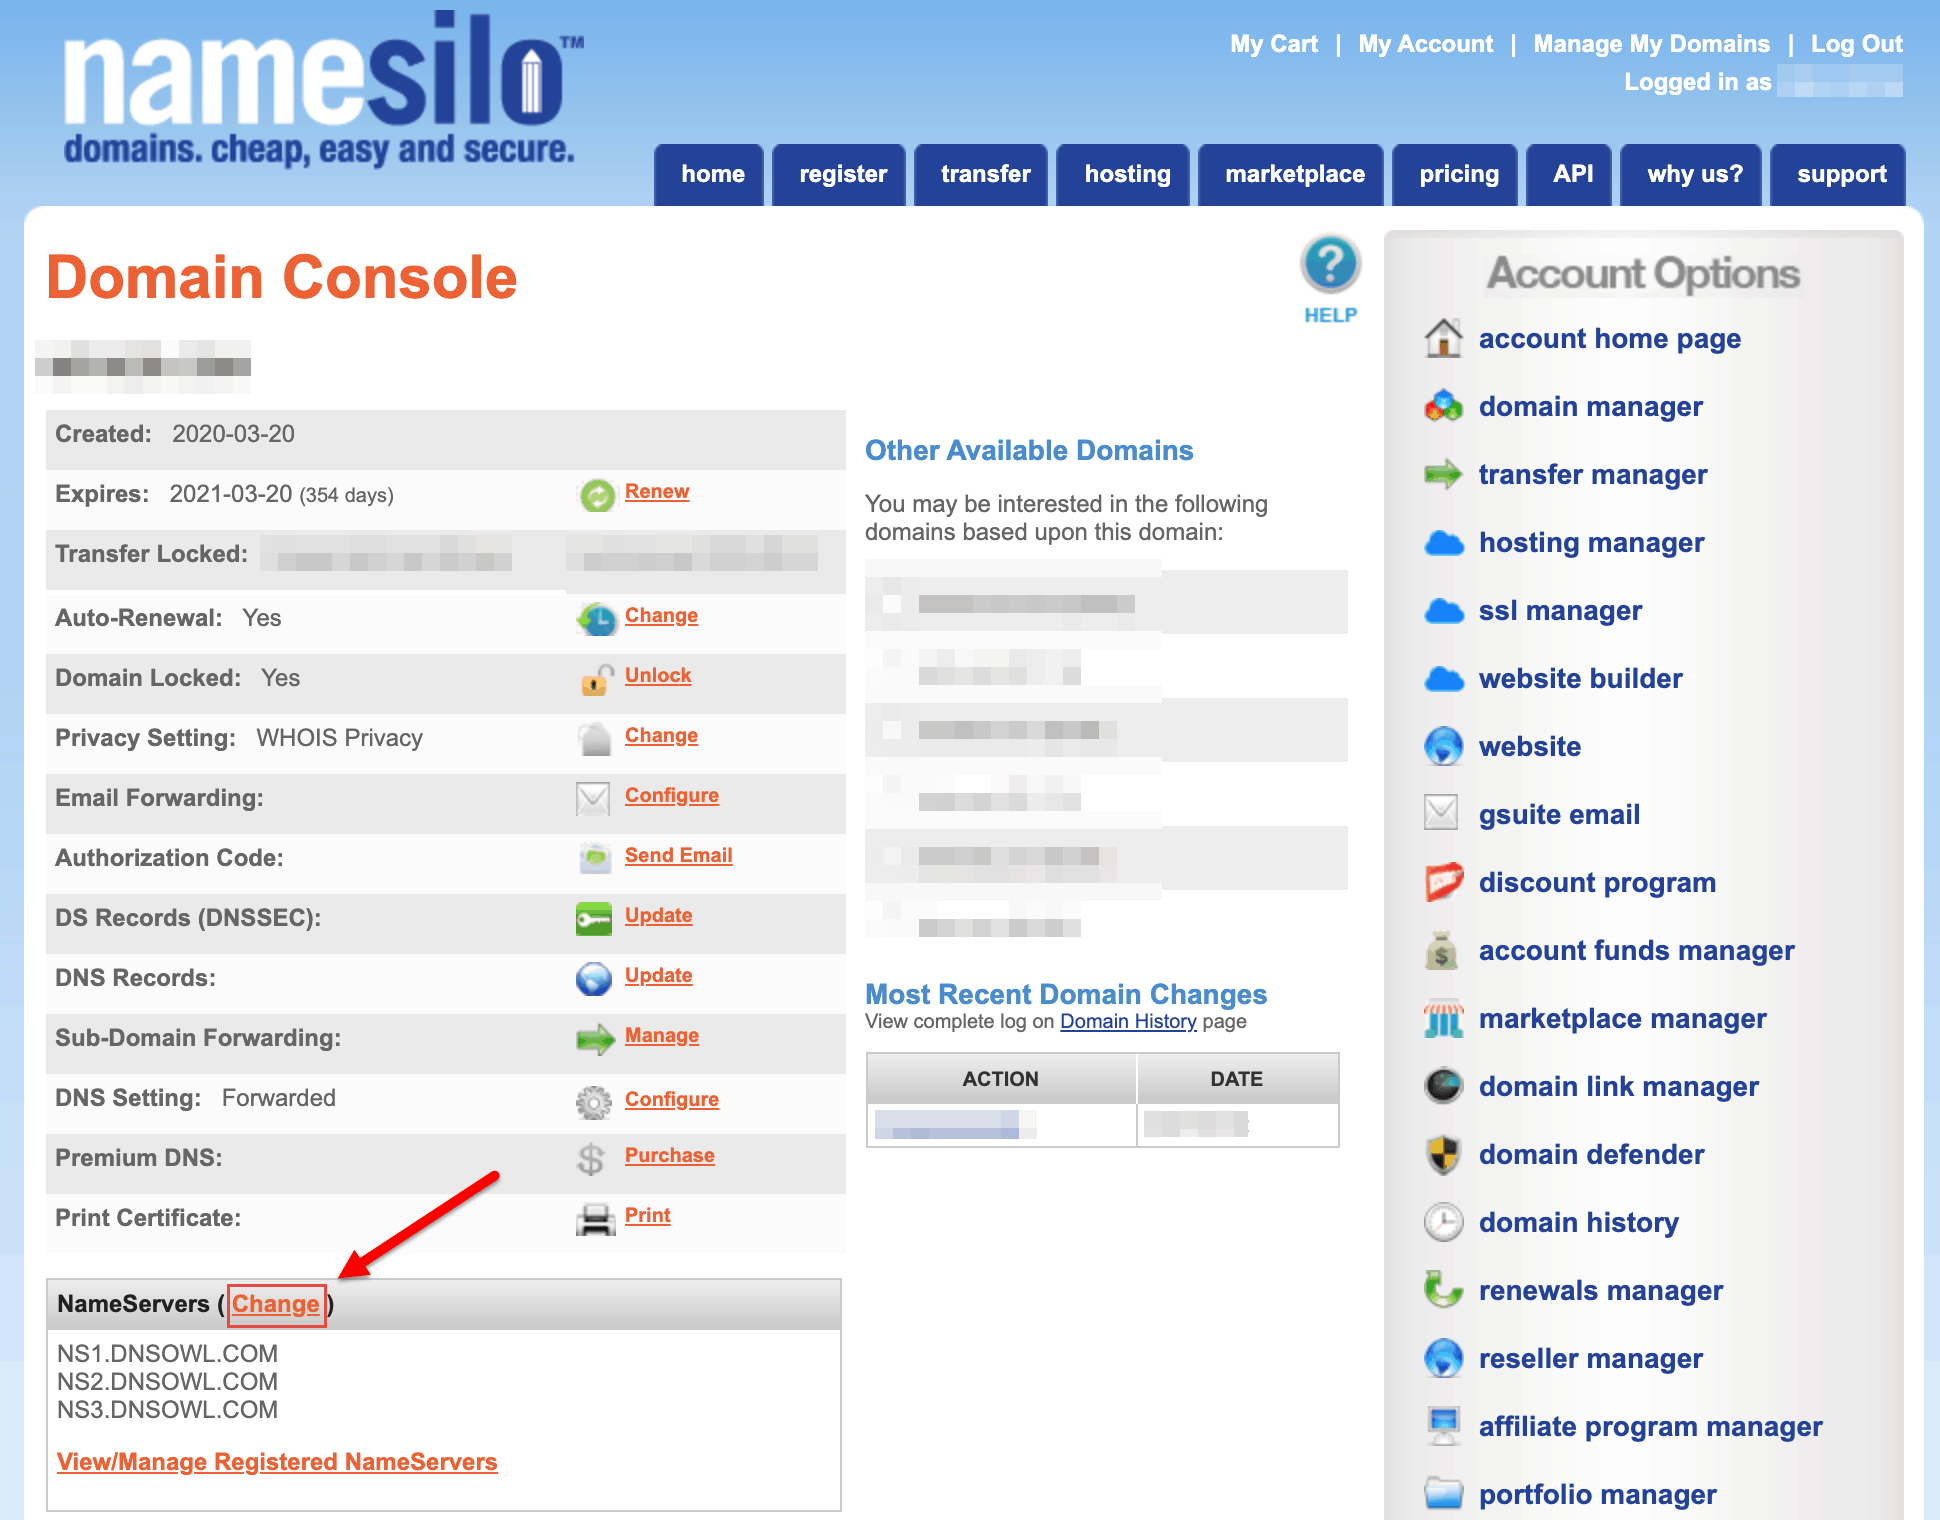
6.) In a separate tab, visit your domain name registrar (in our case, it’s NameSilo):
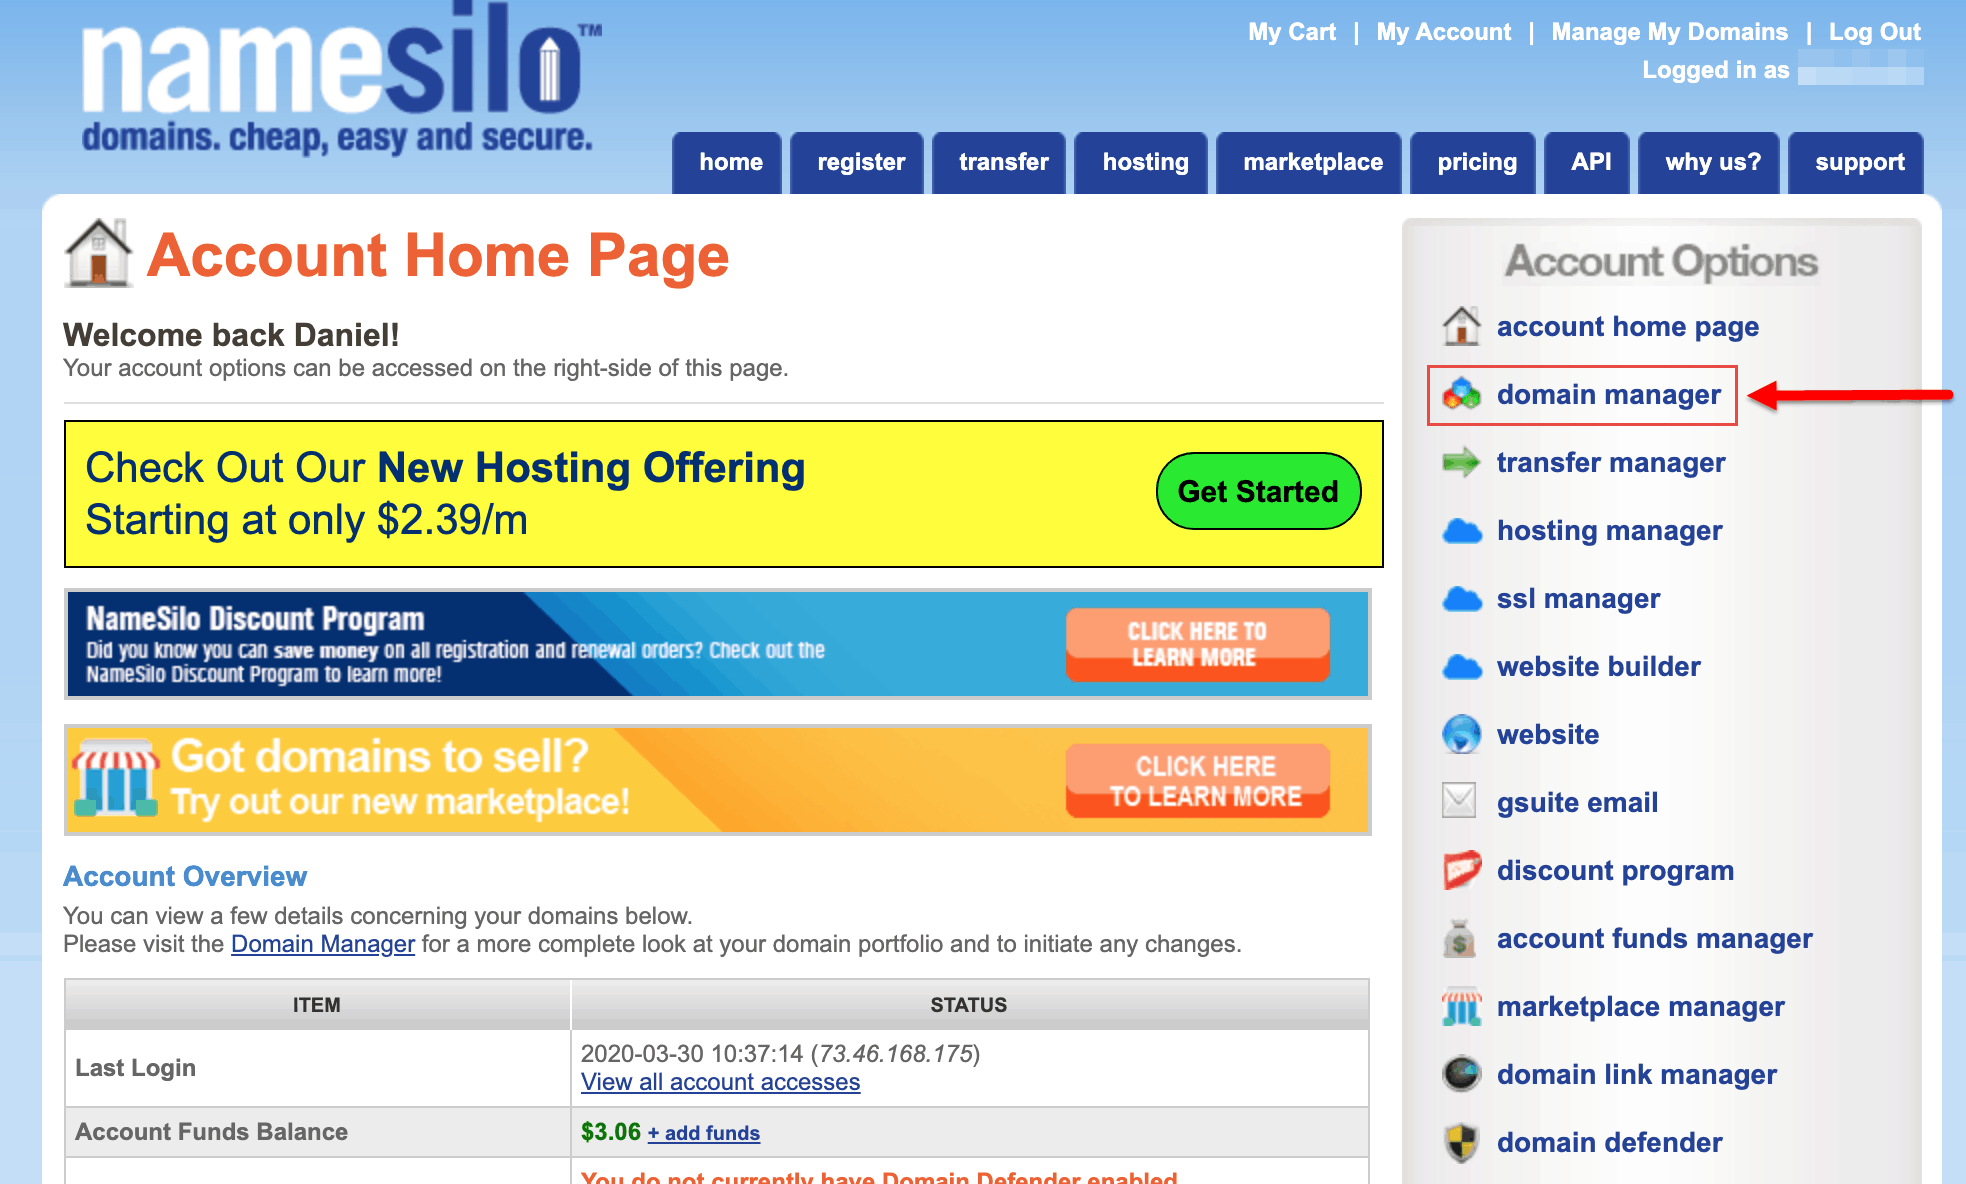
Locate the URL you want to edit and click on the site link located on the left hand side (under the ‘Domain’ column):
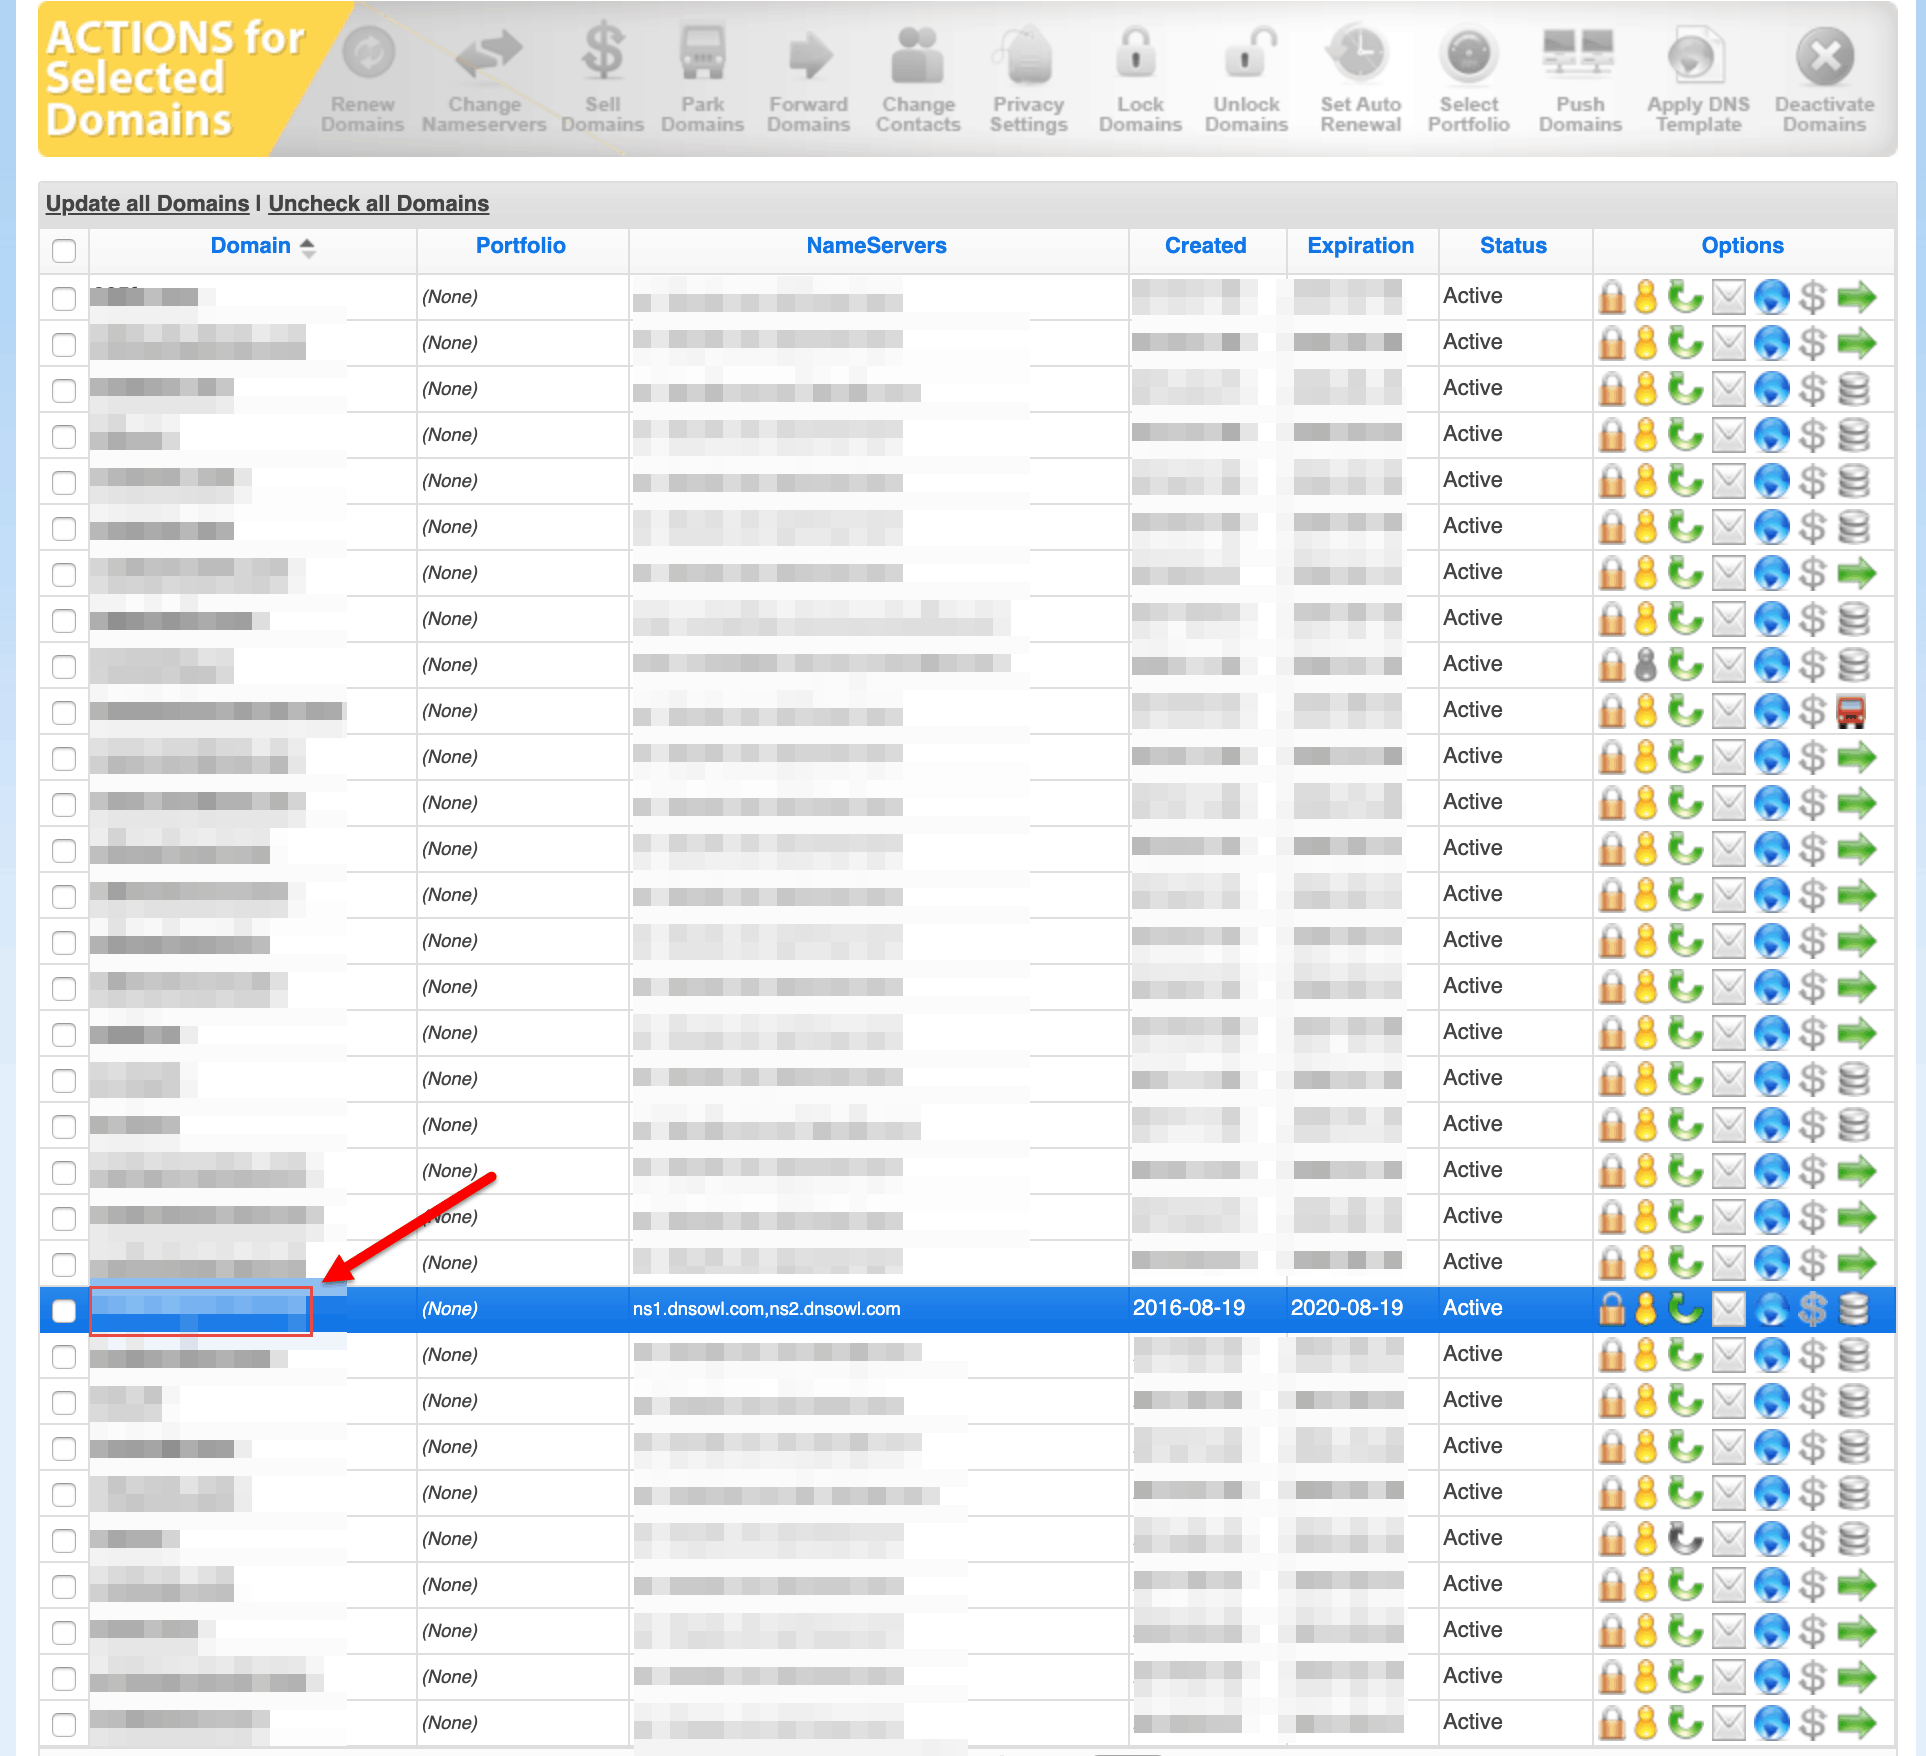
Once you’re on the ‘Domain Console’ page for that URL, click on the ‘Change’ link next to ‘NameServers’:
Go back to the previous tab and copy the full address listed under ‘Nameserver 1’ by selecting/copying it manually or clicking the ‘Click to copy’ link:
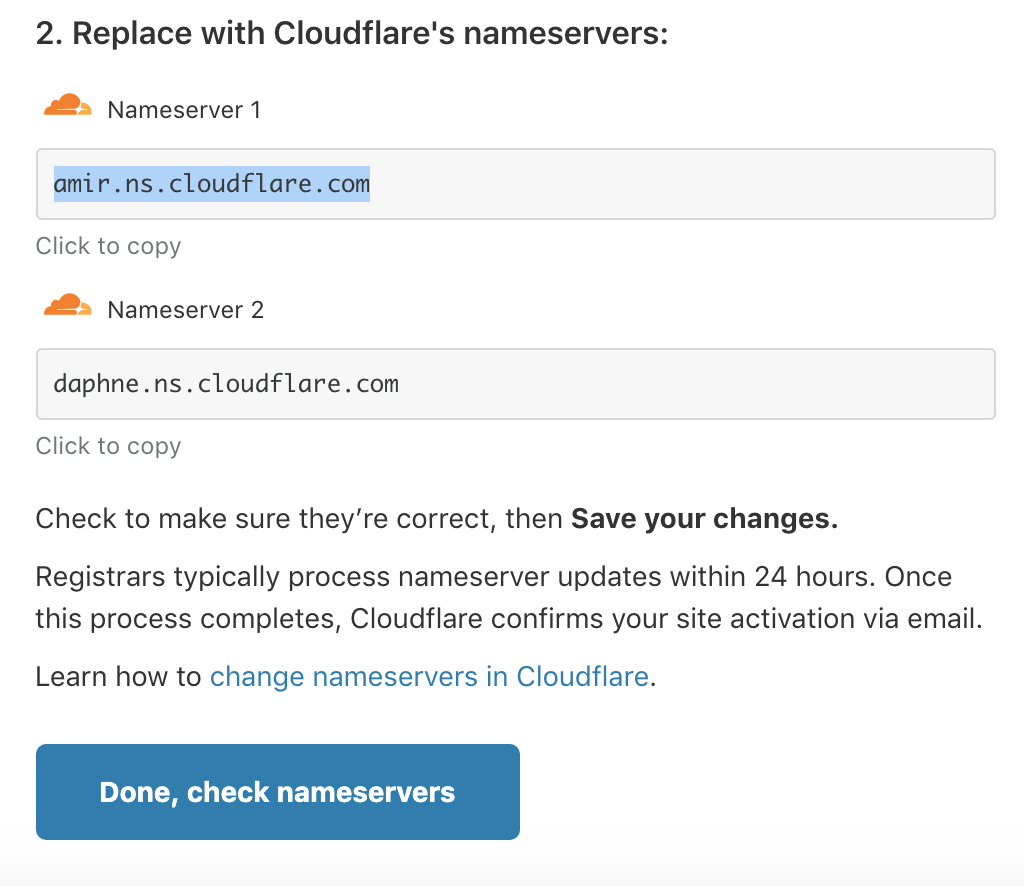
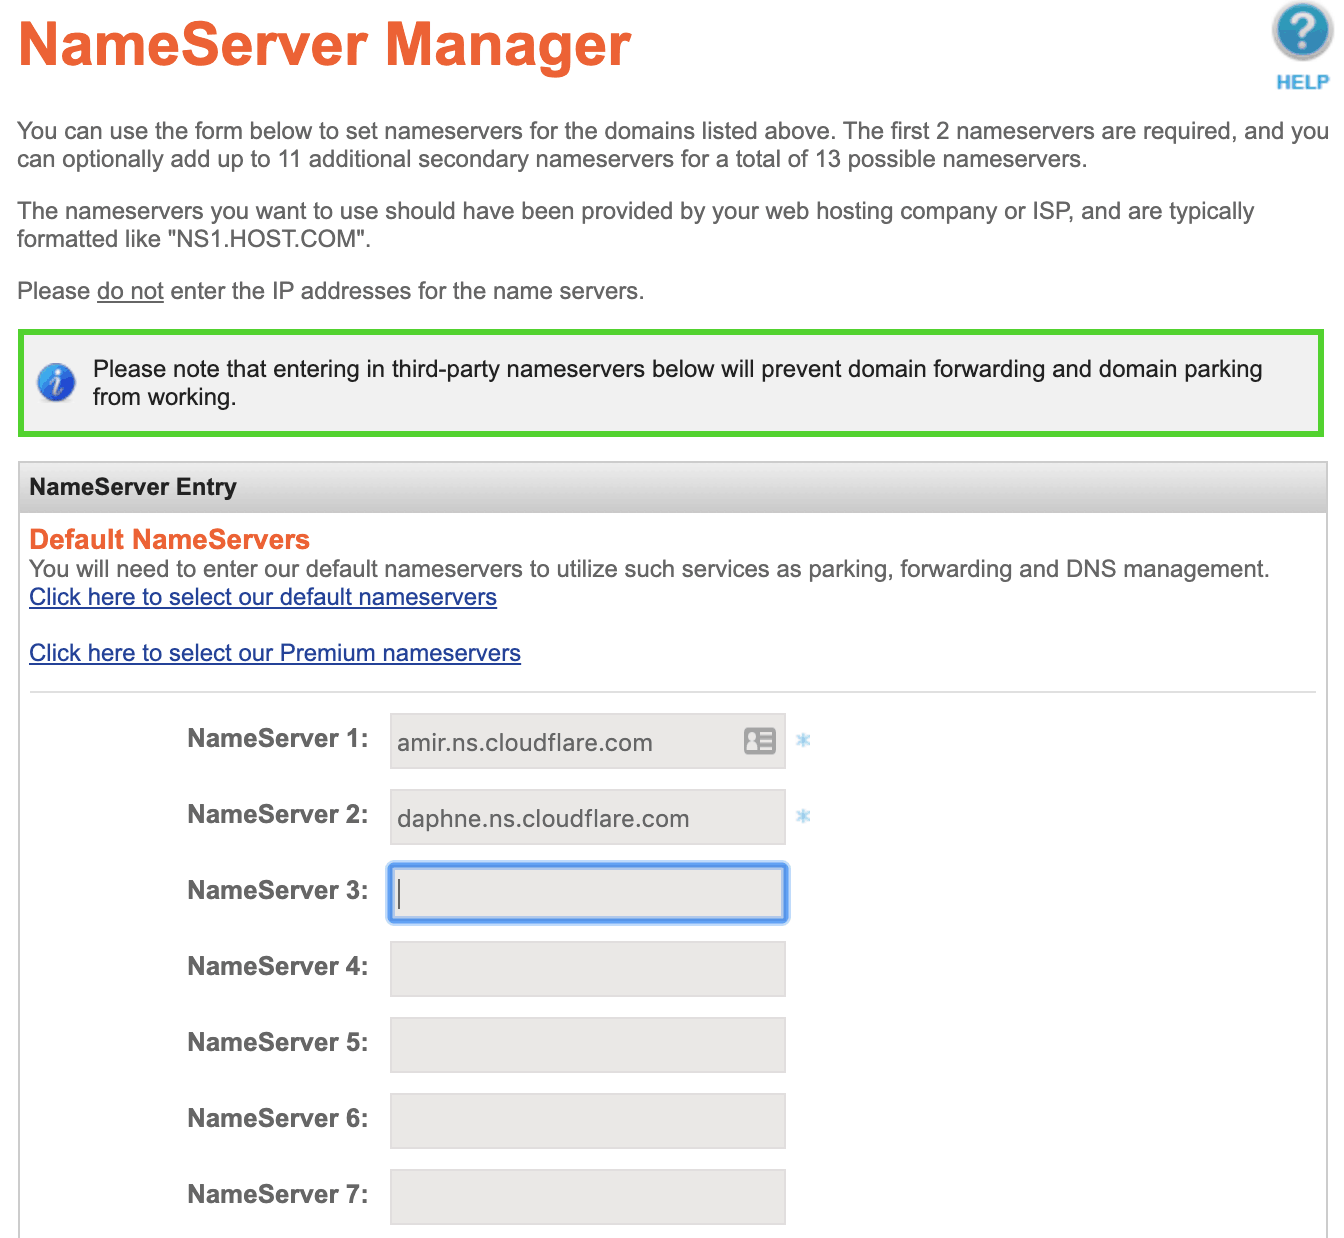
Paste in the new Cloudflare nameserver address into the ‘NameServer 1’ field on your domain registrar page, then repeat the process for NameServer 2 and save (remove any remaining addresses that may appear by default):
Once you’ve inputted both nameserver addresses, go back to the Cloudflare page and click on ‘Done, check nameservers’:
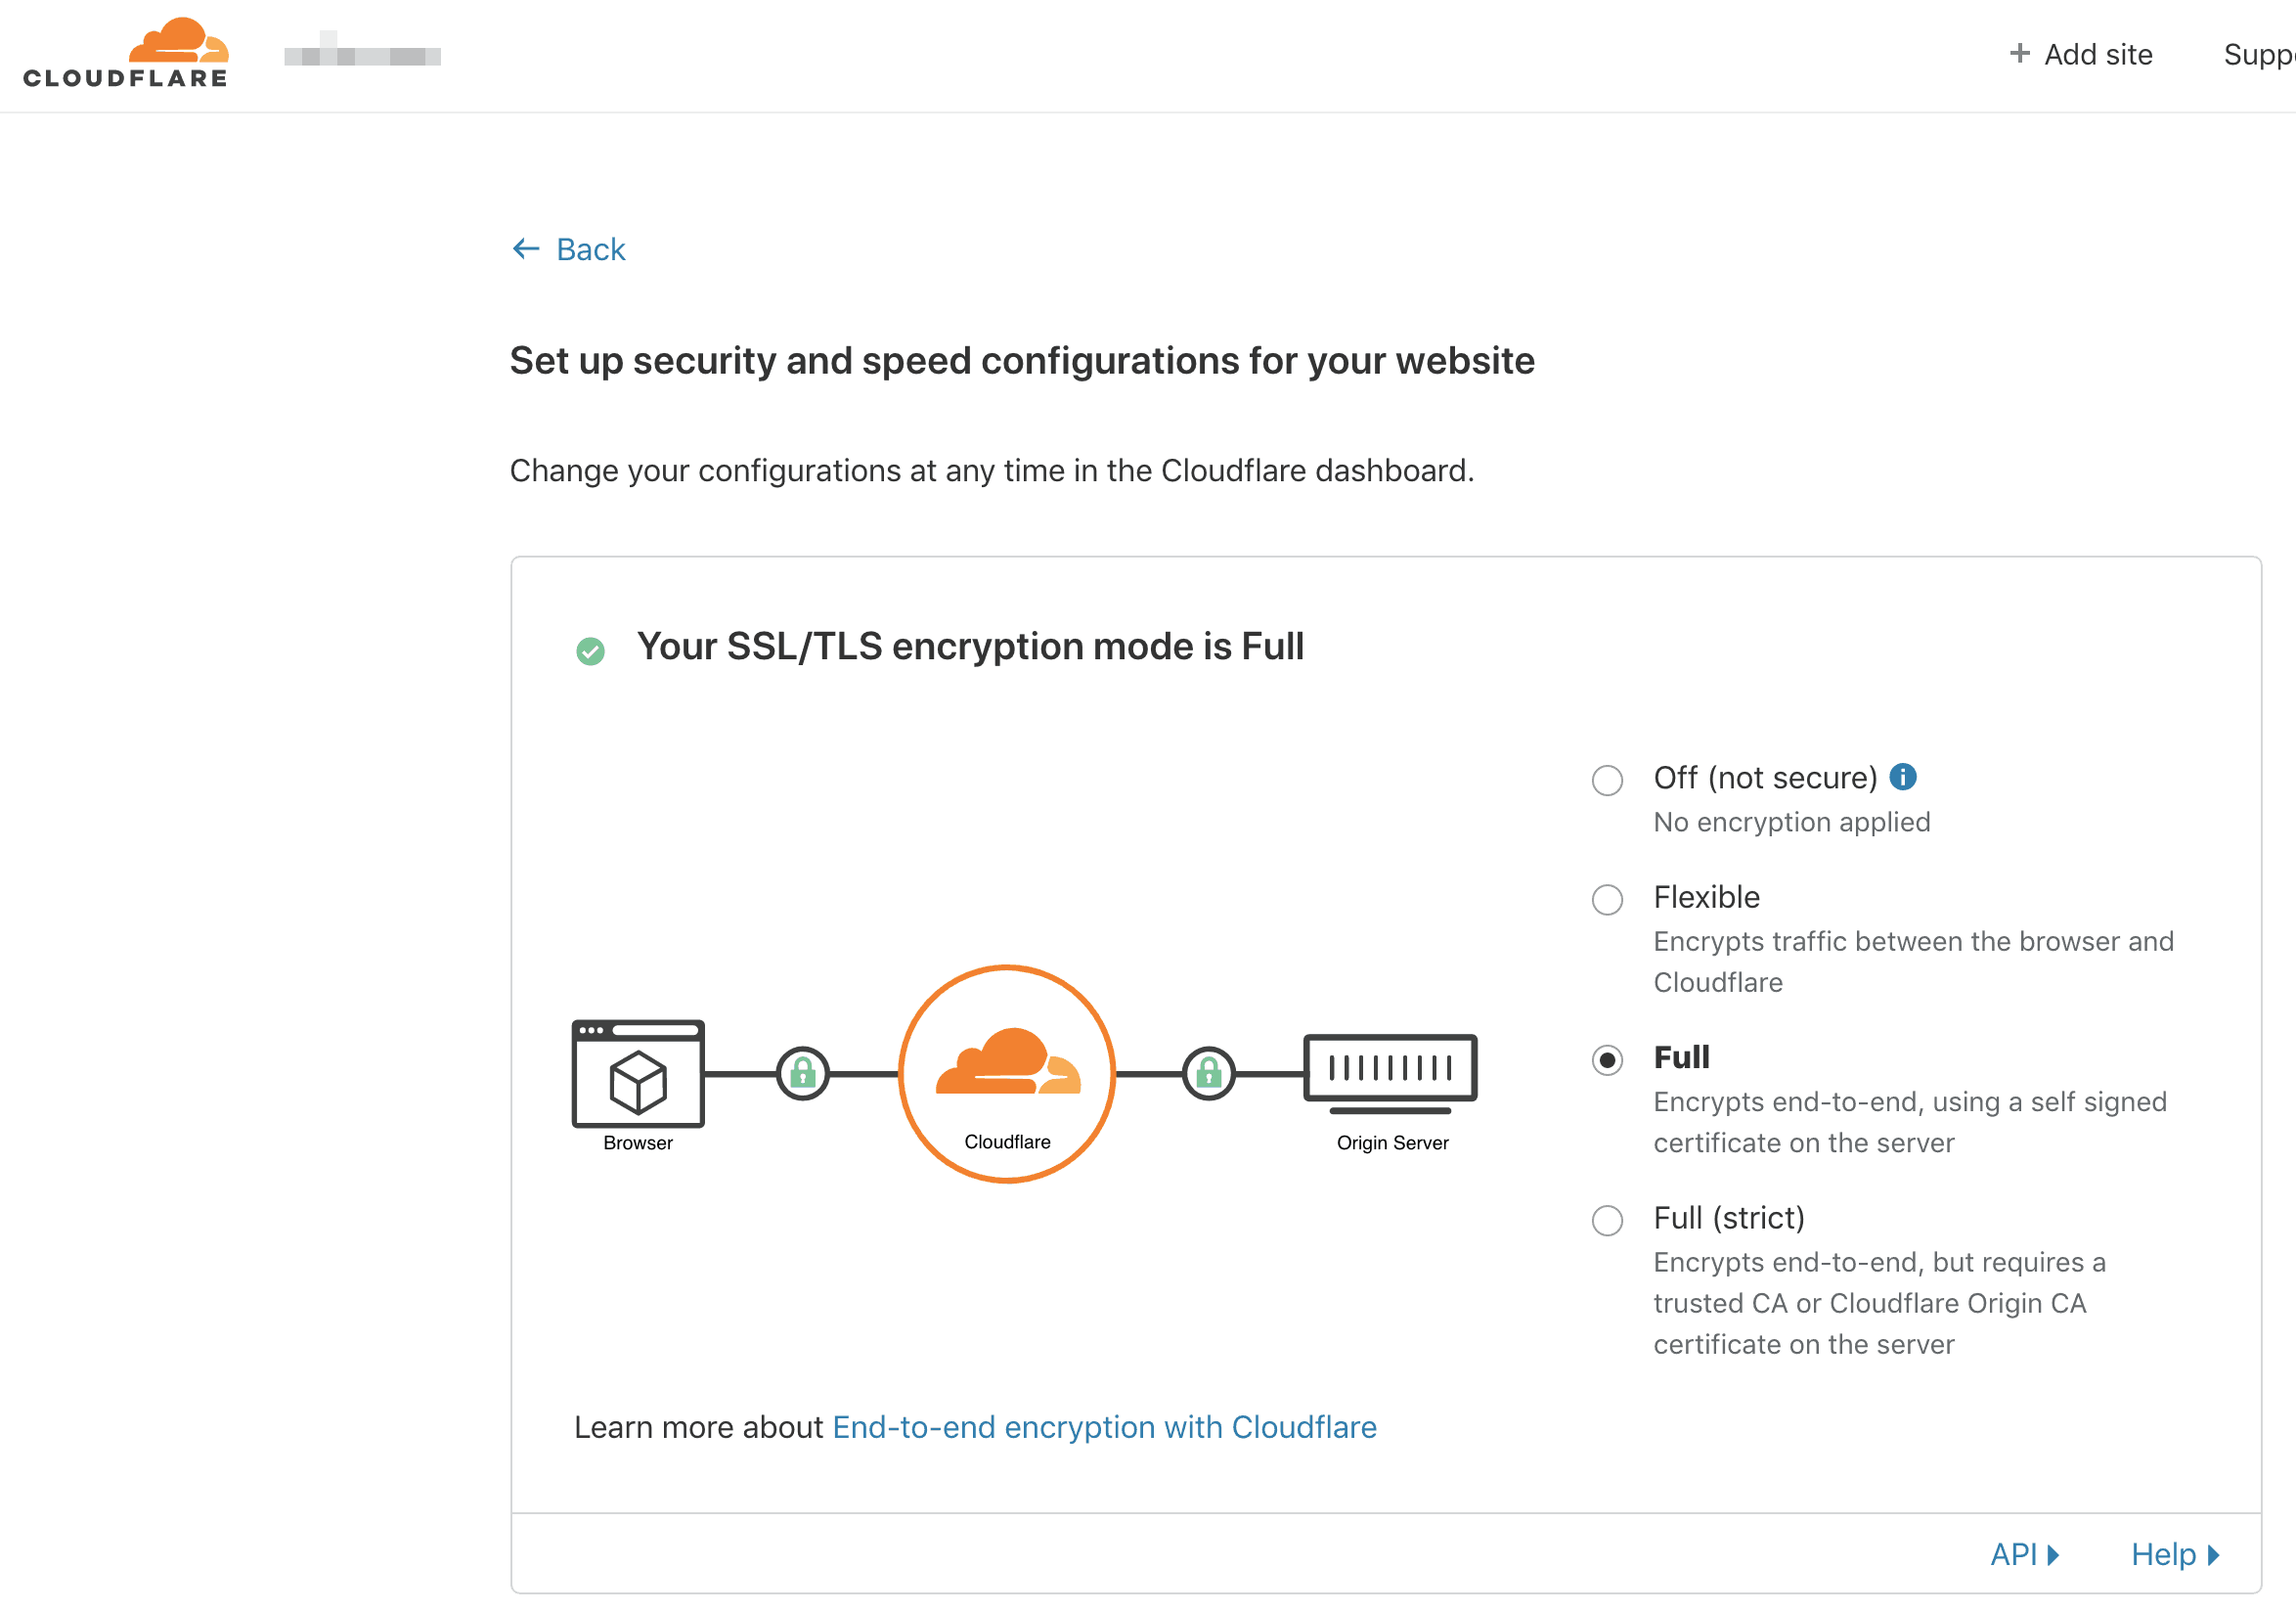
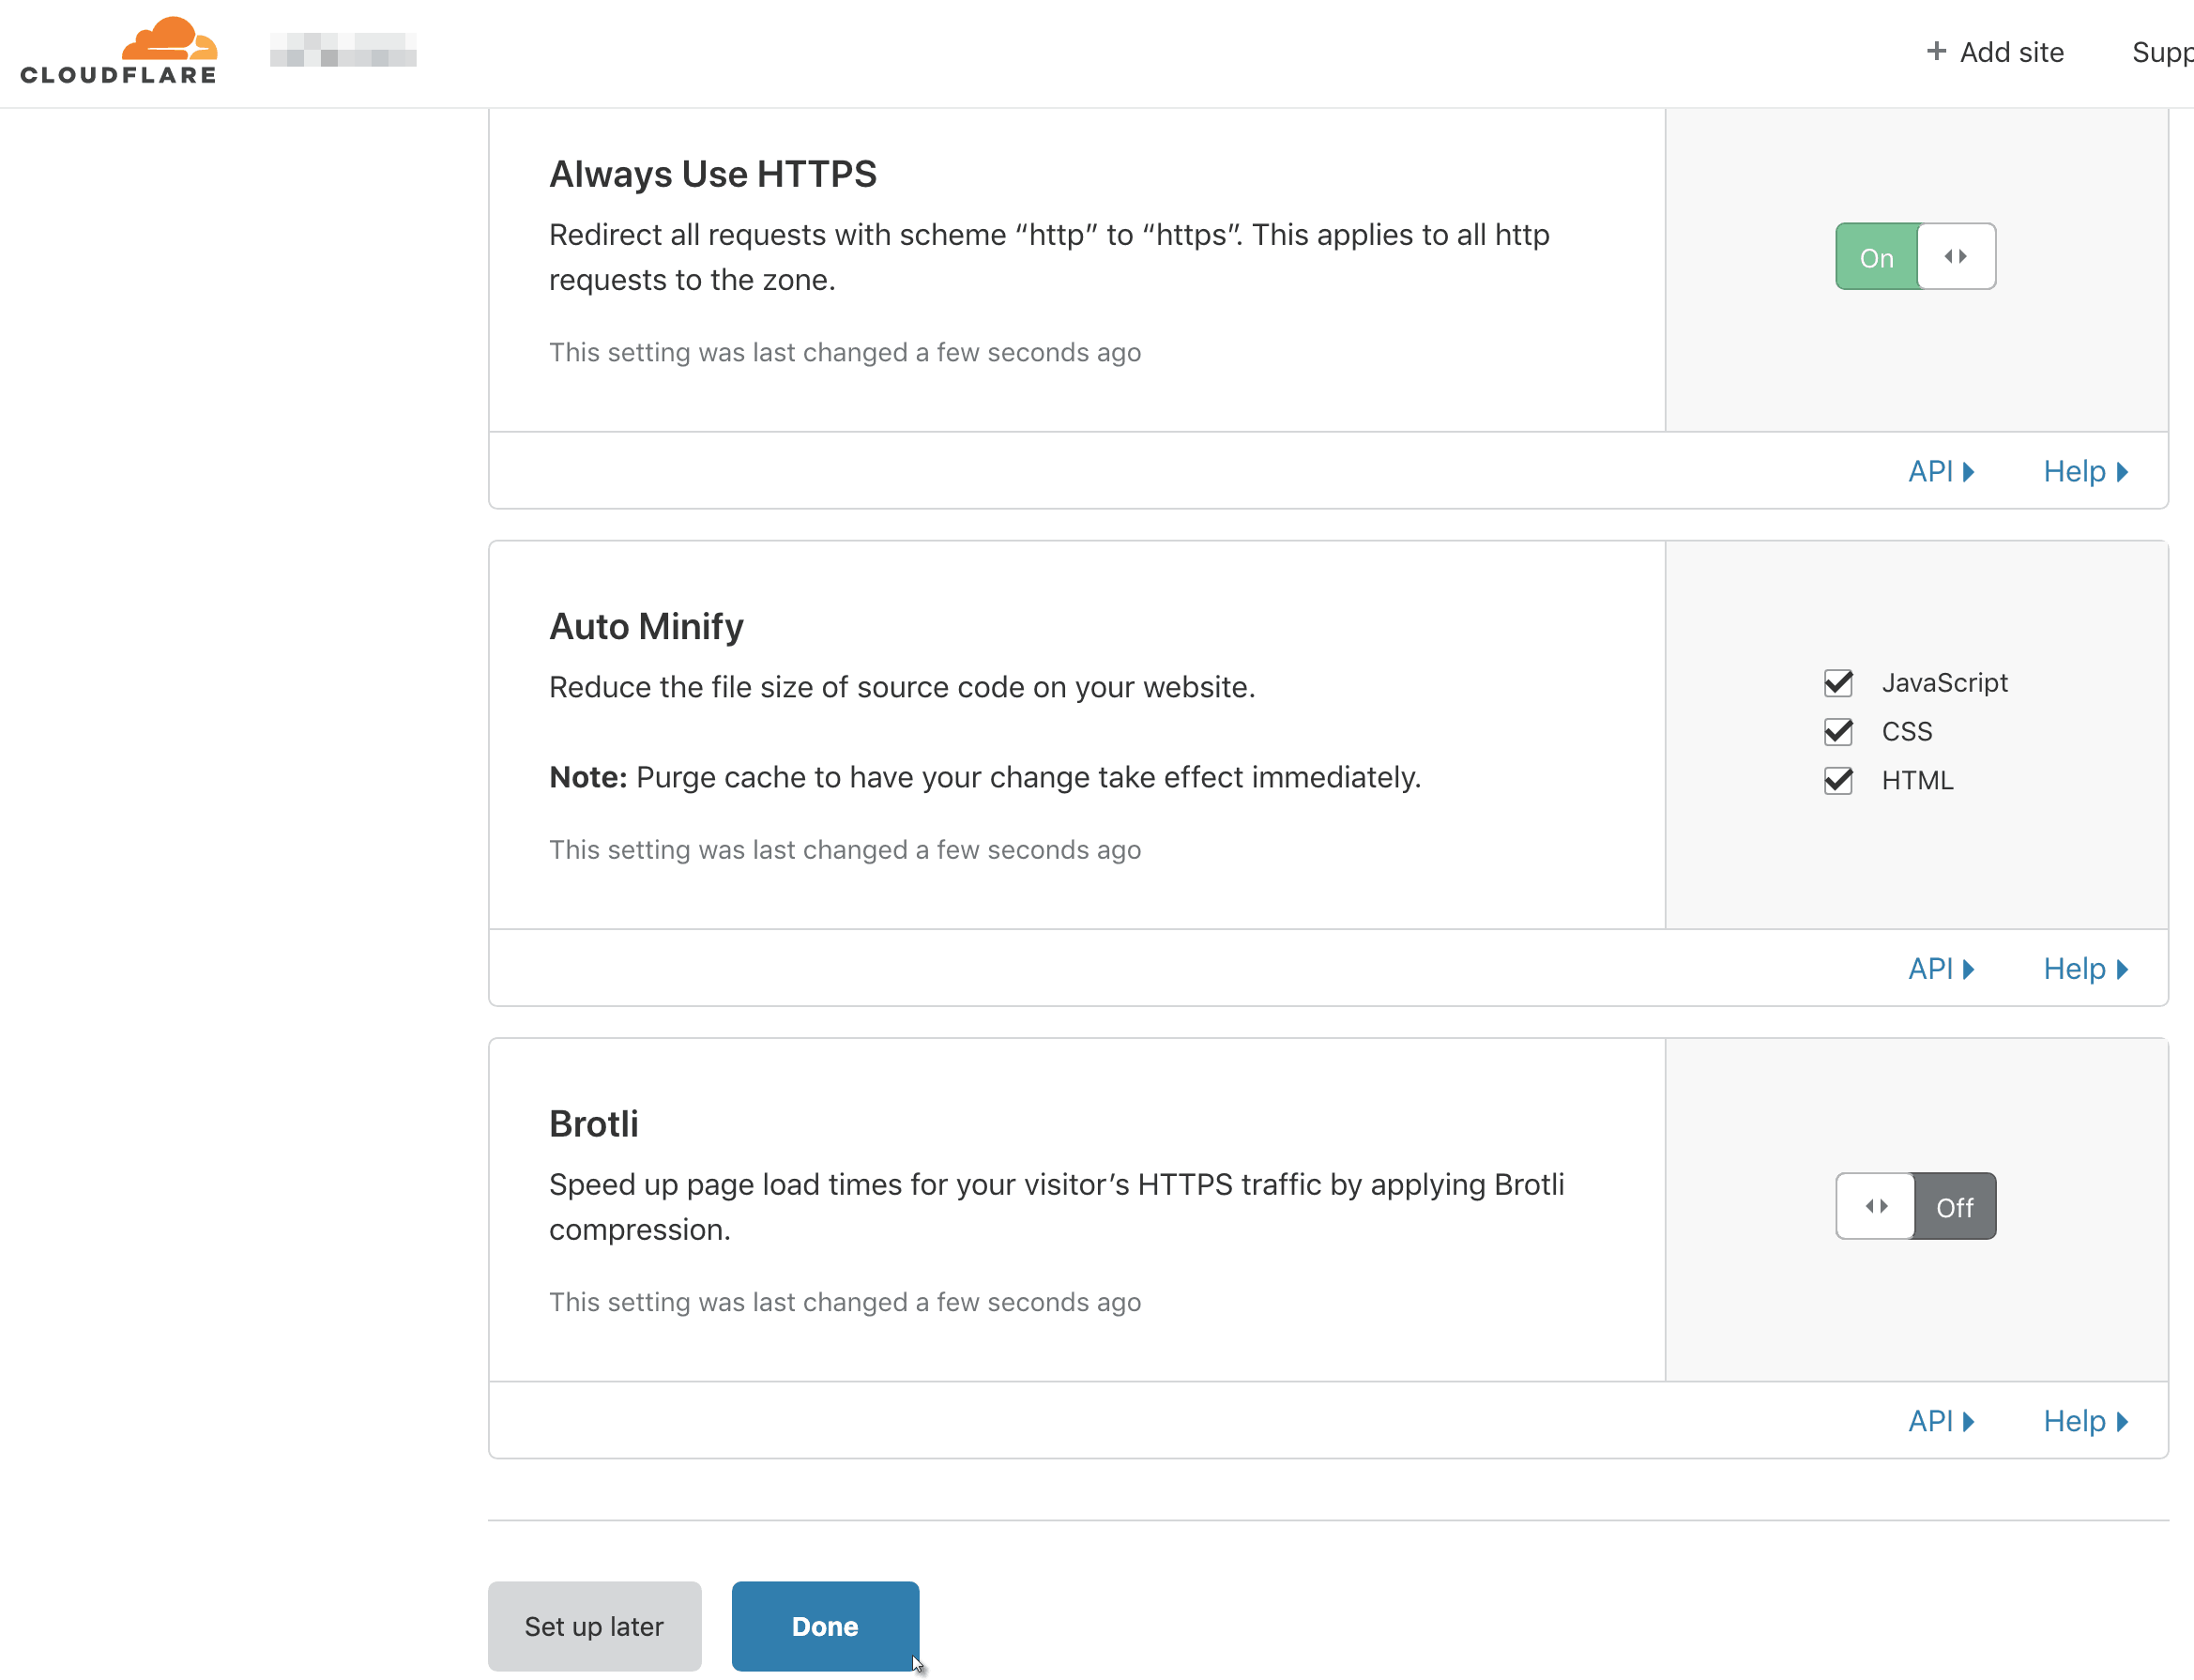
On the following page, leave it on ‘Full’, toggle ‘Always Use HTTPS’ on, select all three items under ‘Auto Minify’, toggle ‘Brotli’ off and then click ‘Done’:
On the ‘Complete your nameserver setup’ page, click the ‘Re-check now’ button located below:
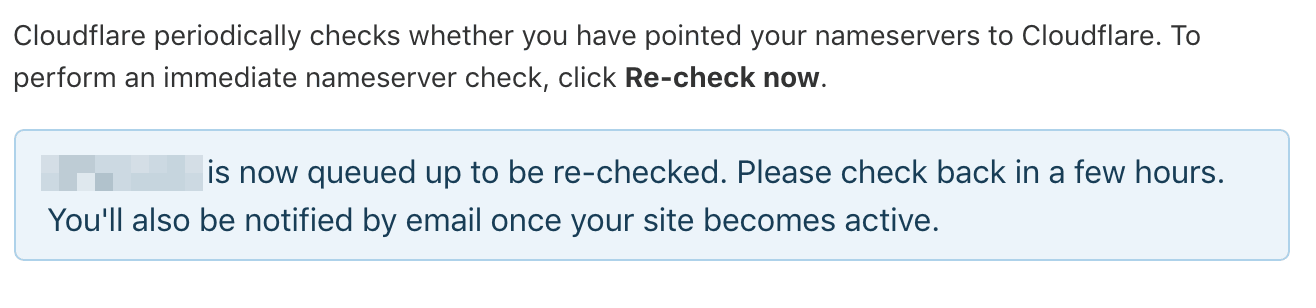
Cloudflare will then notify you that your website is now queued to be re-checked and they’ll email you once it’s been activated:
7.) Before you can collect and analyze your website statistics, you’ll need to link it to a Google Analytics account first.
If you don’t have an account yet, make sure that you’re signed into the Google account you want to associate with your website and create a new Google Analytics account:
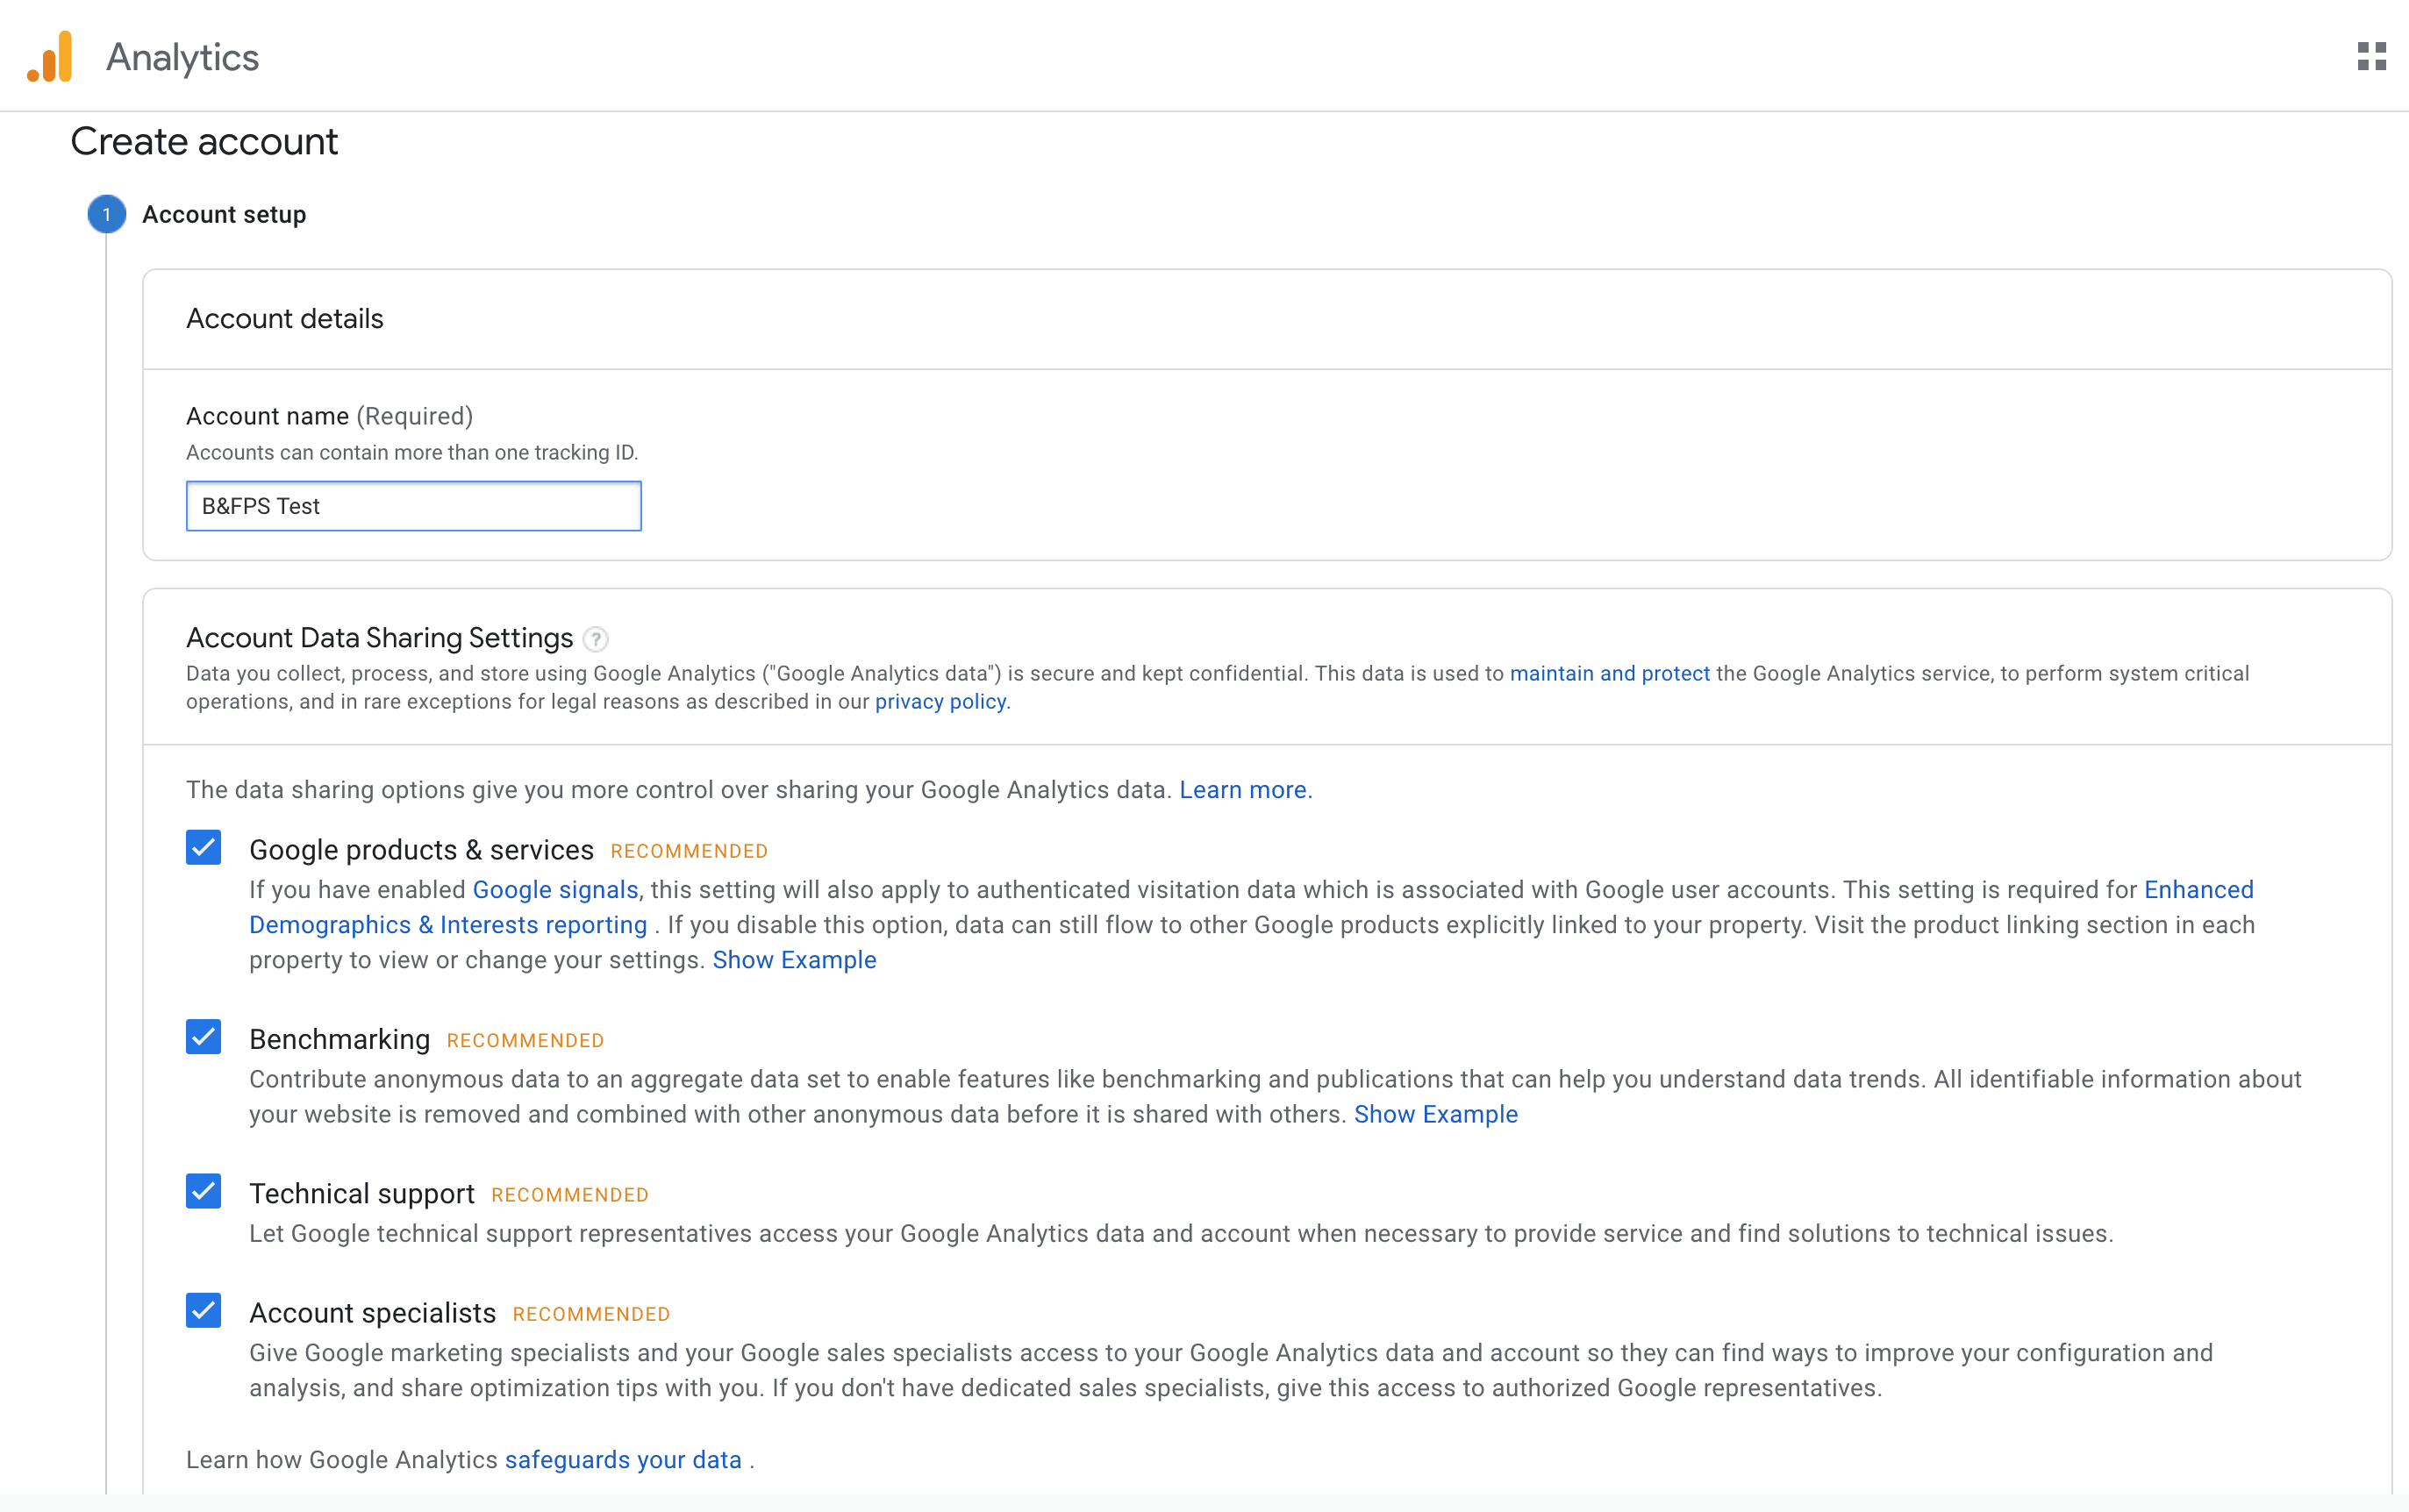
Enter your website name under ‘Account Name’ and uncheck any items under ‘Account Data Sharing Settings’ that you don’t want shared (we recommend leaving everything checked):
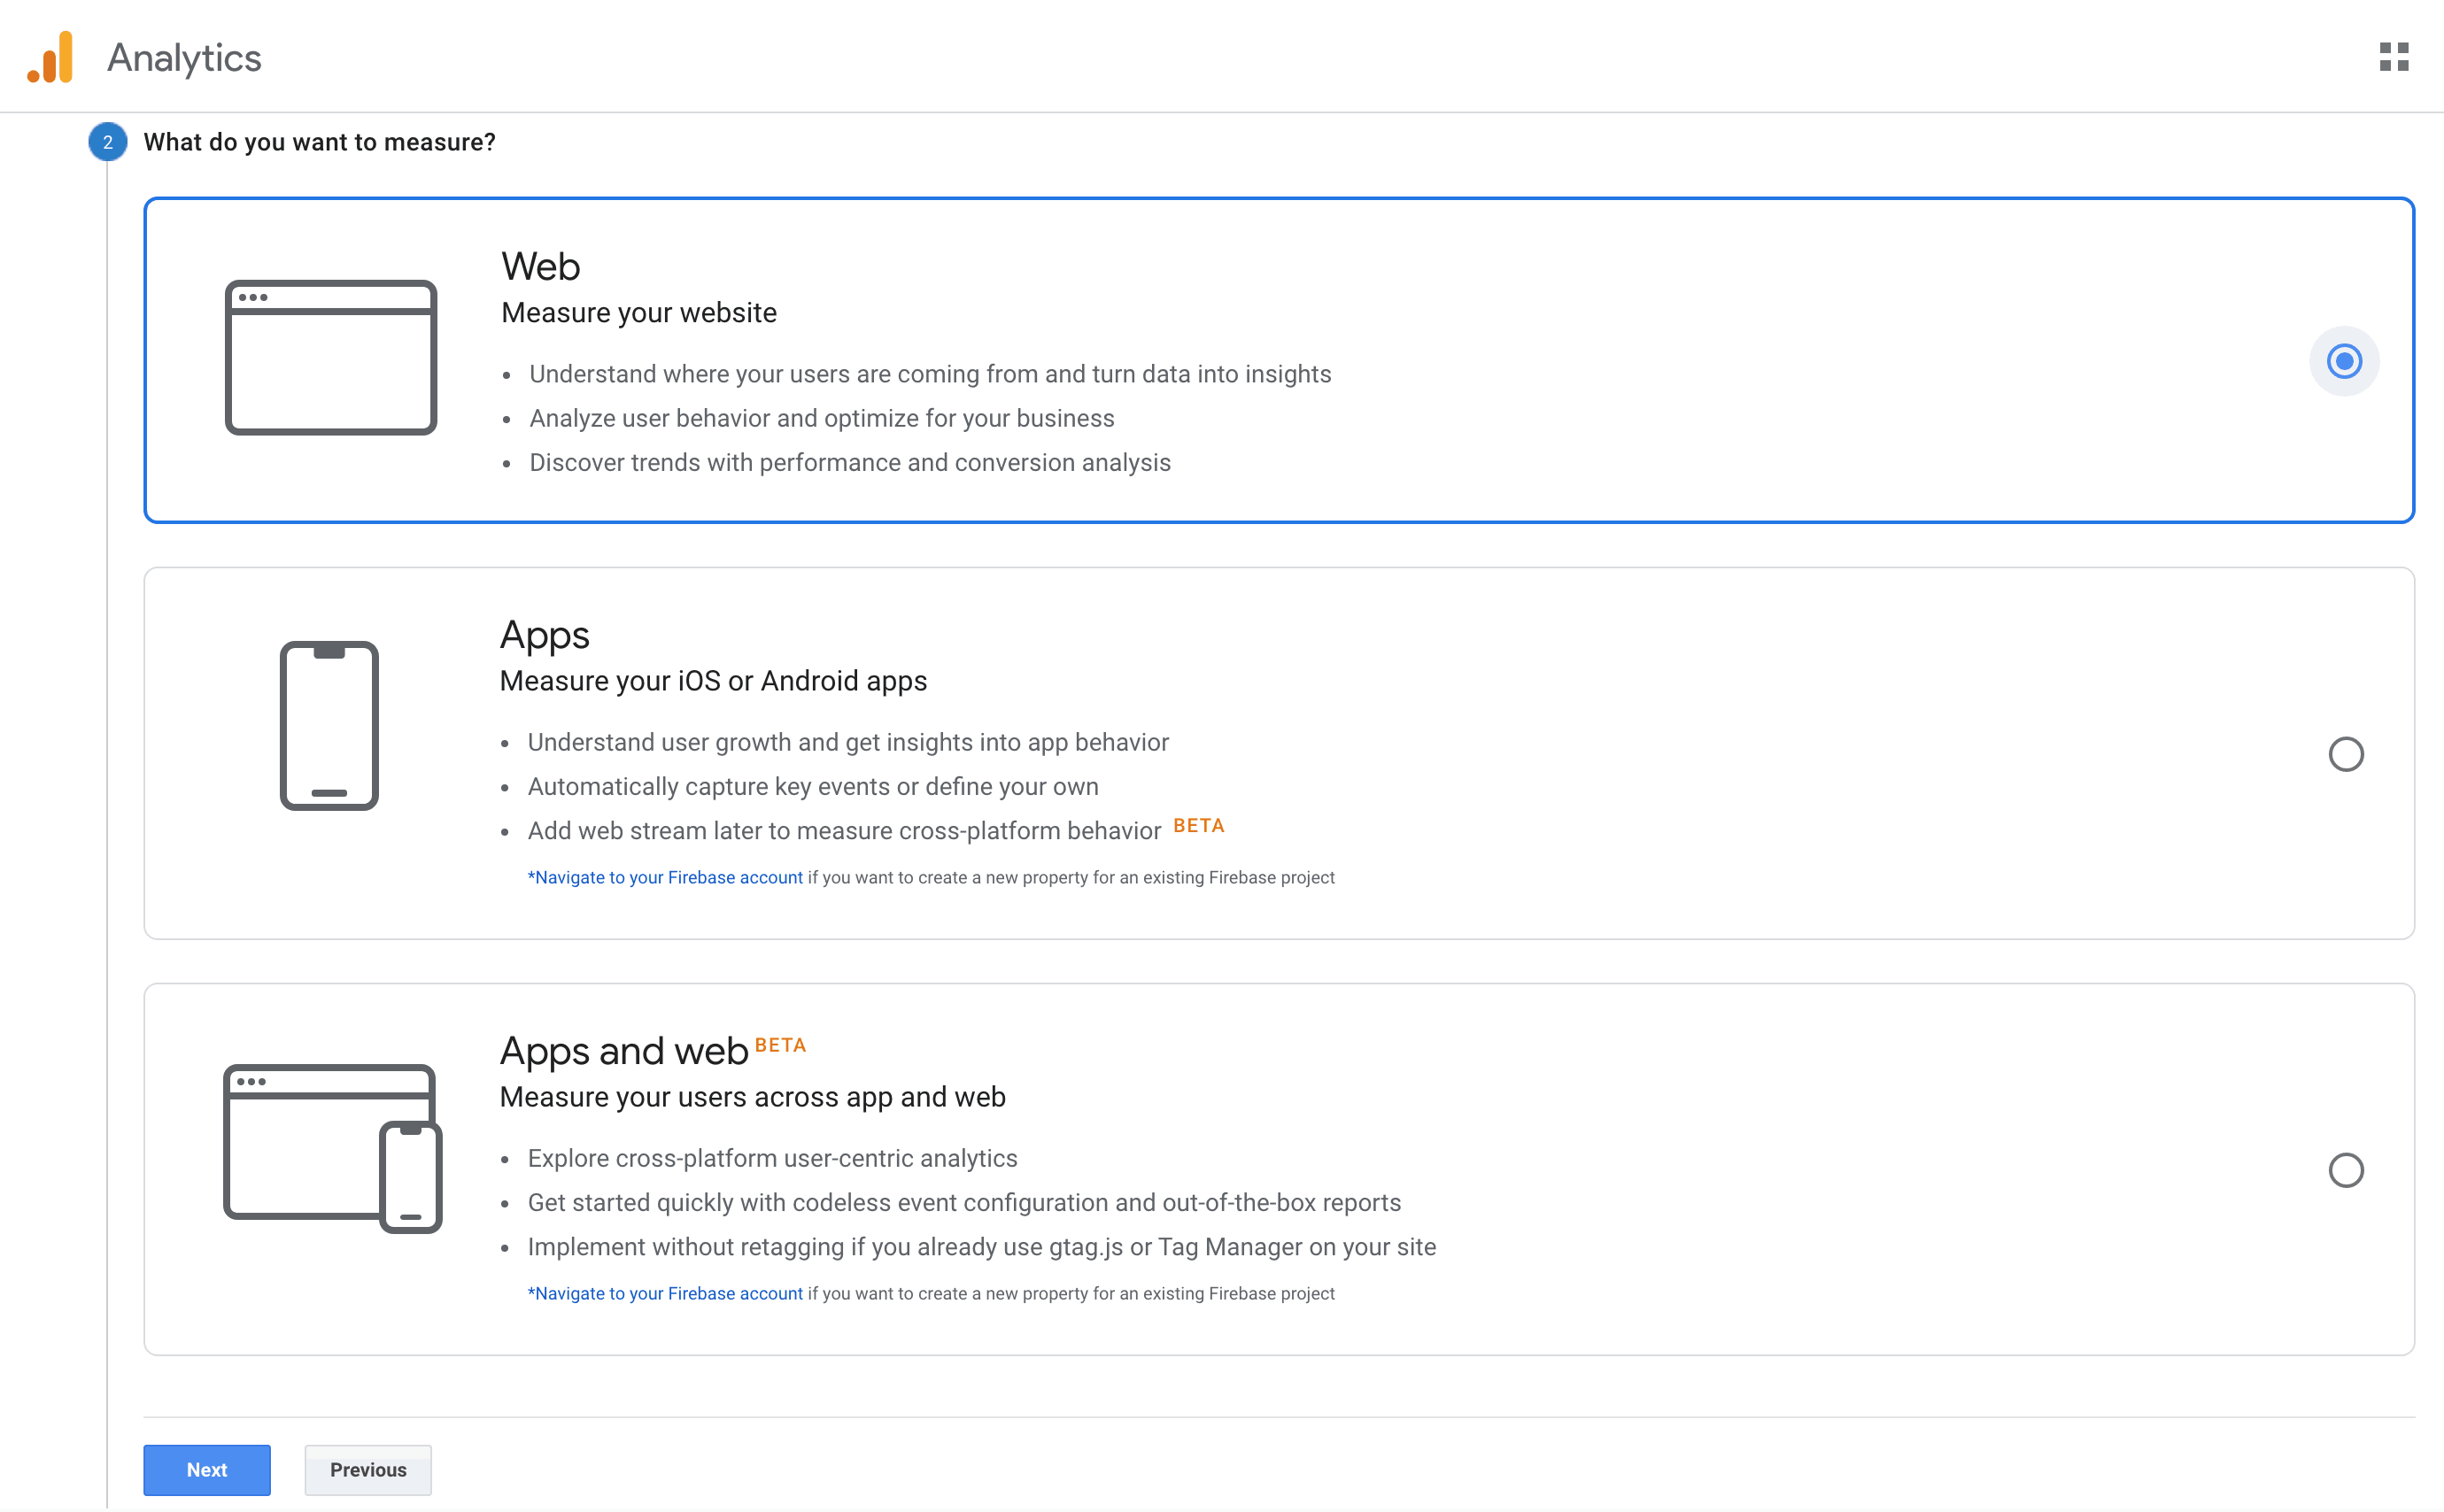
Since we want to track and measure our website, leave it on ‘Web’ and click on ‘Next’:
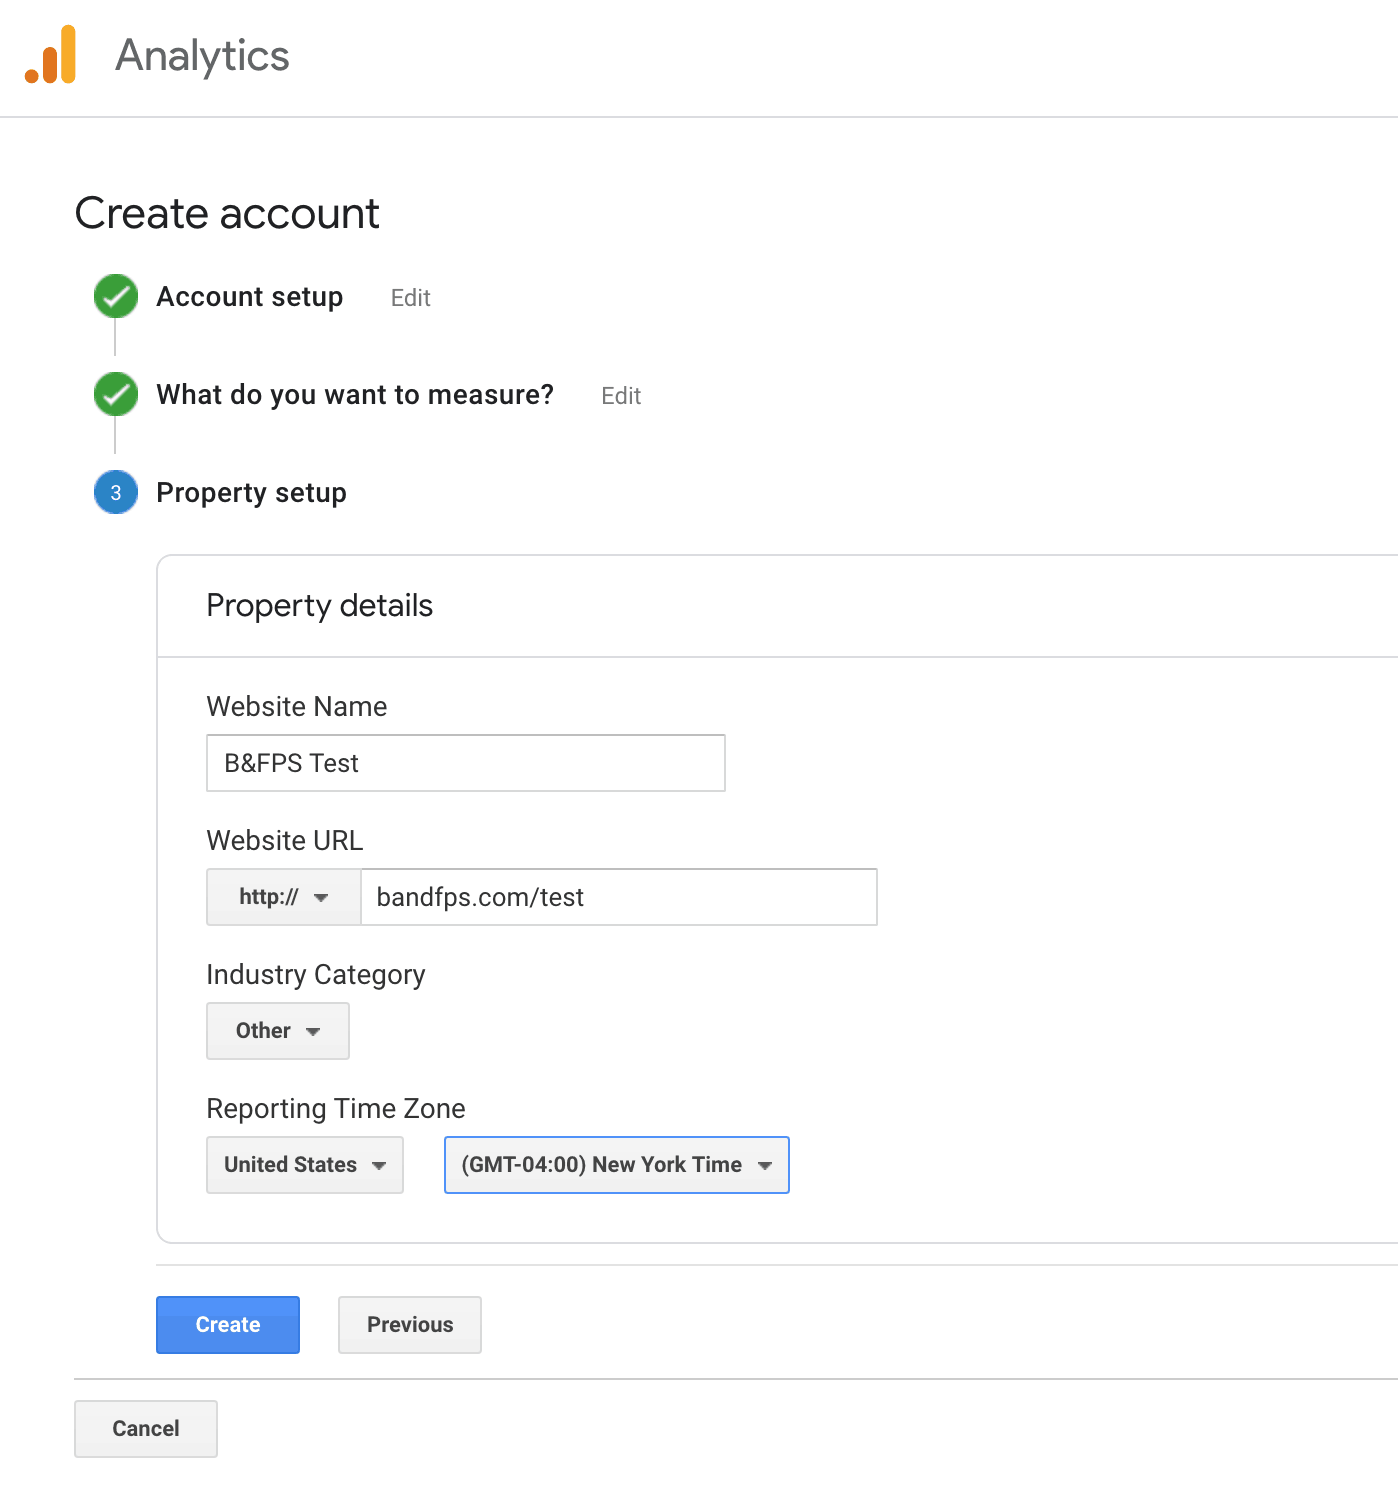
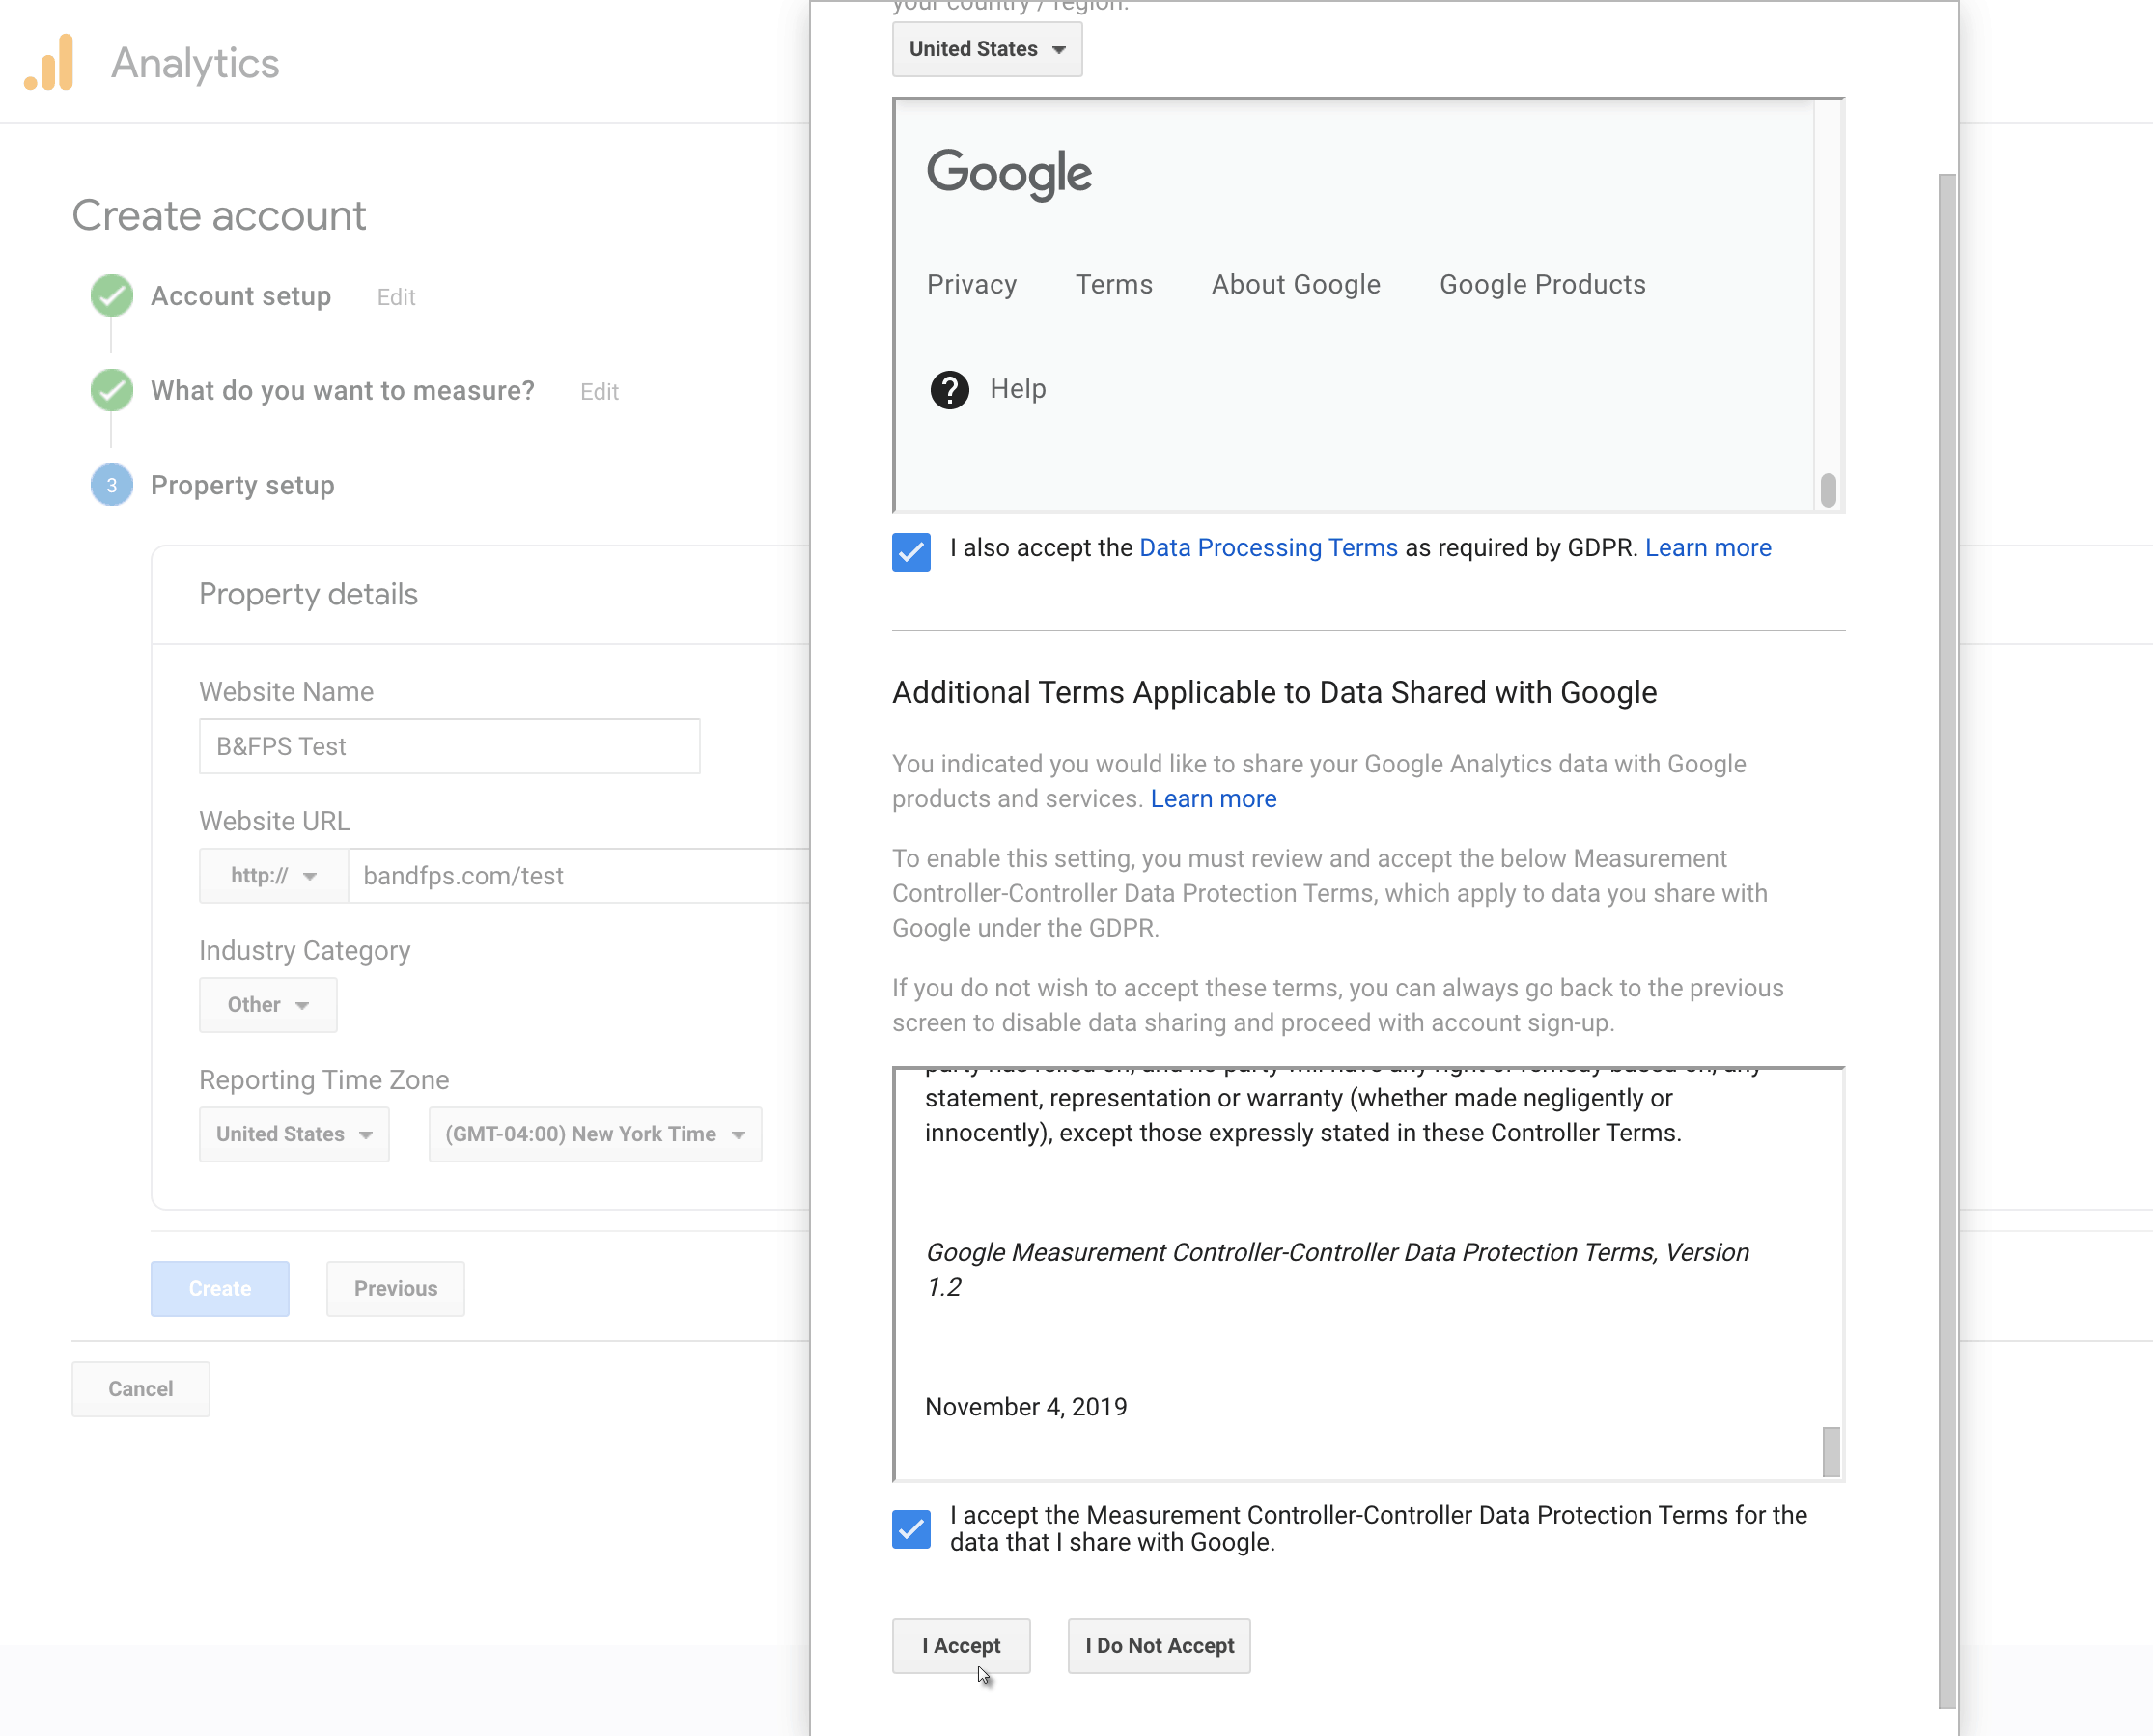
On the next page, enter your website URL, choose your ‘Industry Category’, then select your ‘Reporting Time Zone’ and finally click on ‘Create’:
Read through the GDPR Data Processing and Measurement Controller-Controller Data Protection Terms, then check both boxes and click on ‘I Accept’ if you agree to both:
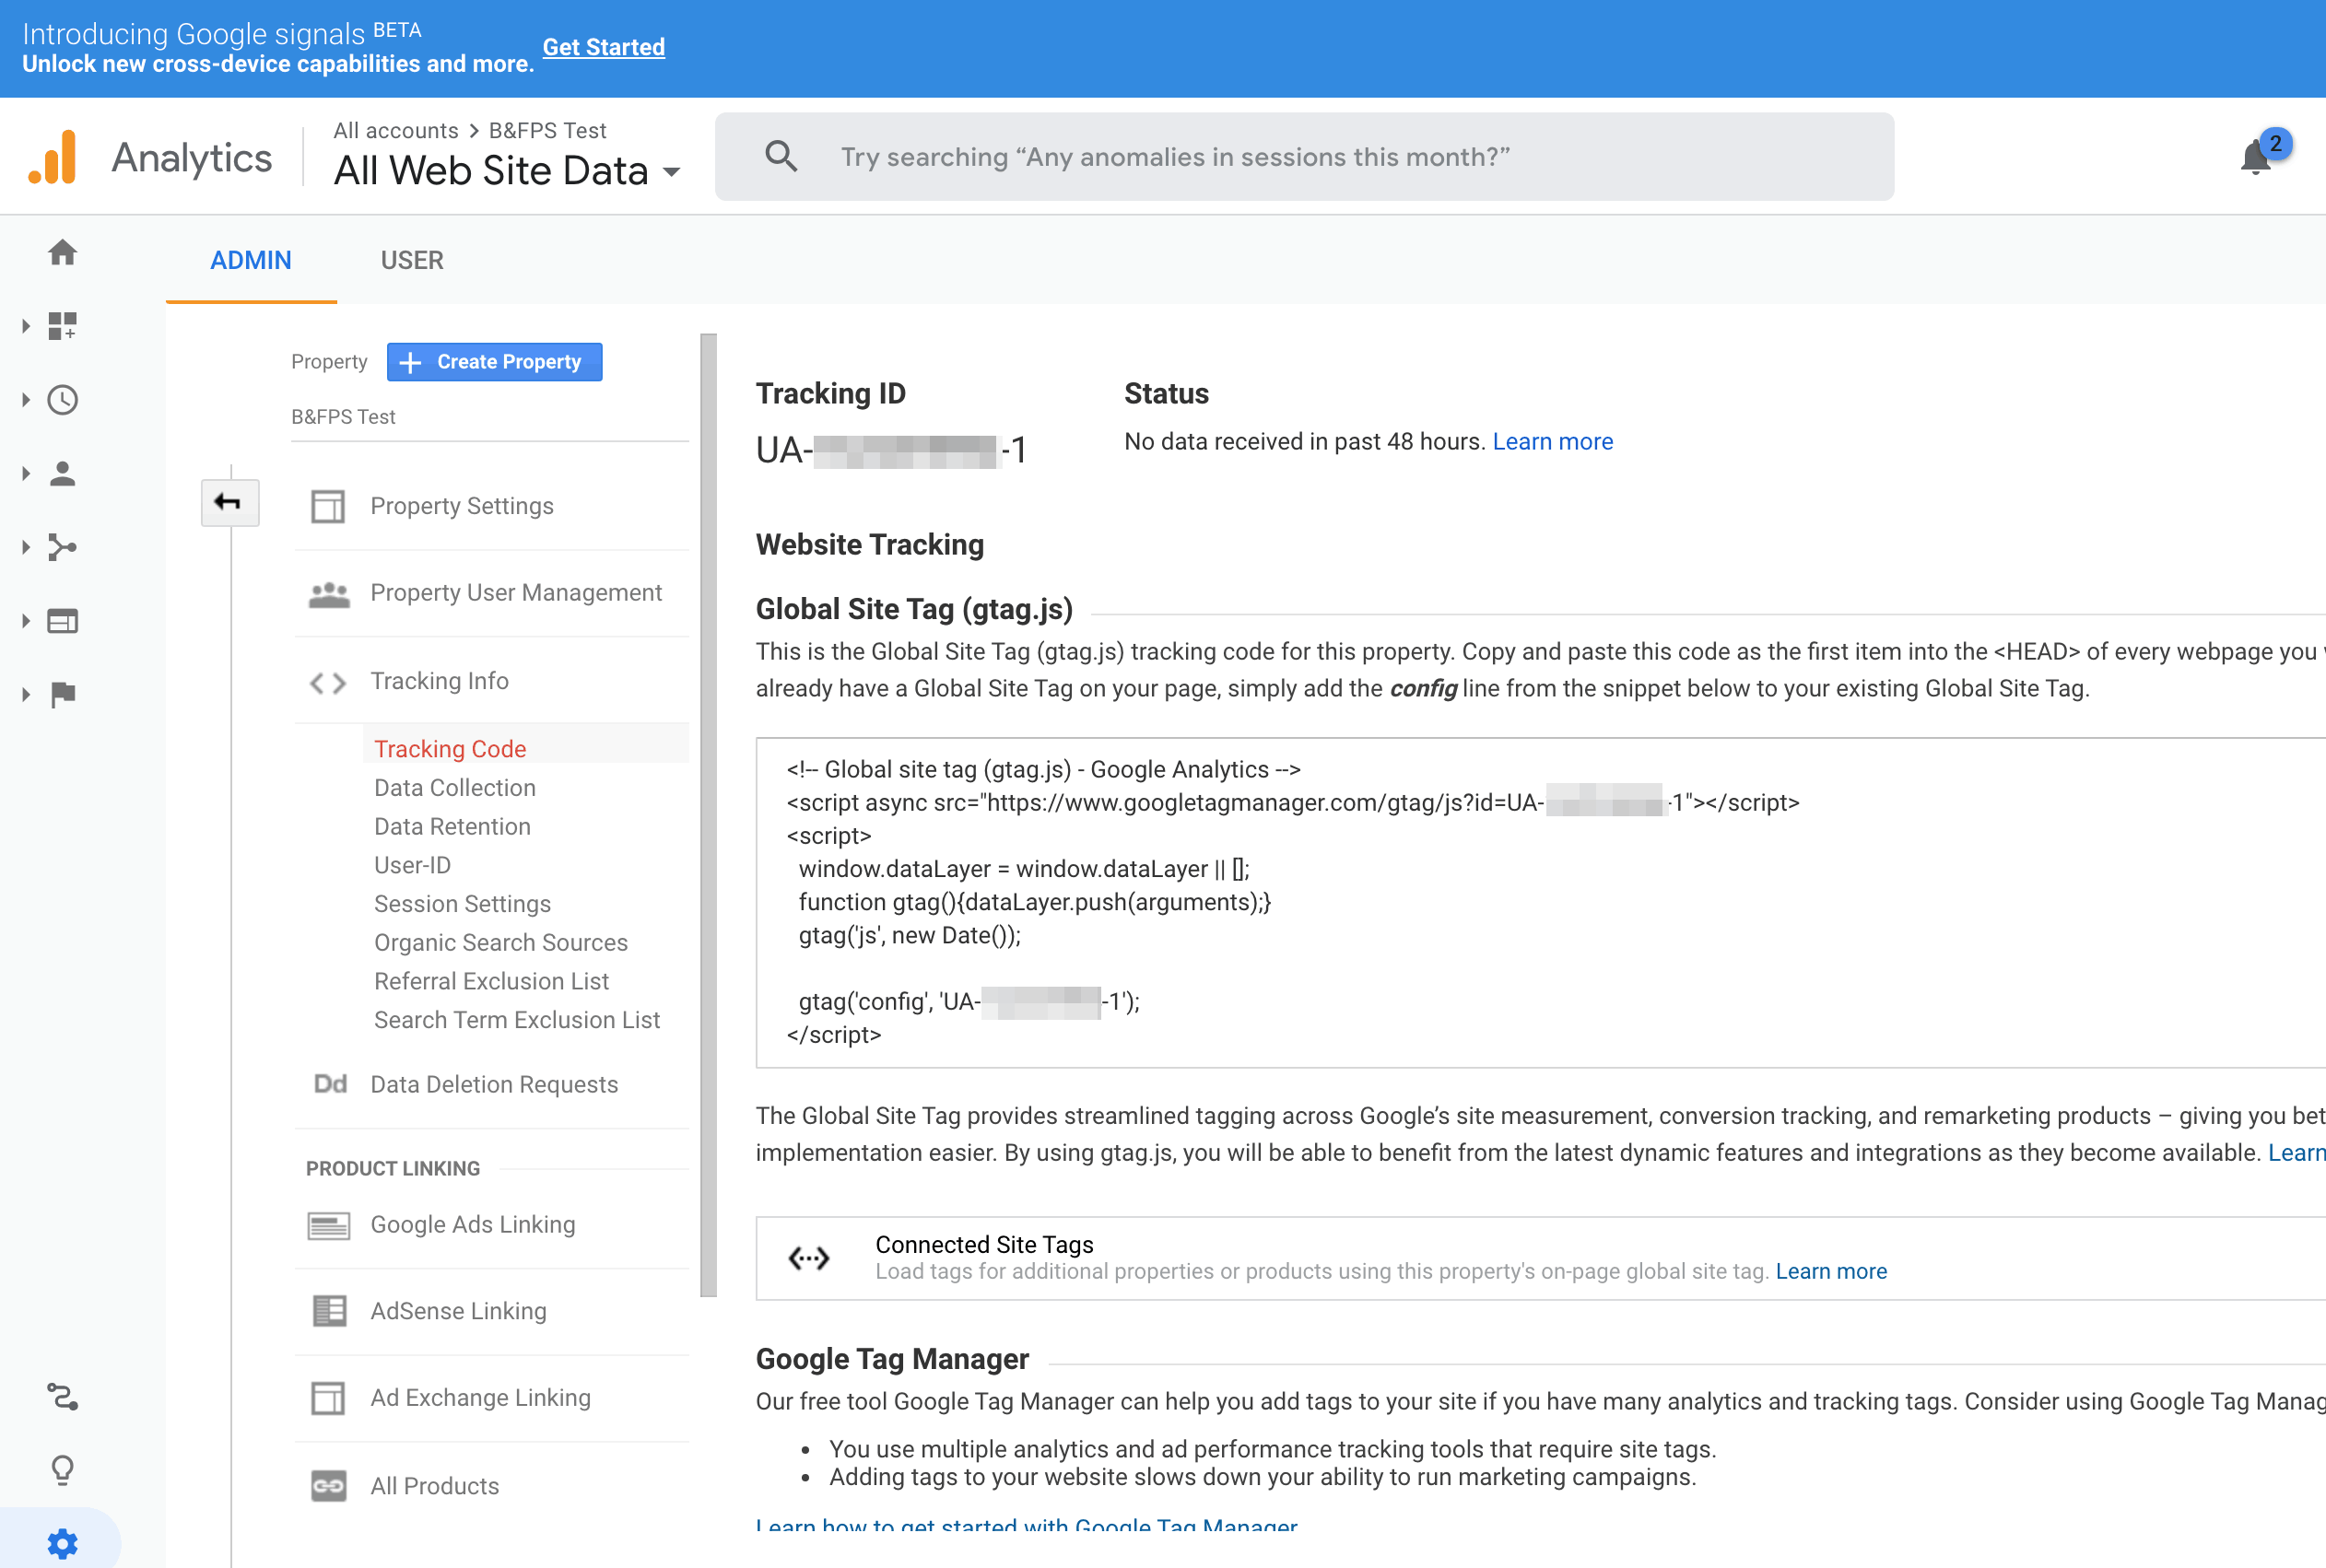
You should see a page that looks like this (write down your ‘Tracking ID’ for your records):
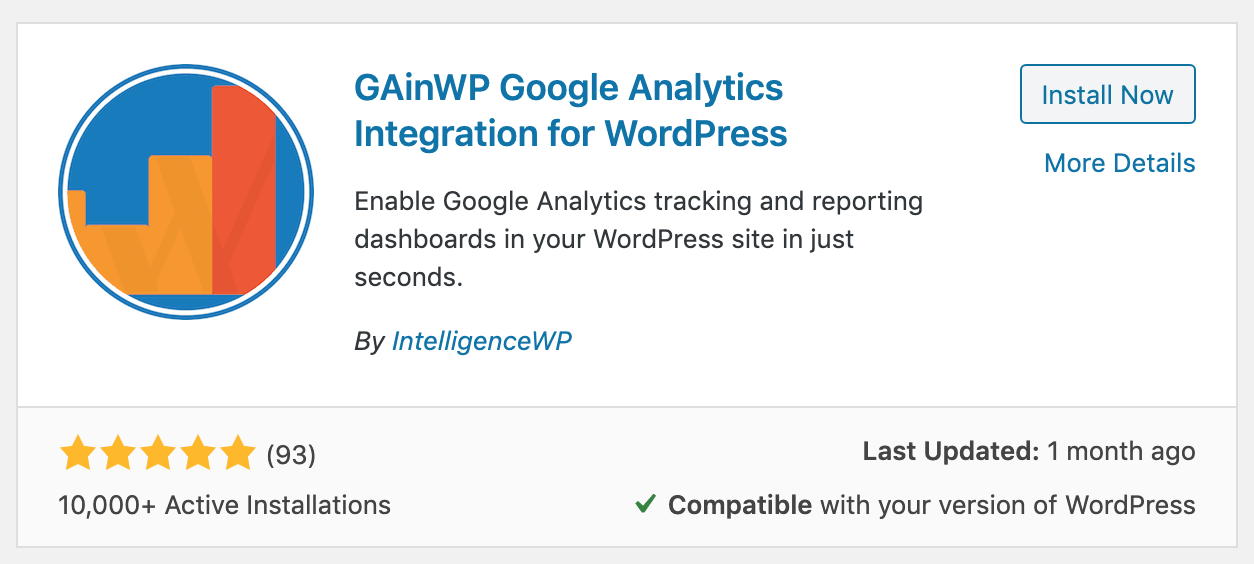
8.) Go back to your WordPress plugins and search for the ‘GAinWP Google Analytics Integration’ plugin:
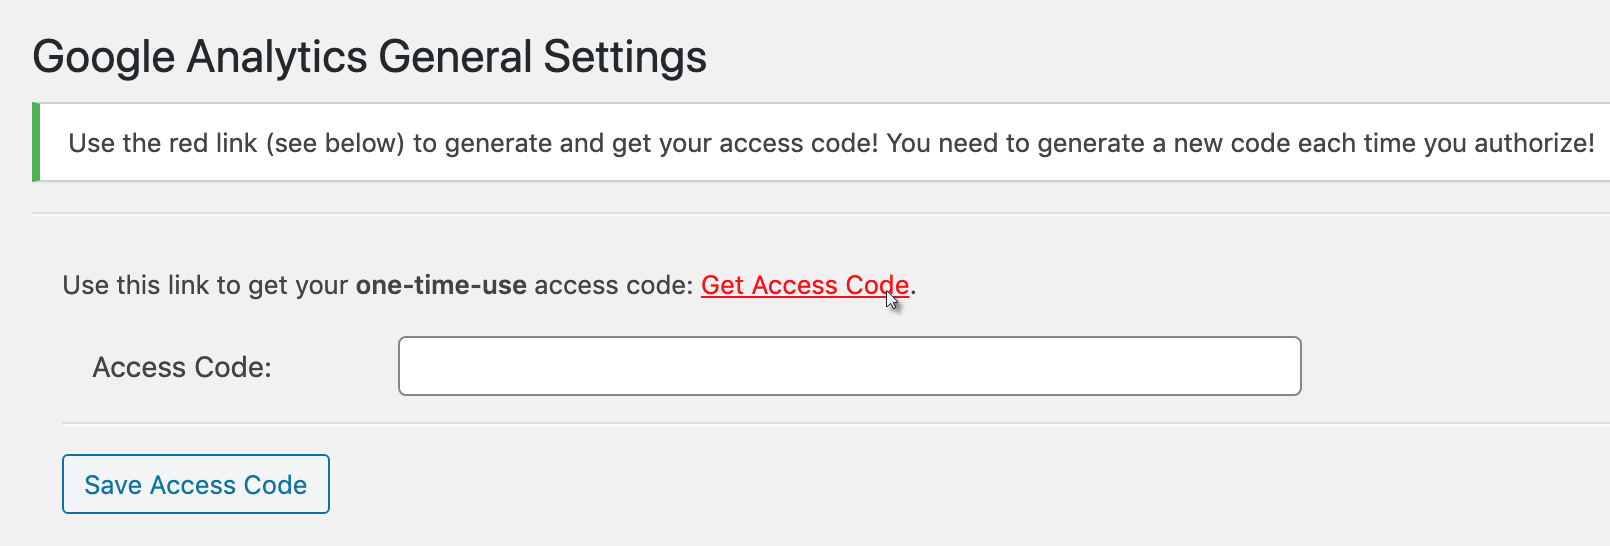
Once you’ve installed and activated GAinWP, go to the WordPress settings page and click on ‘Authorize Plugin’:

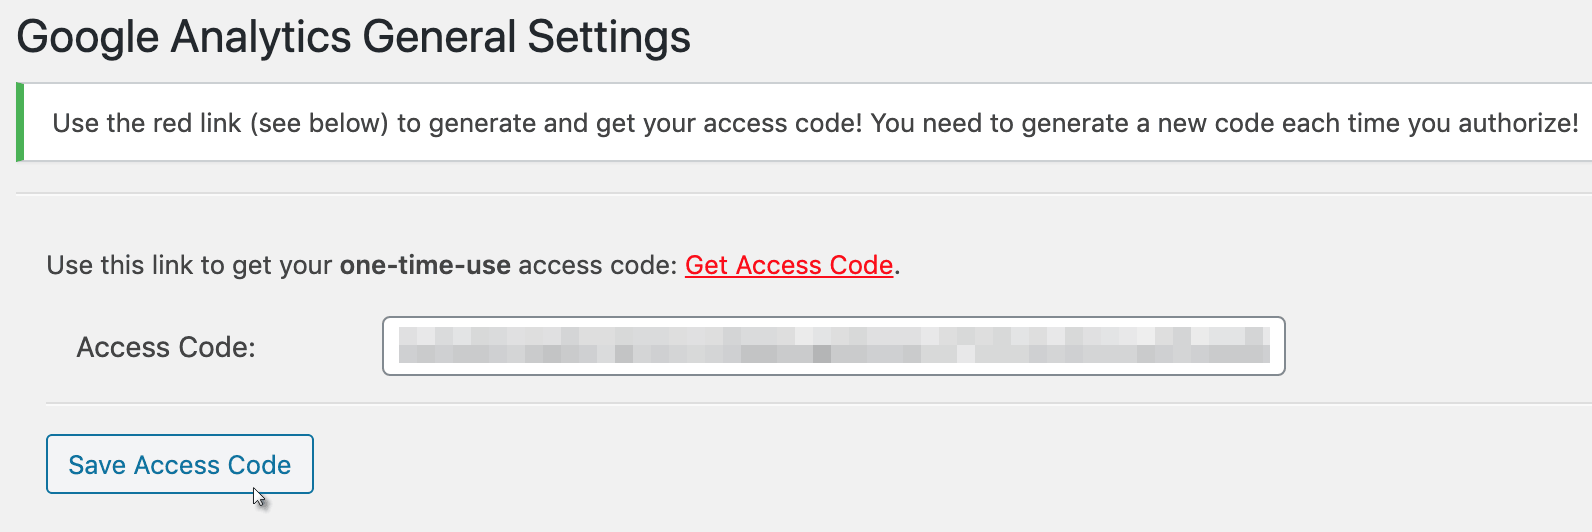
Then click on the red ‘Get Access Code’ link:
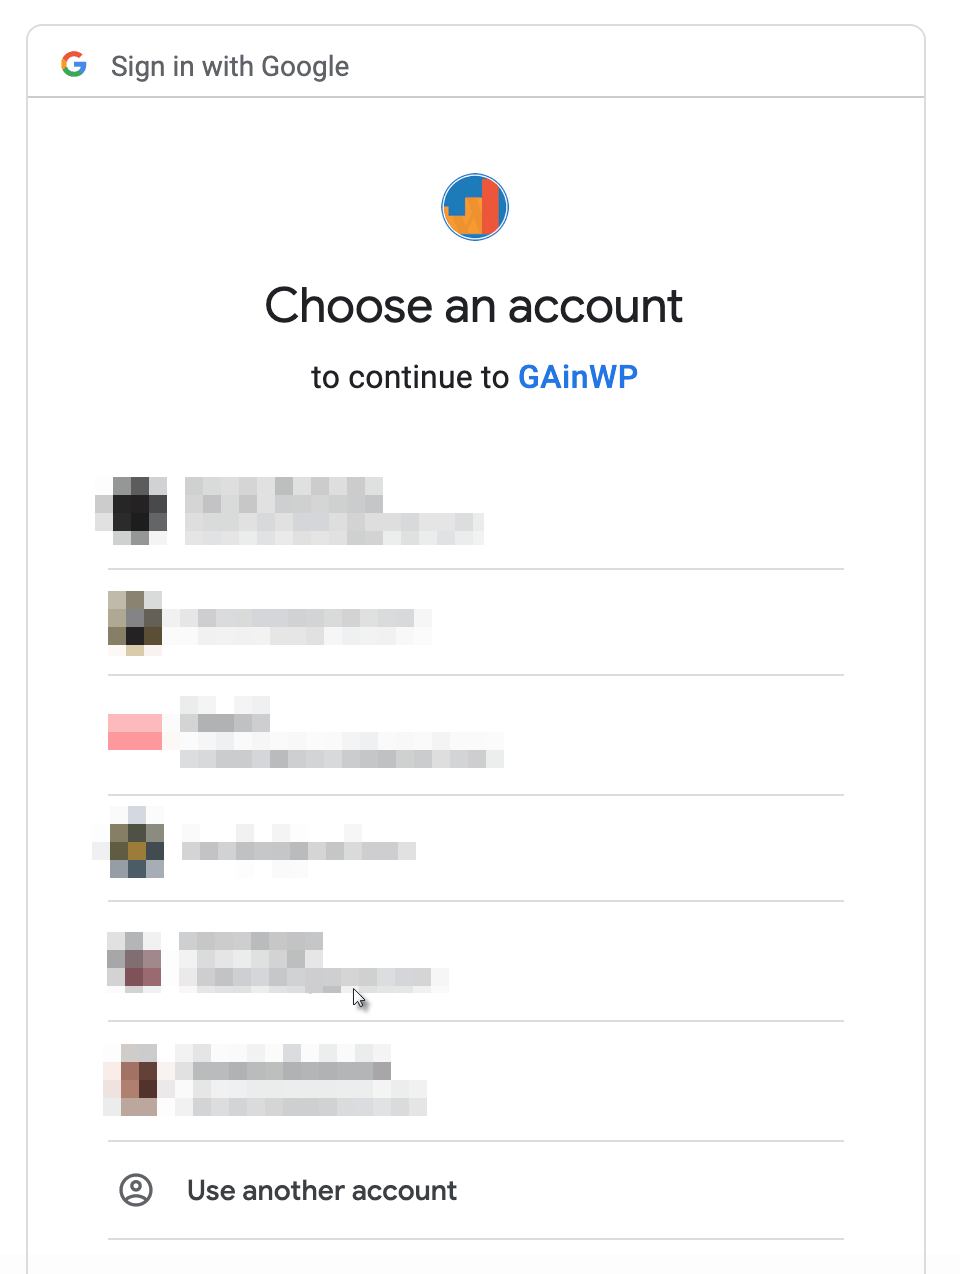
You’ll then be prompted to sign in with your Google account, so make sure to select the account you used to create your Google Analytics account with:
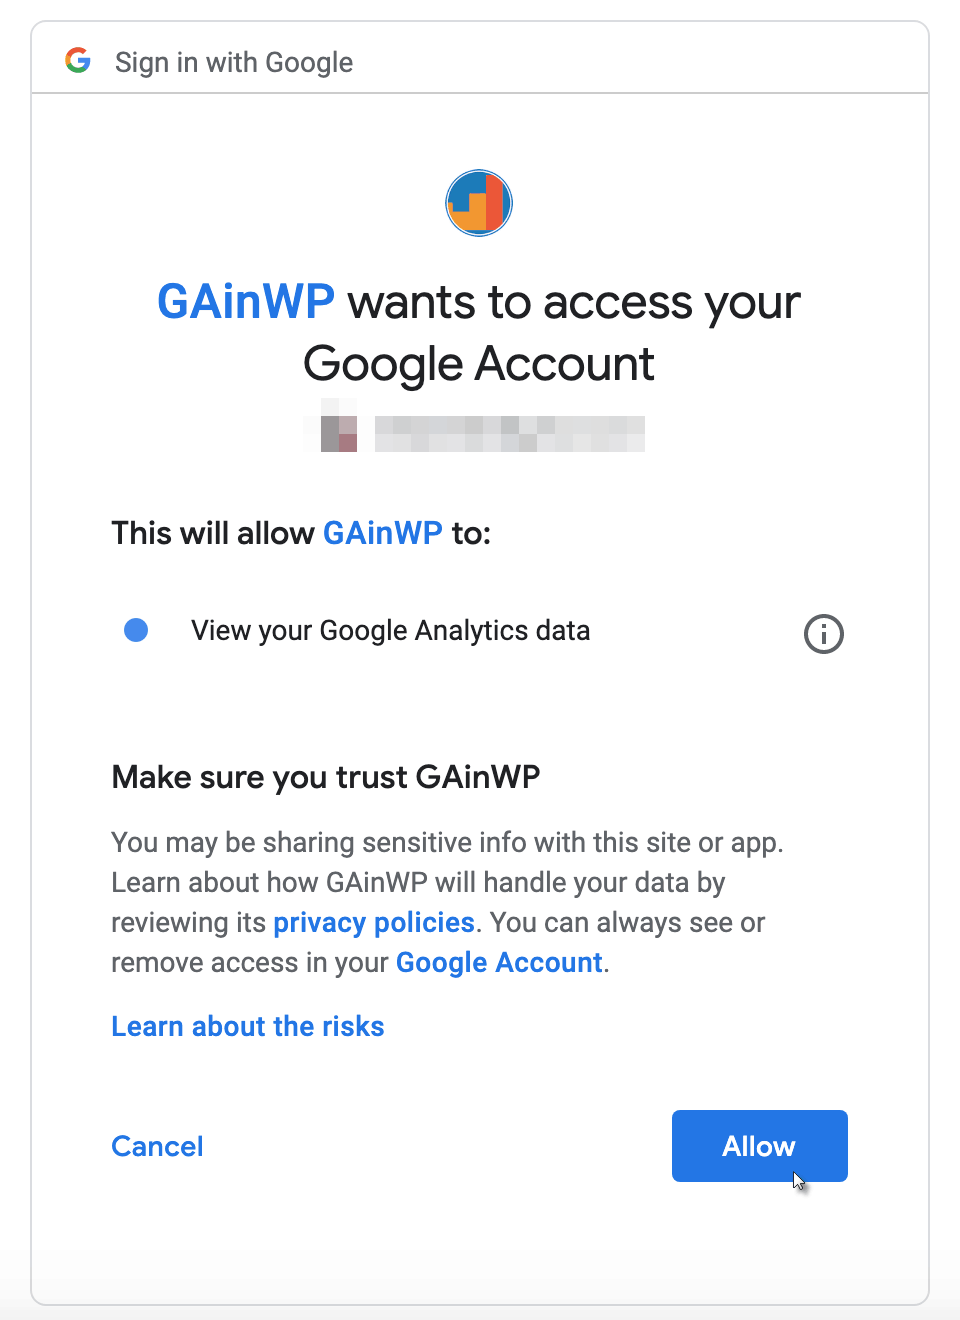
Click on ‘Allow’ to let GAinWP access your view your Google Analytics data:
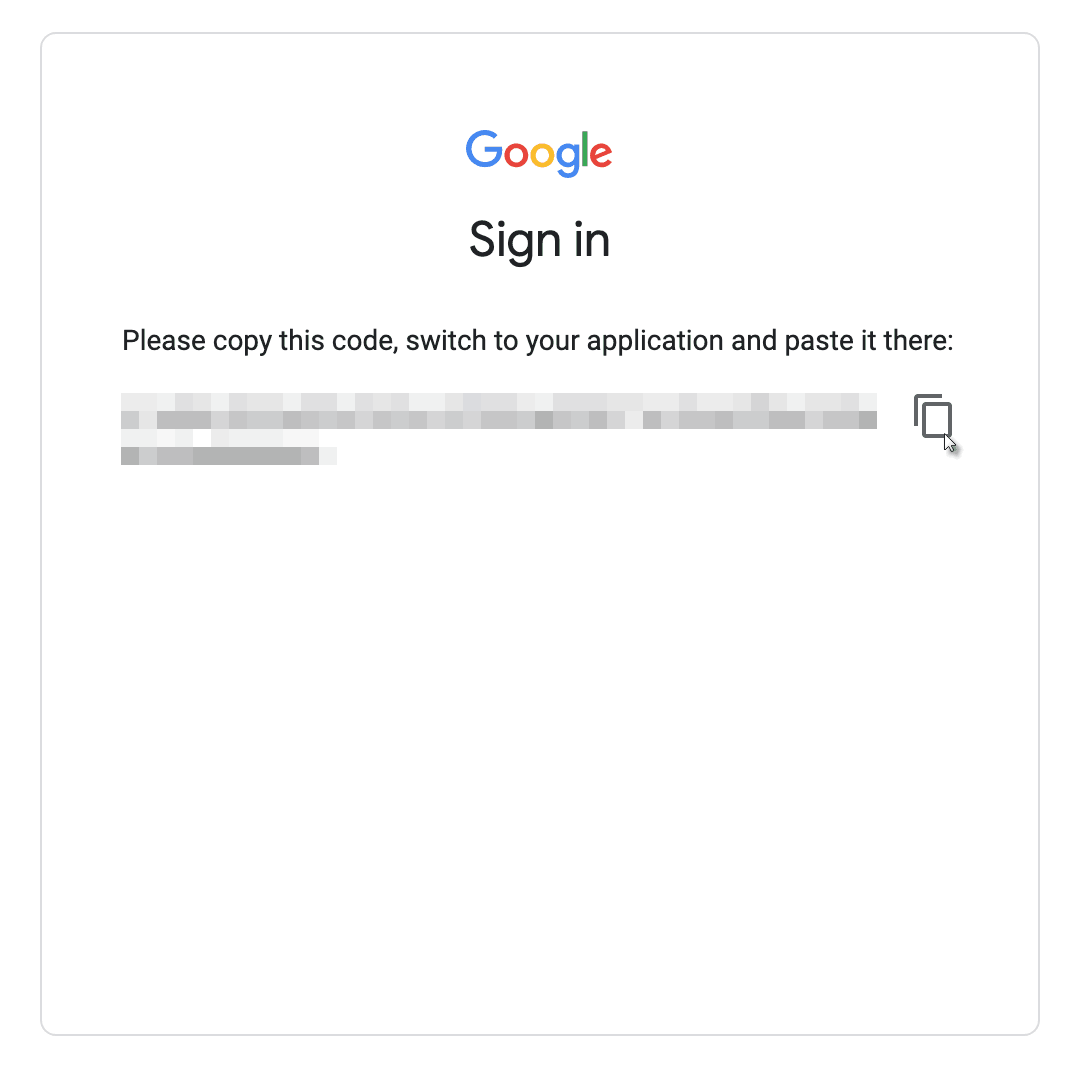
Click the button to the right of the code to copy to your clipboard:
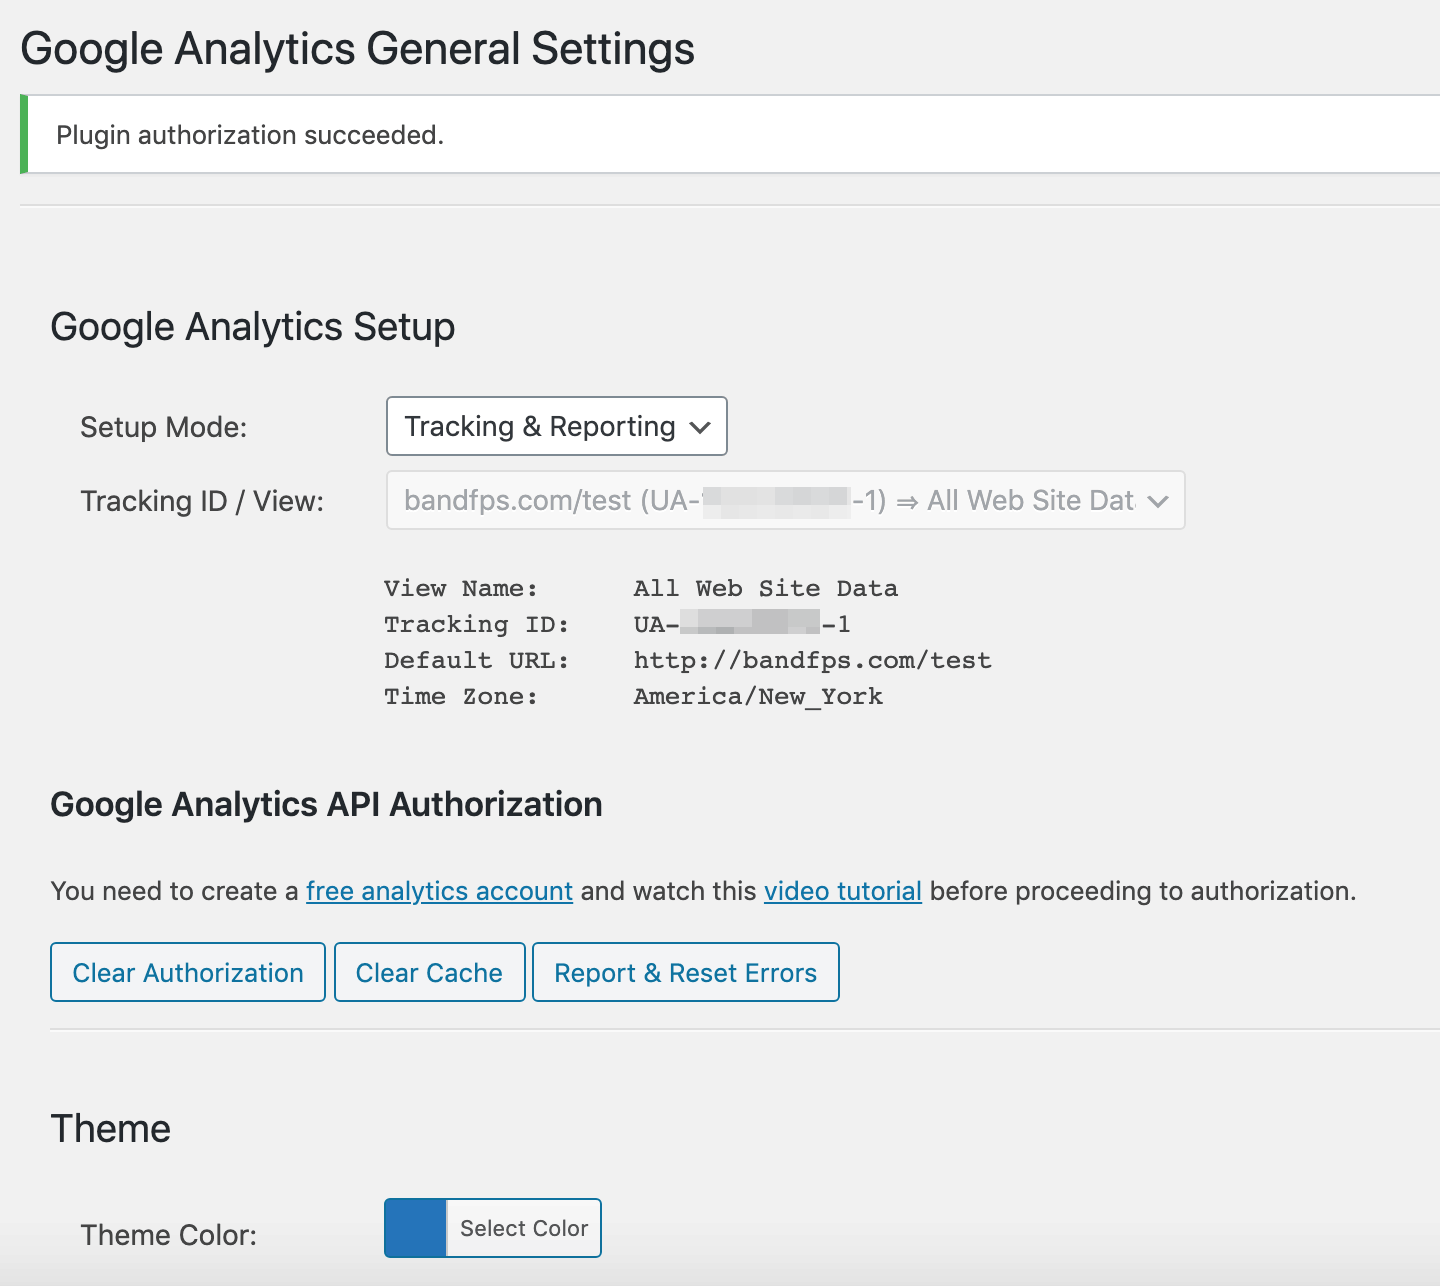
Then paste the code inside the ‘Access Code’ field and click on ‘Save Access Code’:
If you did everything correctly, you should see the following ‘Plugin authorization succeeded’ confirmation message:
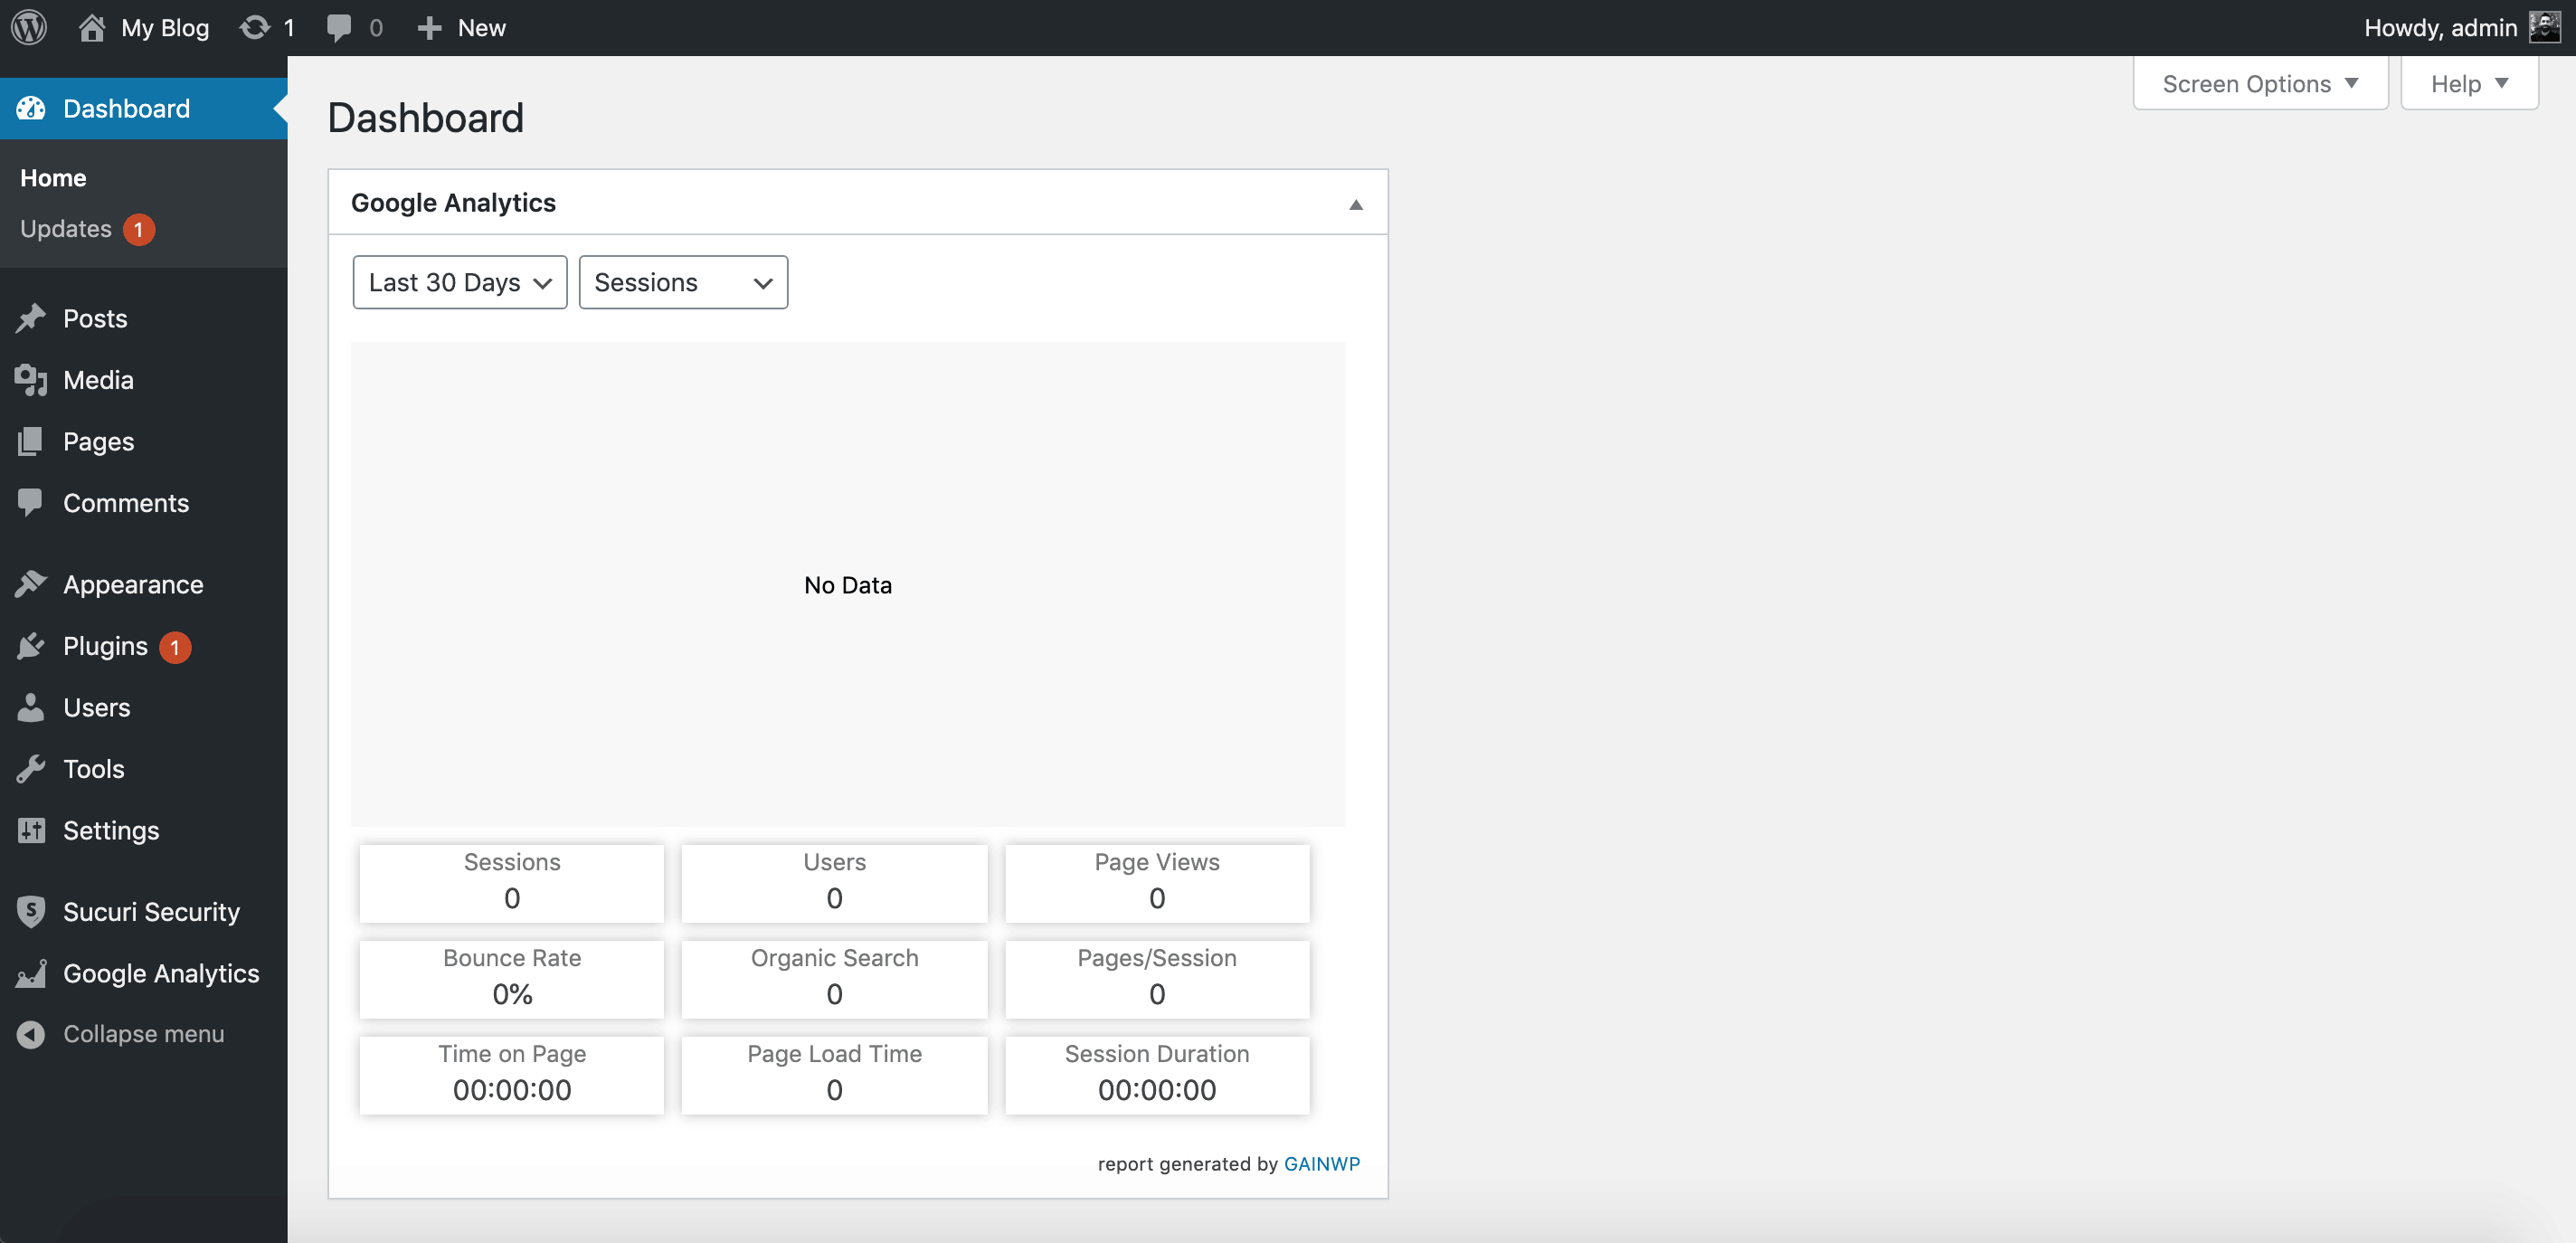
The GAinWP box should now appear by default on your WordPress dashboard:
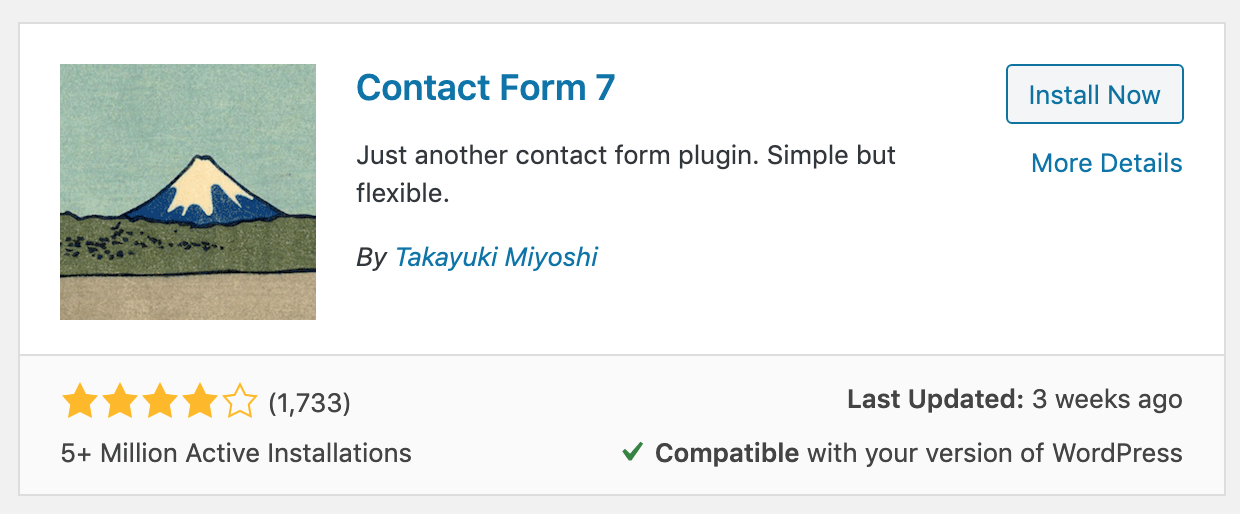
9.) Return to your plugins page to install and activate ‘Contact Form 7’:
Visit Contact > Contact Forms using the new side menu link and click on ‘Edit’ underneath ‘Contact form 1’ sample:
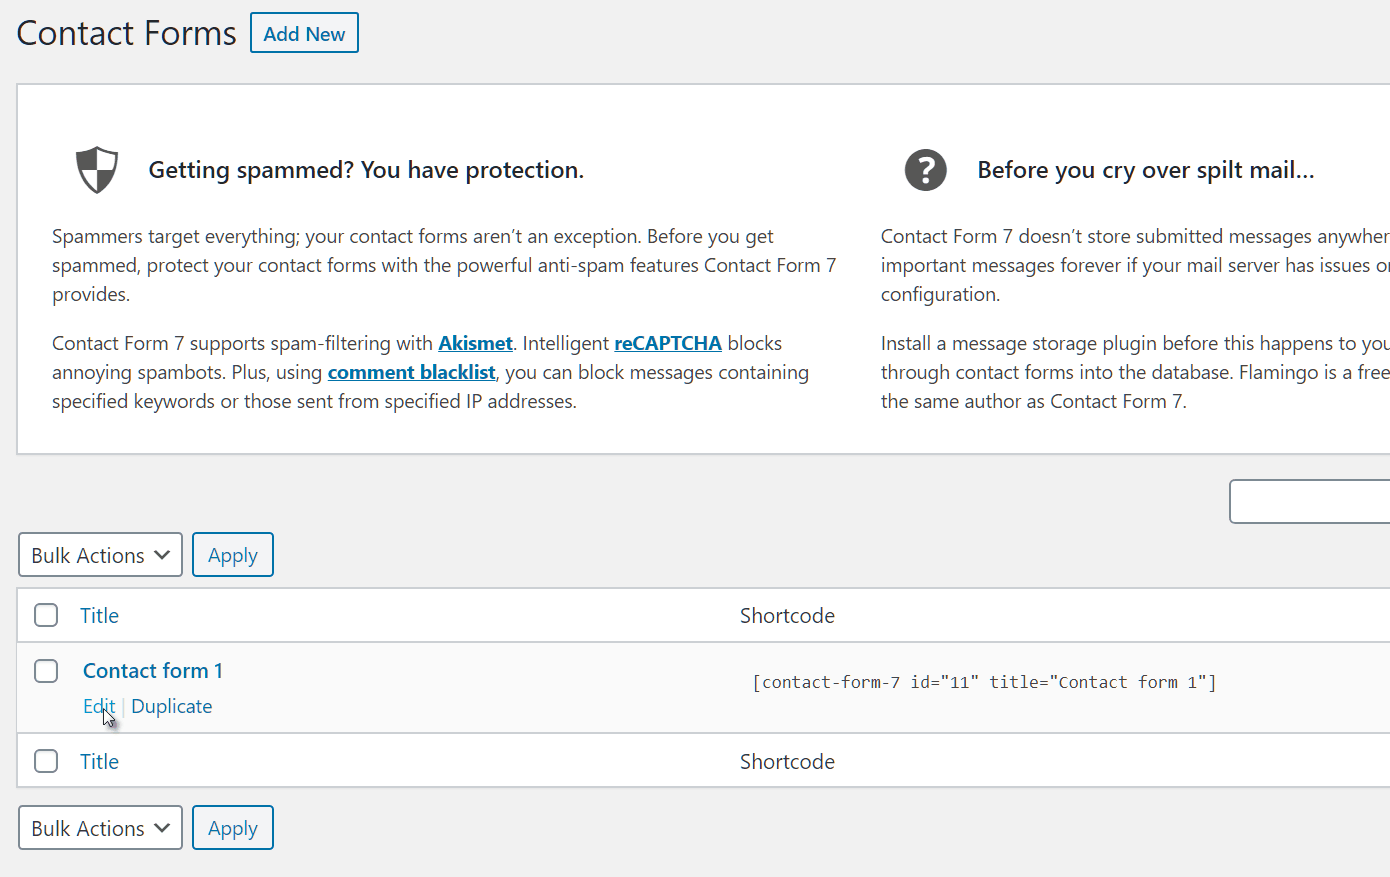
You should see the following contact form template:
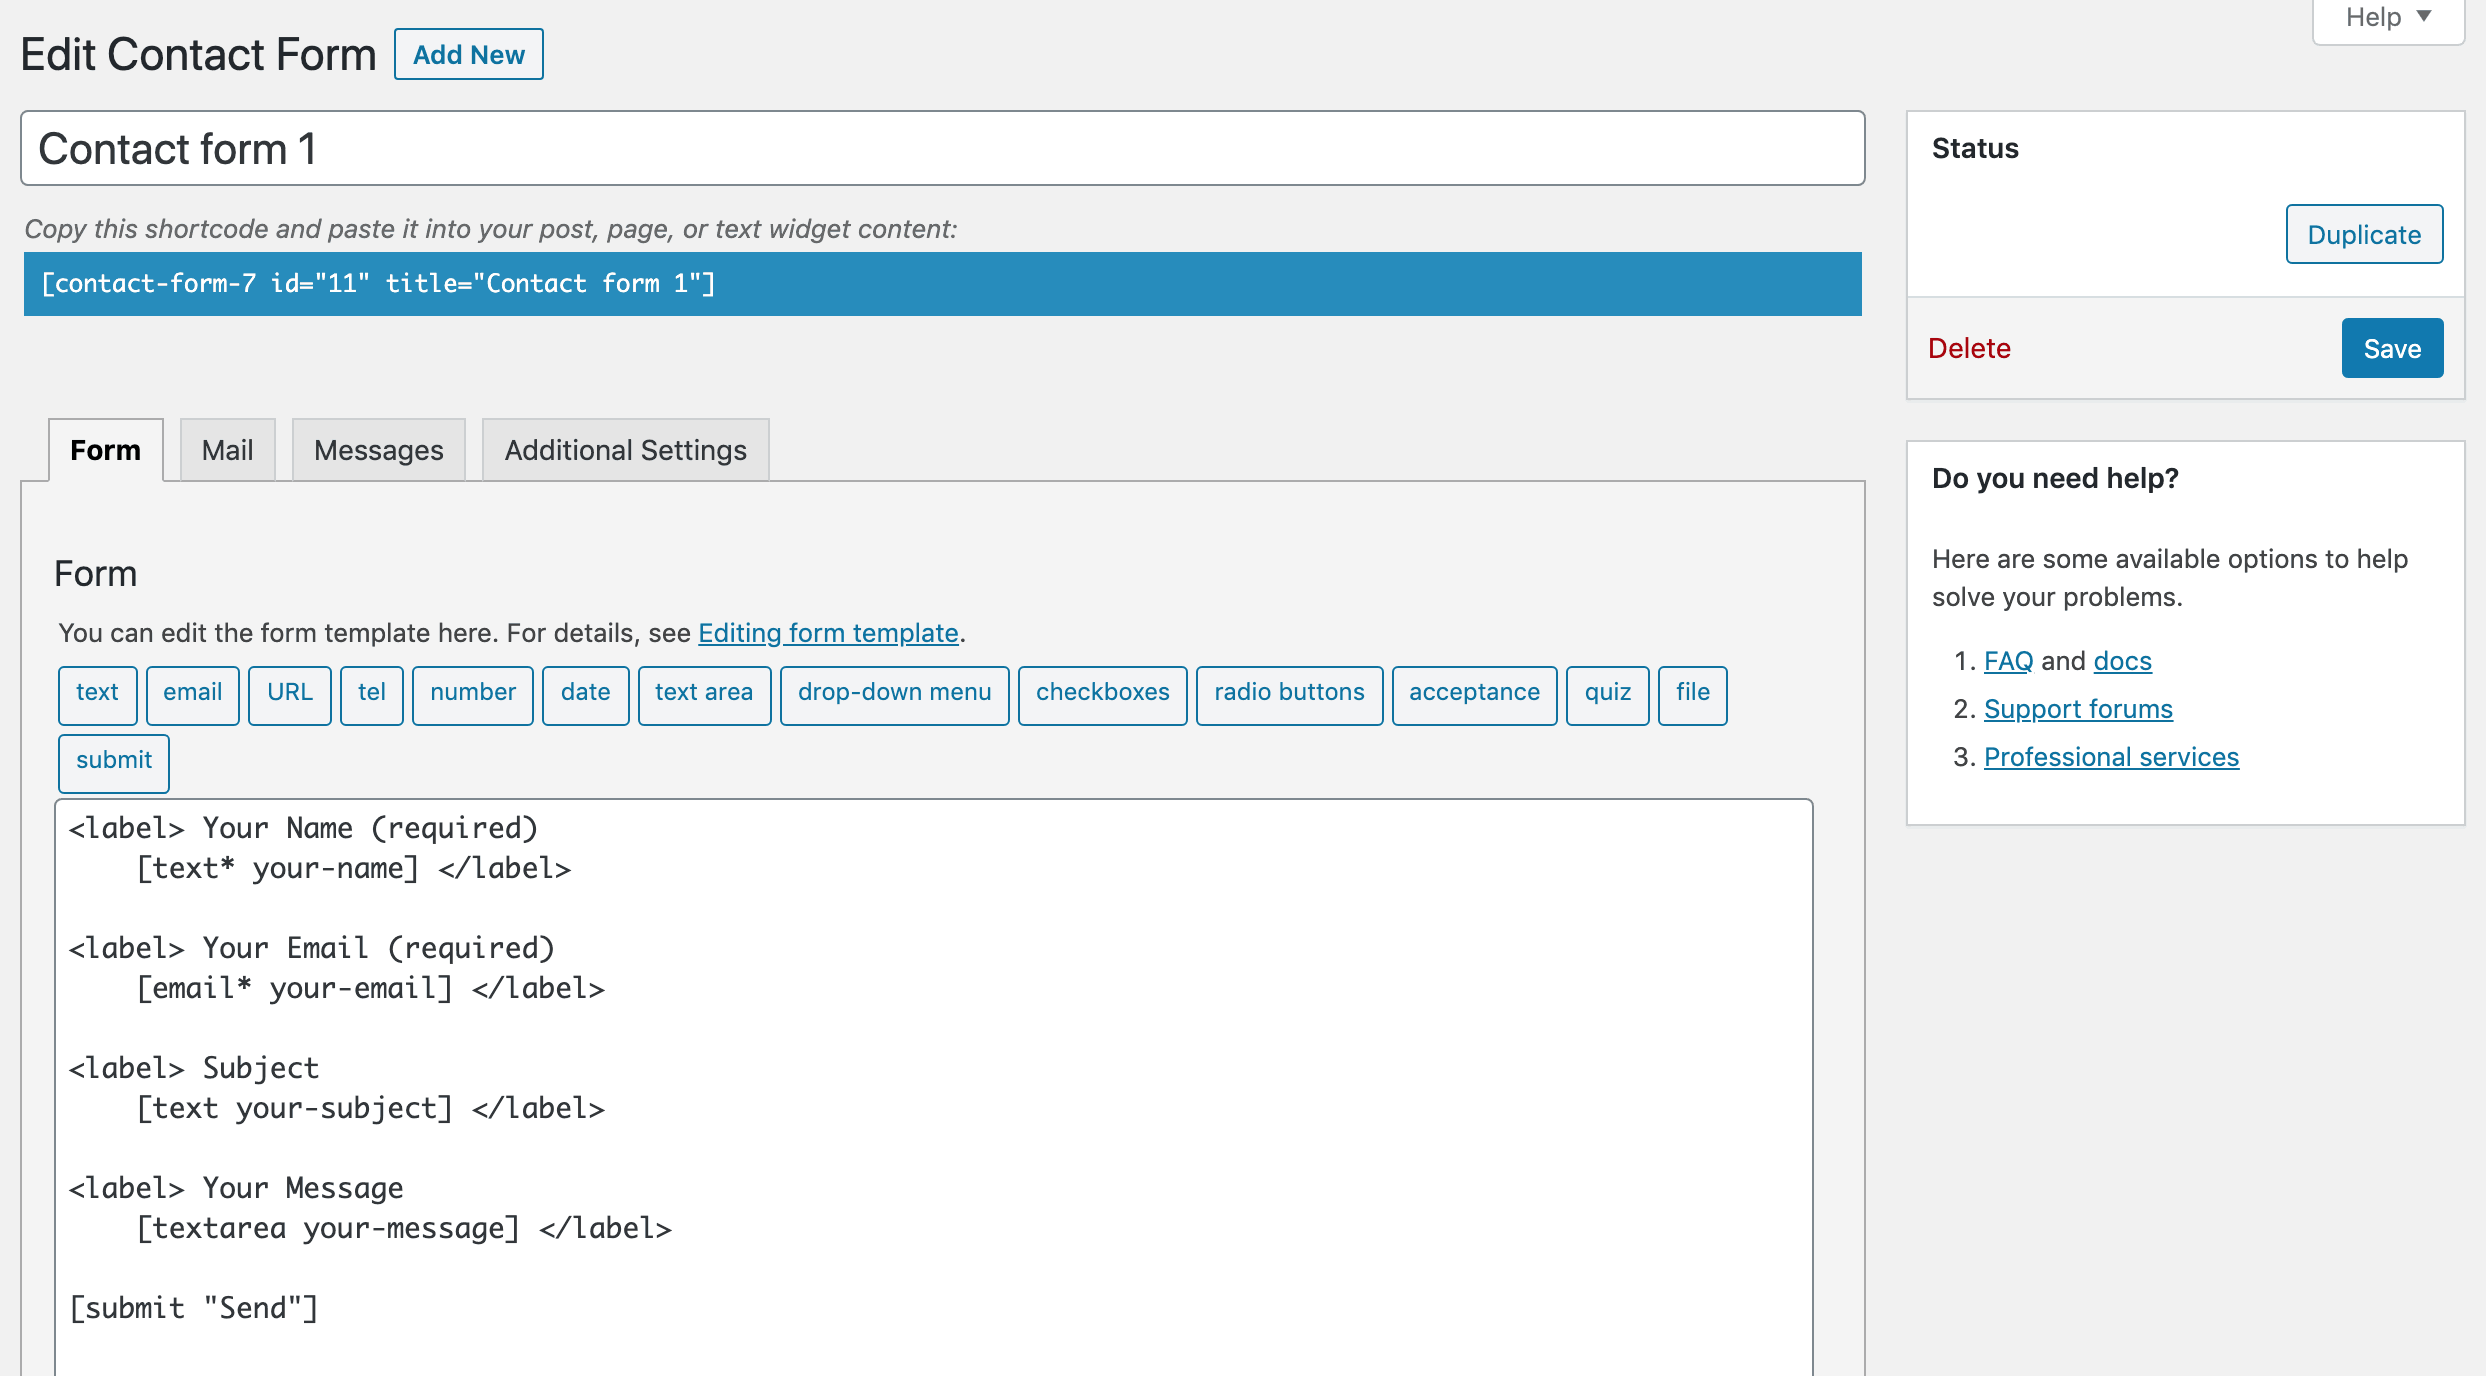
Since you’ve already installed and configured Akismet, simply type akismet:author and akismet:author_email in the exact locations shown below, then click ‘Save’:
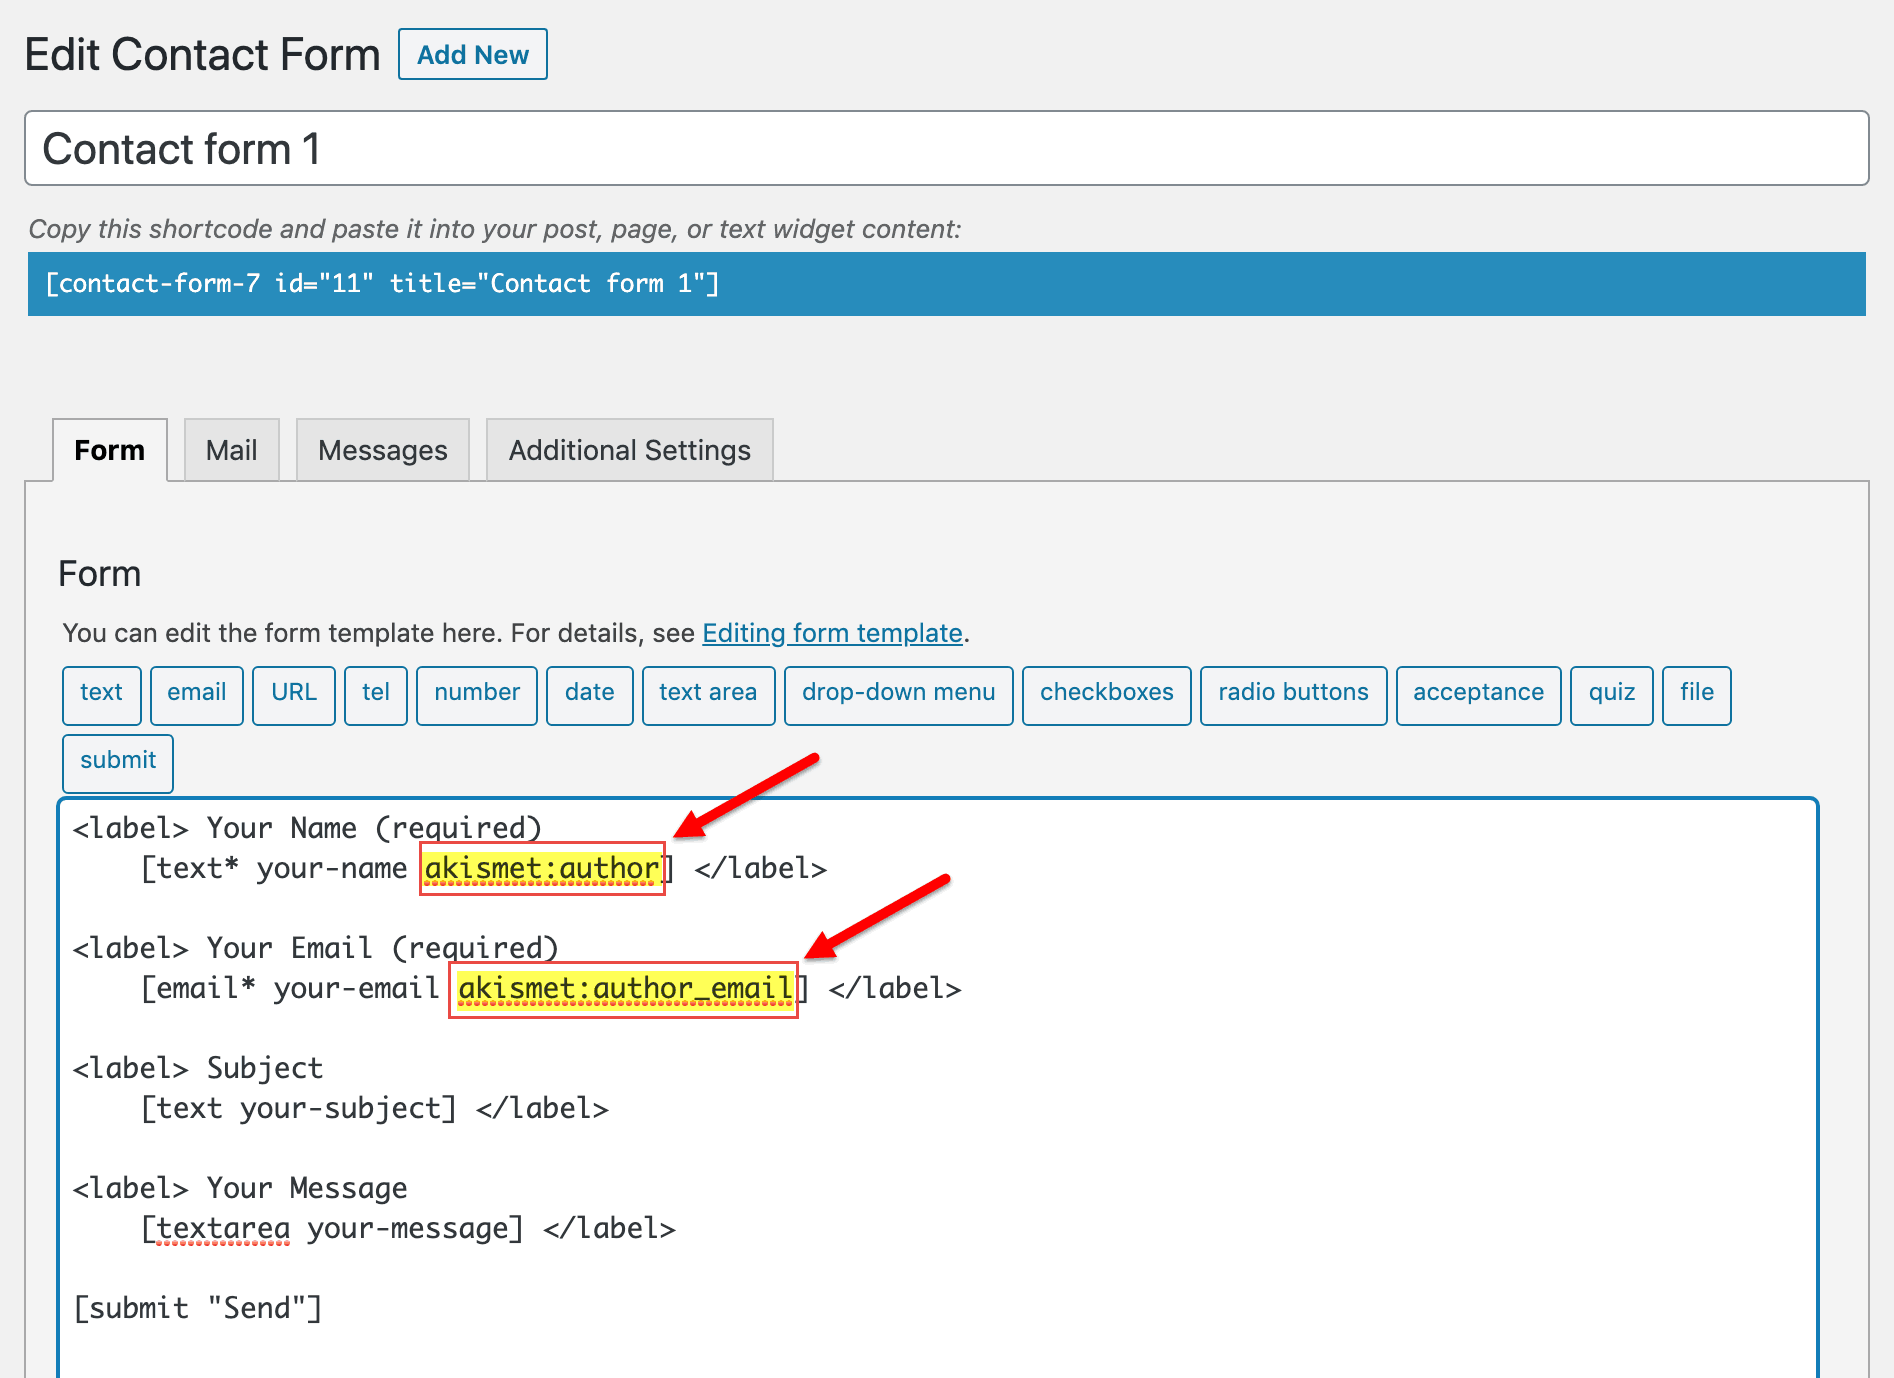
💡 Akismet works by combining information captured on other websites to block future spam.
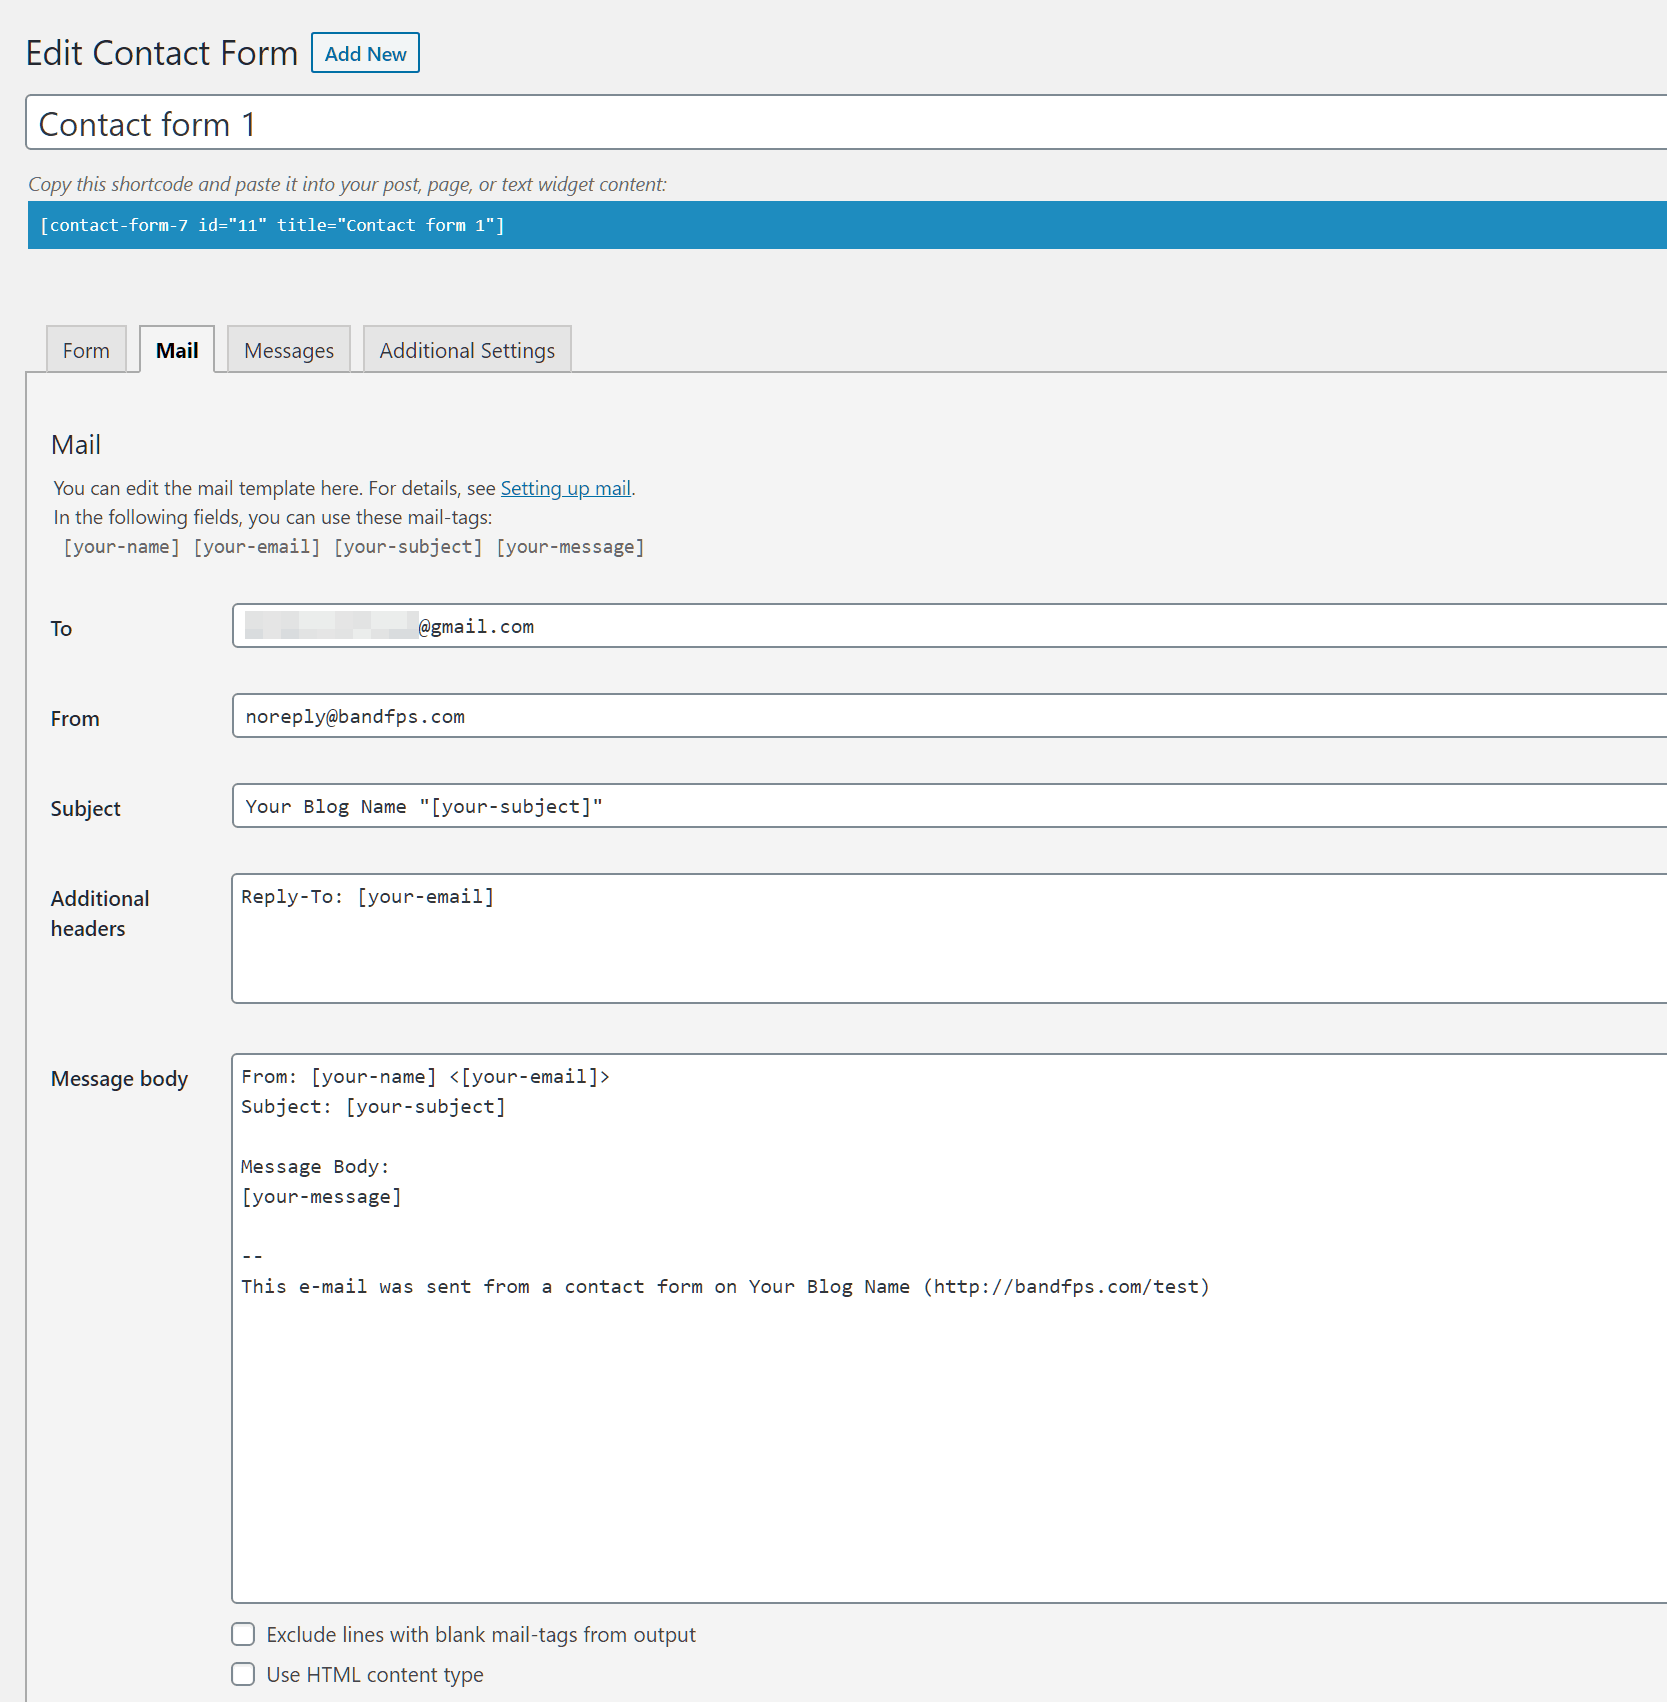
Finally, click on the ‘Mail’ tab and edit the email address in the ‘To’ field. We recommend using a non-domain email address in case you encounter any issues with your mail server (you can list more than one email address separated by comma).
We also recommend changing the username in the ‘From’ email address to ‘noreply’ (e.g. noreply@yourdomain.com). Scroll down and click ‘Save’:
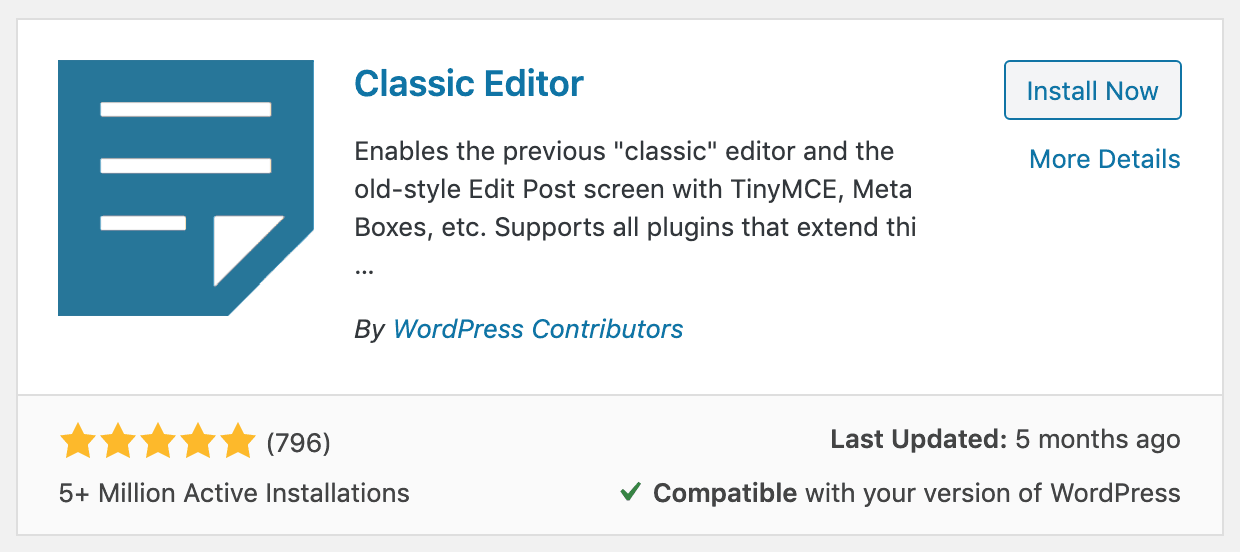
10.) Go to back to plugins to install and activate ‘Classic Editor’. This will replace the new WordPress Gutenberg editor with the older, more user-friendly version (no configuration required).
11.) Finally, go back to plugins to install and activate ‘TinyMCE Advanced’:
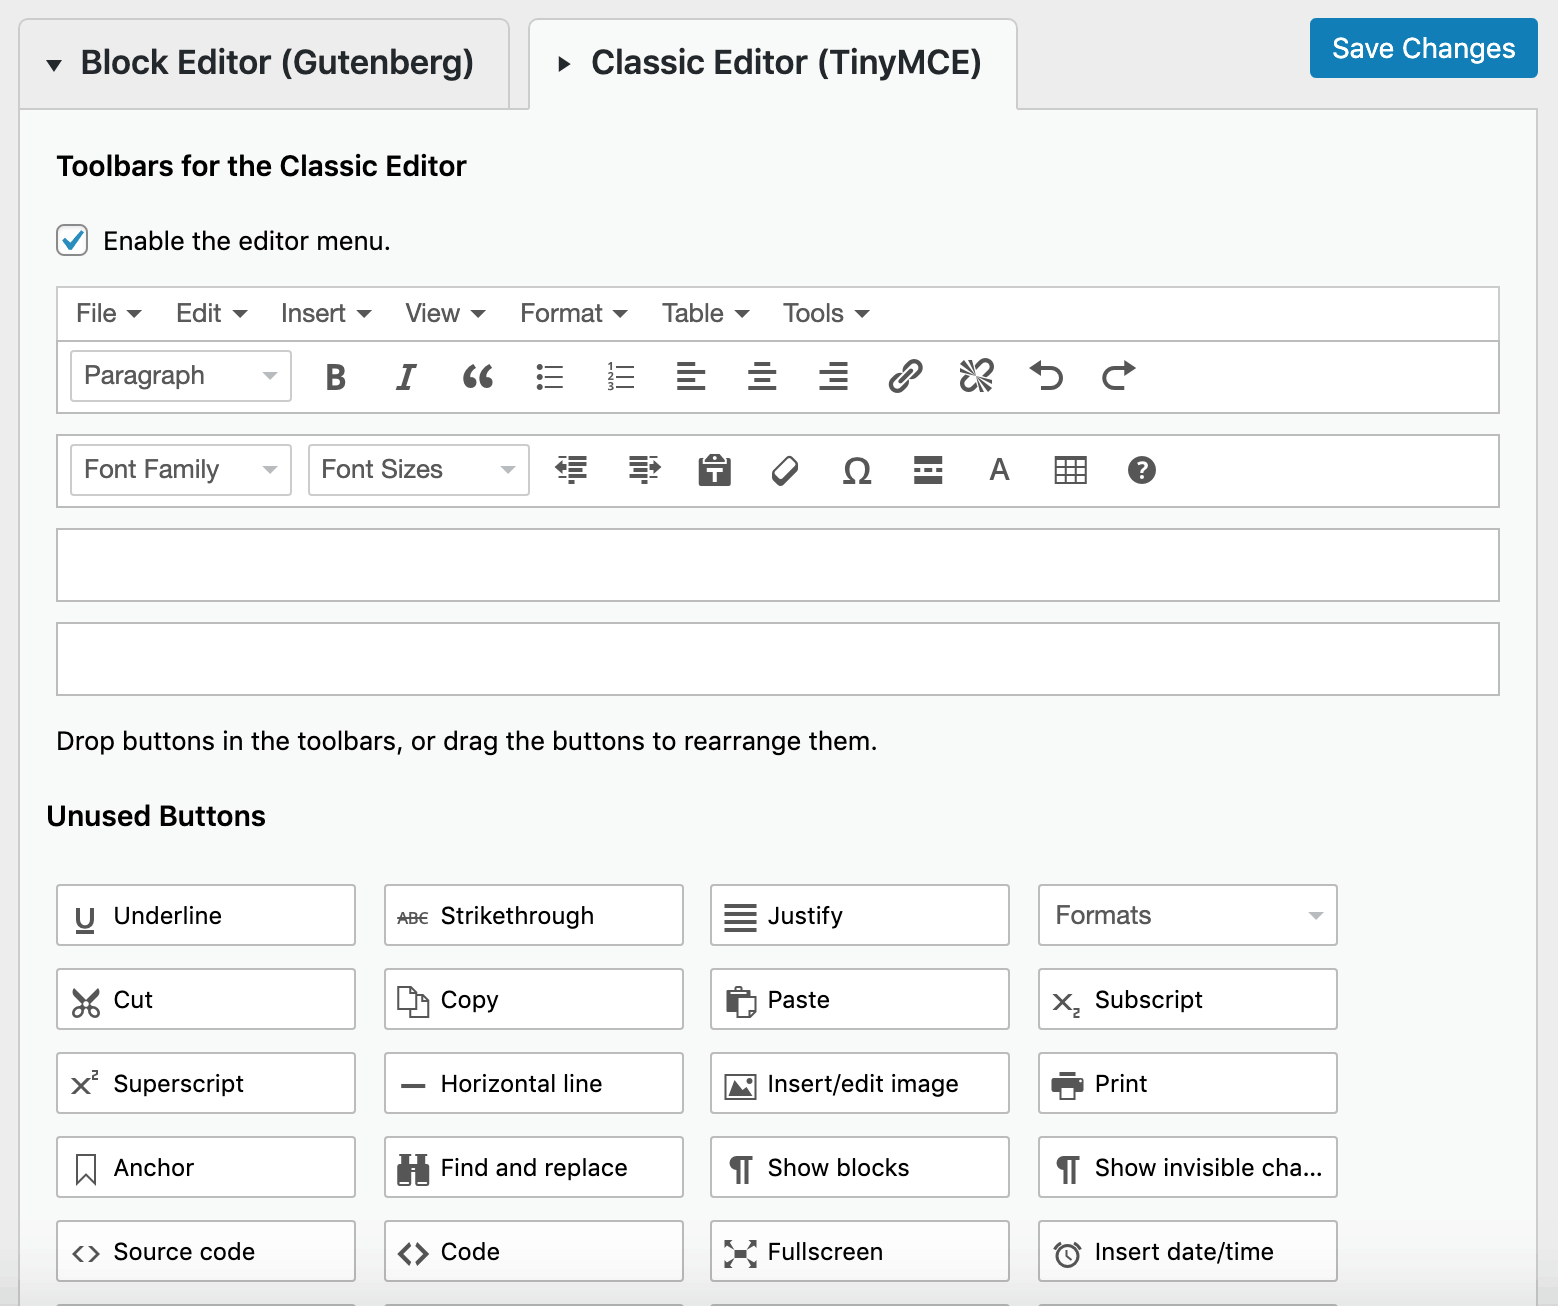
Click on the ‘Classic Editor (TinyMCE) tab, then add and remove toolbar elements by clicking/dragging to the exact location you want:
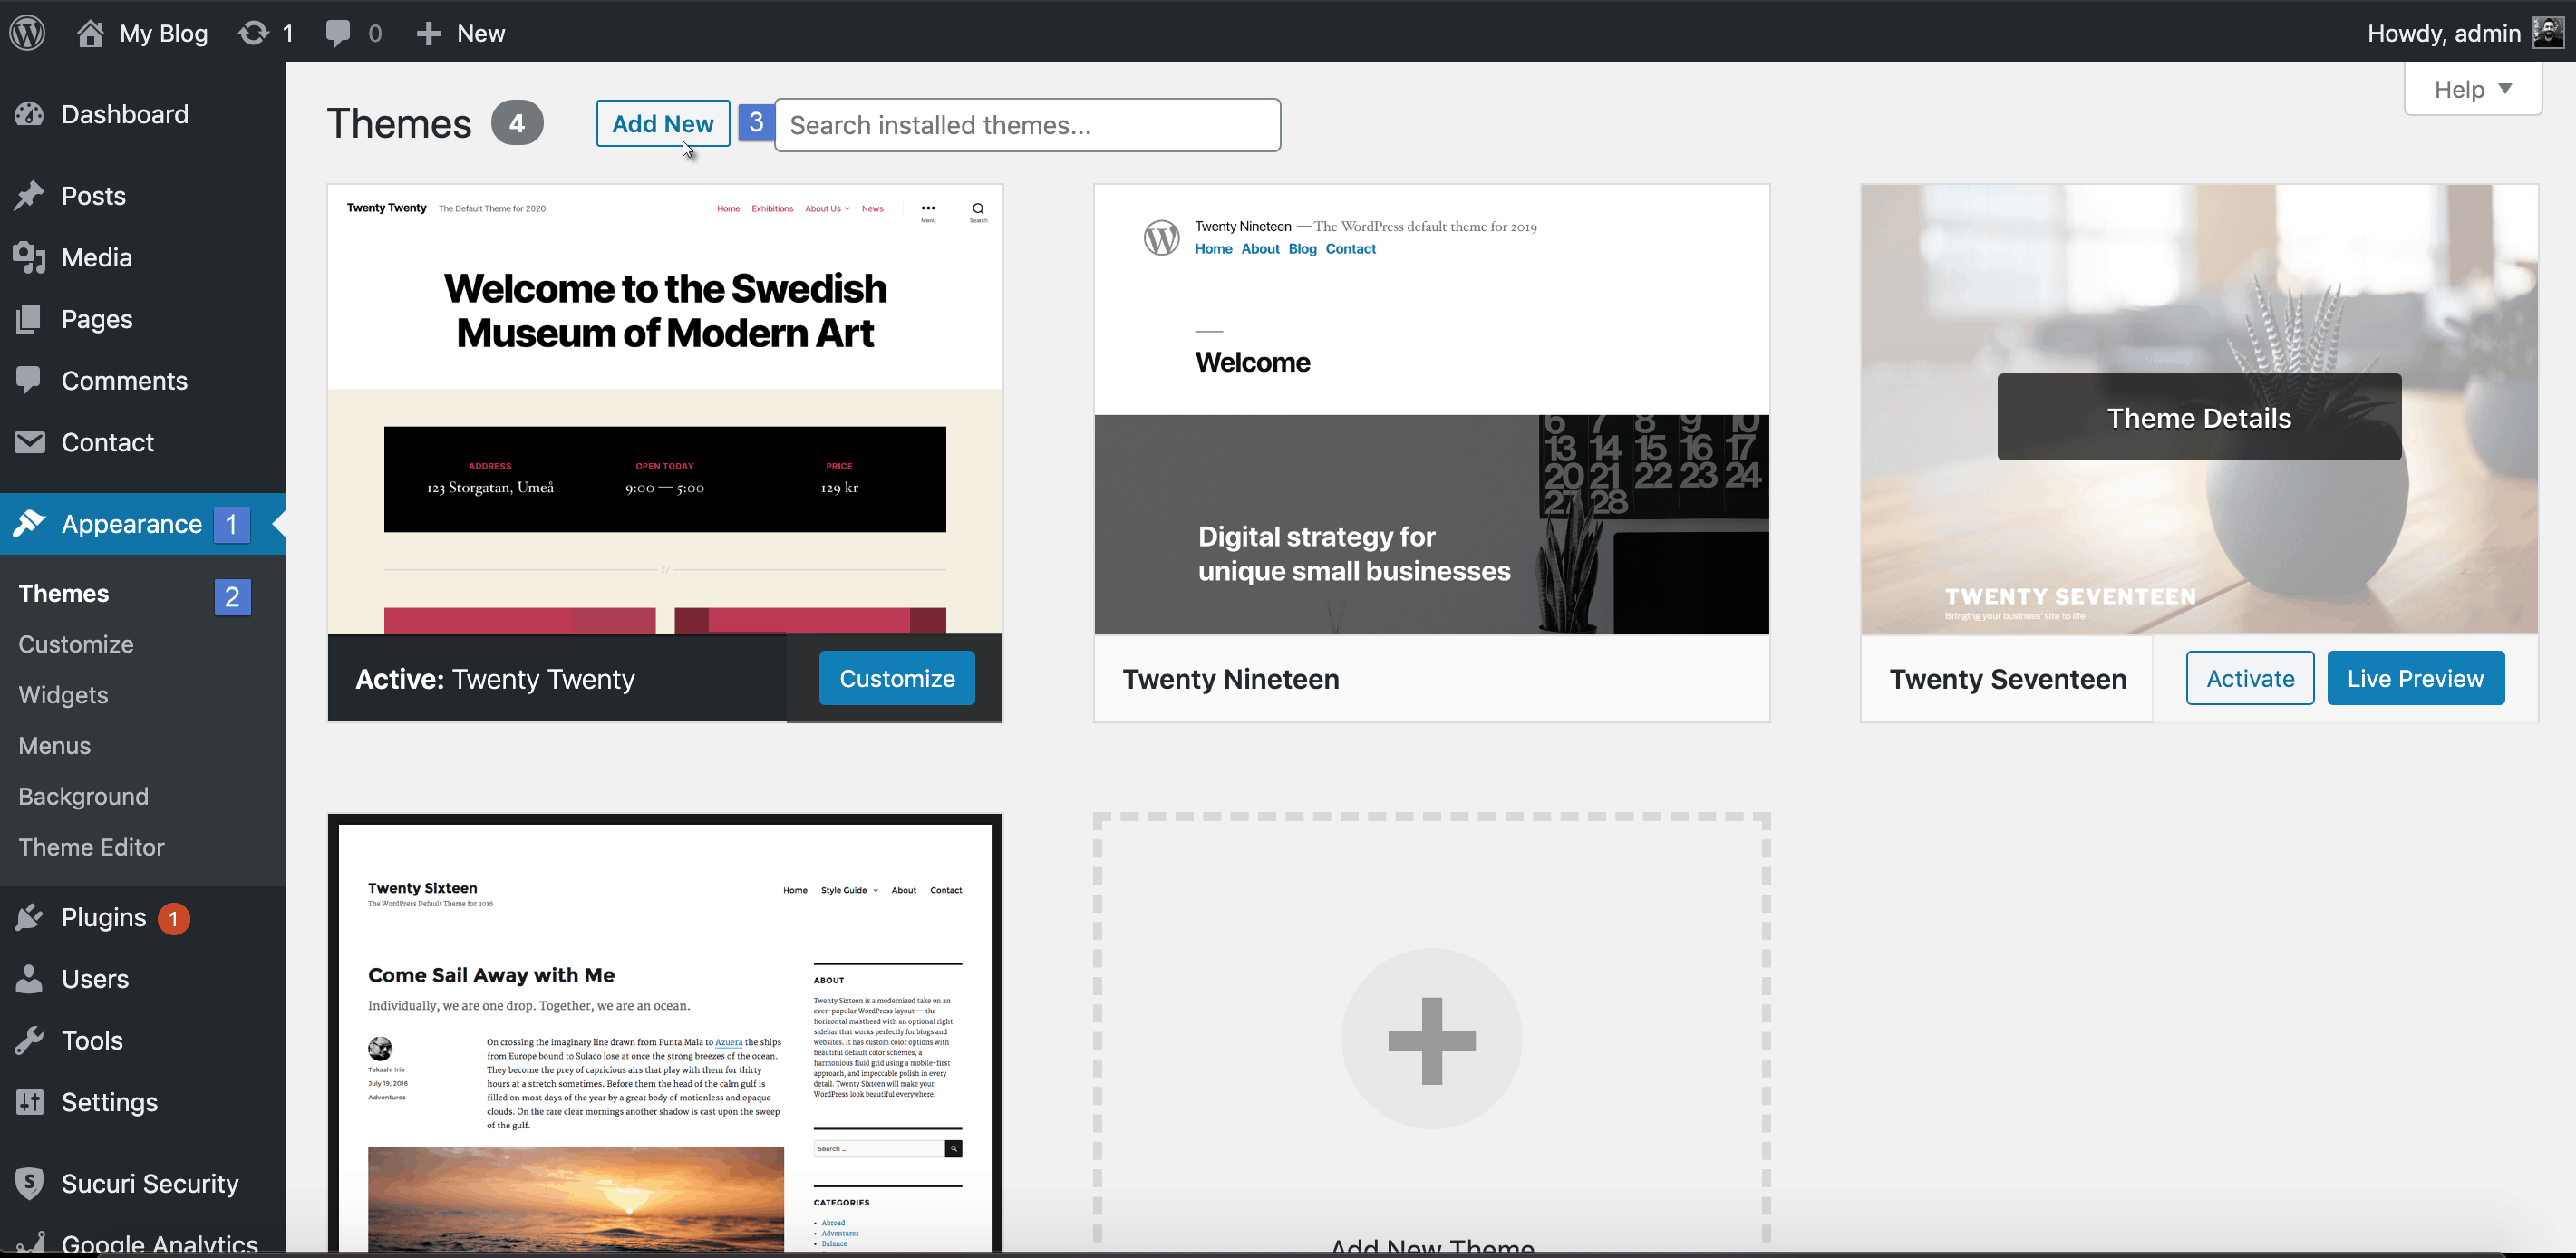
OPTIONAL: To avoid any confusion, we’re using the default ‘Twenty Twenty’ WordPress theme. However, if you want to use a different theme, go to Appearance > Themes > Add New, then search for a theme you like:
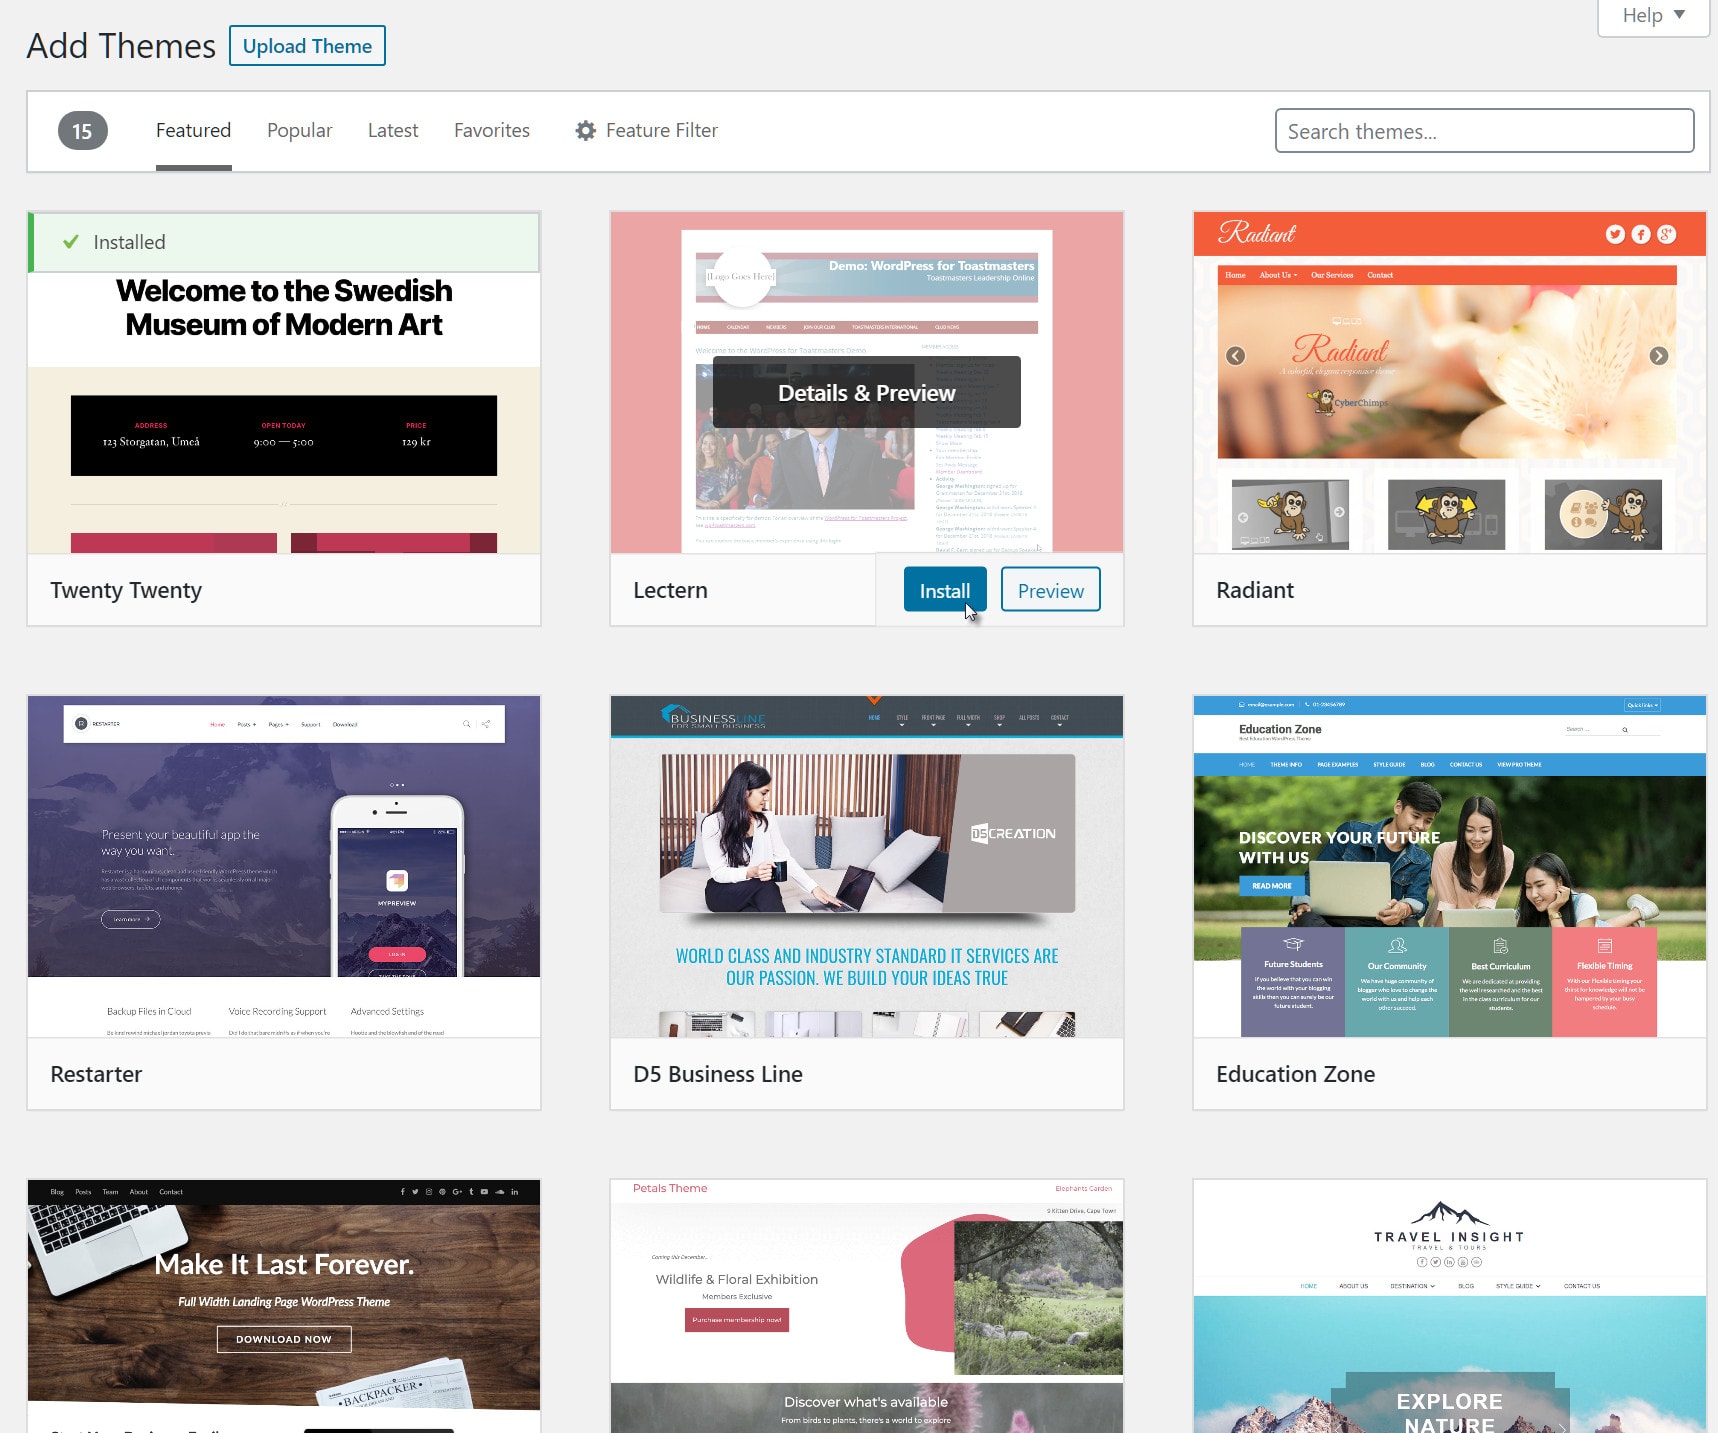
Once you found and previewed the theme you want to use, hover your cursor and click on the ‘Install’ button (you also have the option to upload a theme zip file by clicking on ‘Upload Theme’):
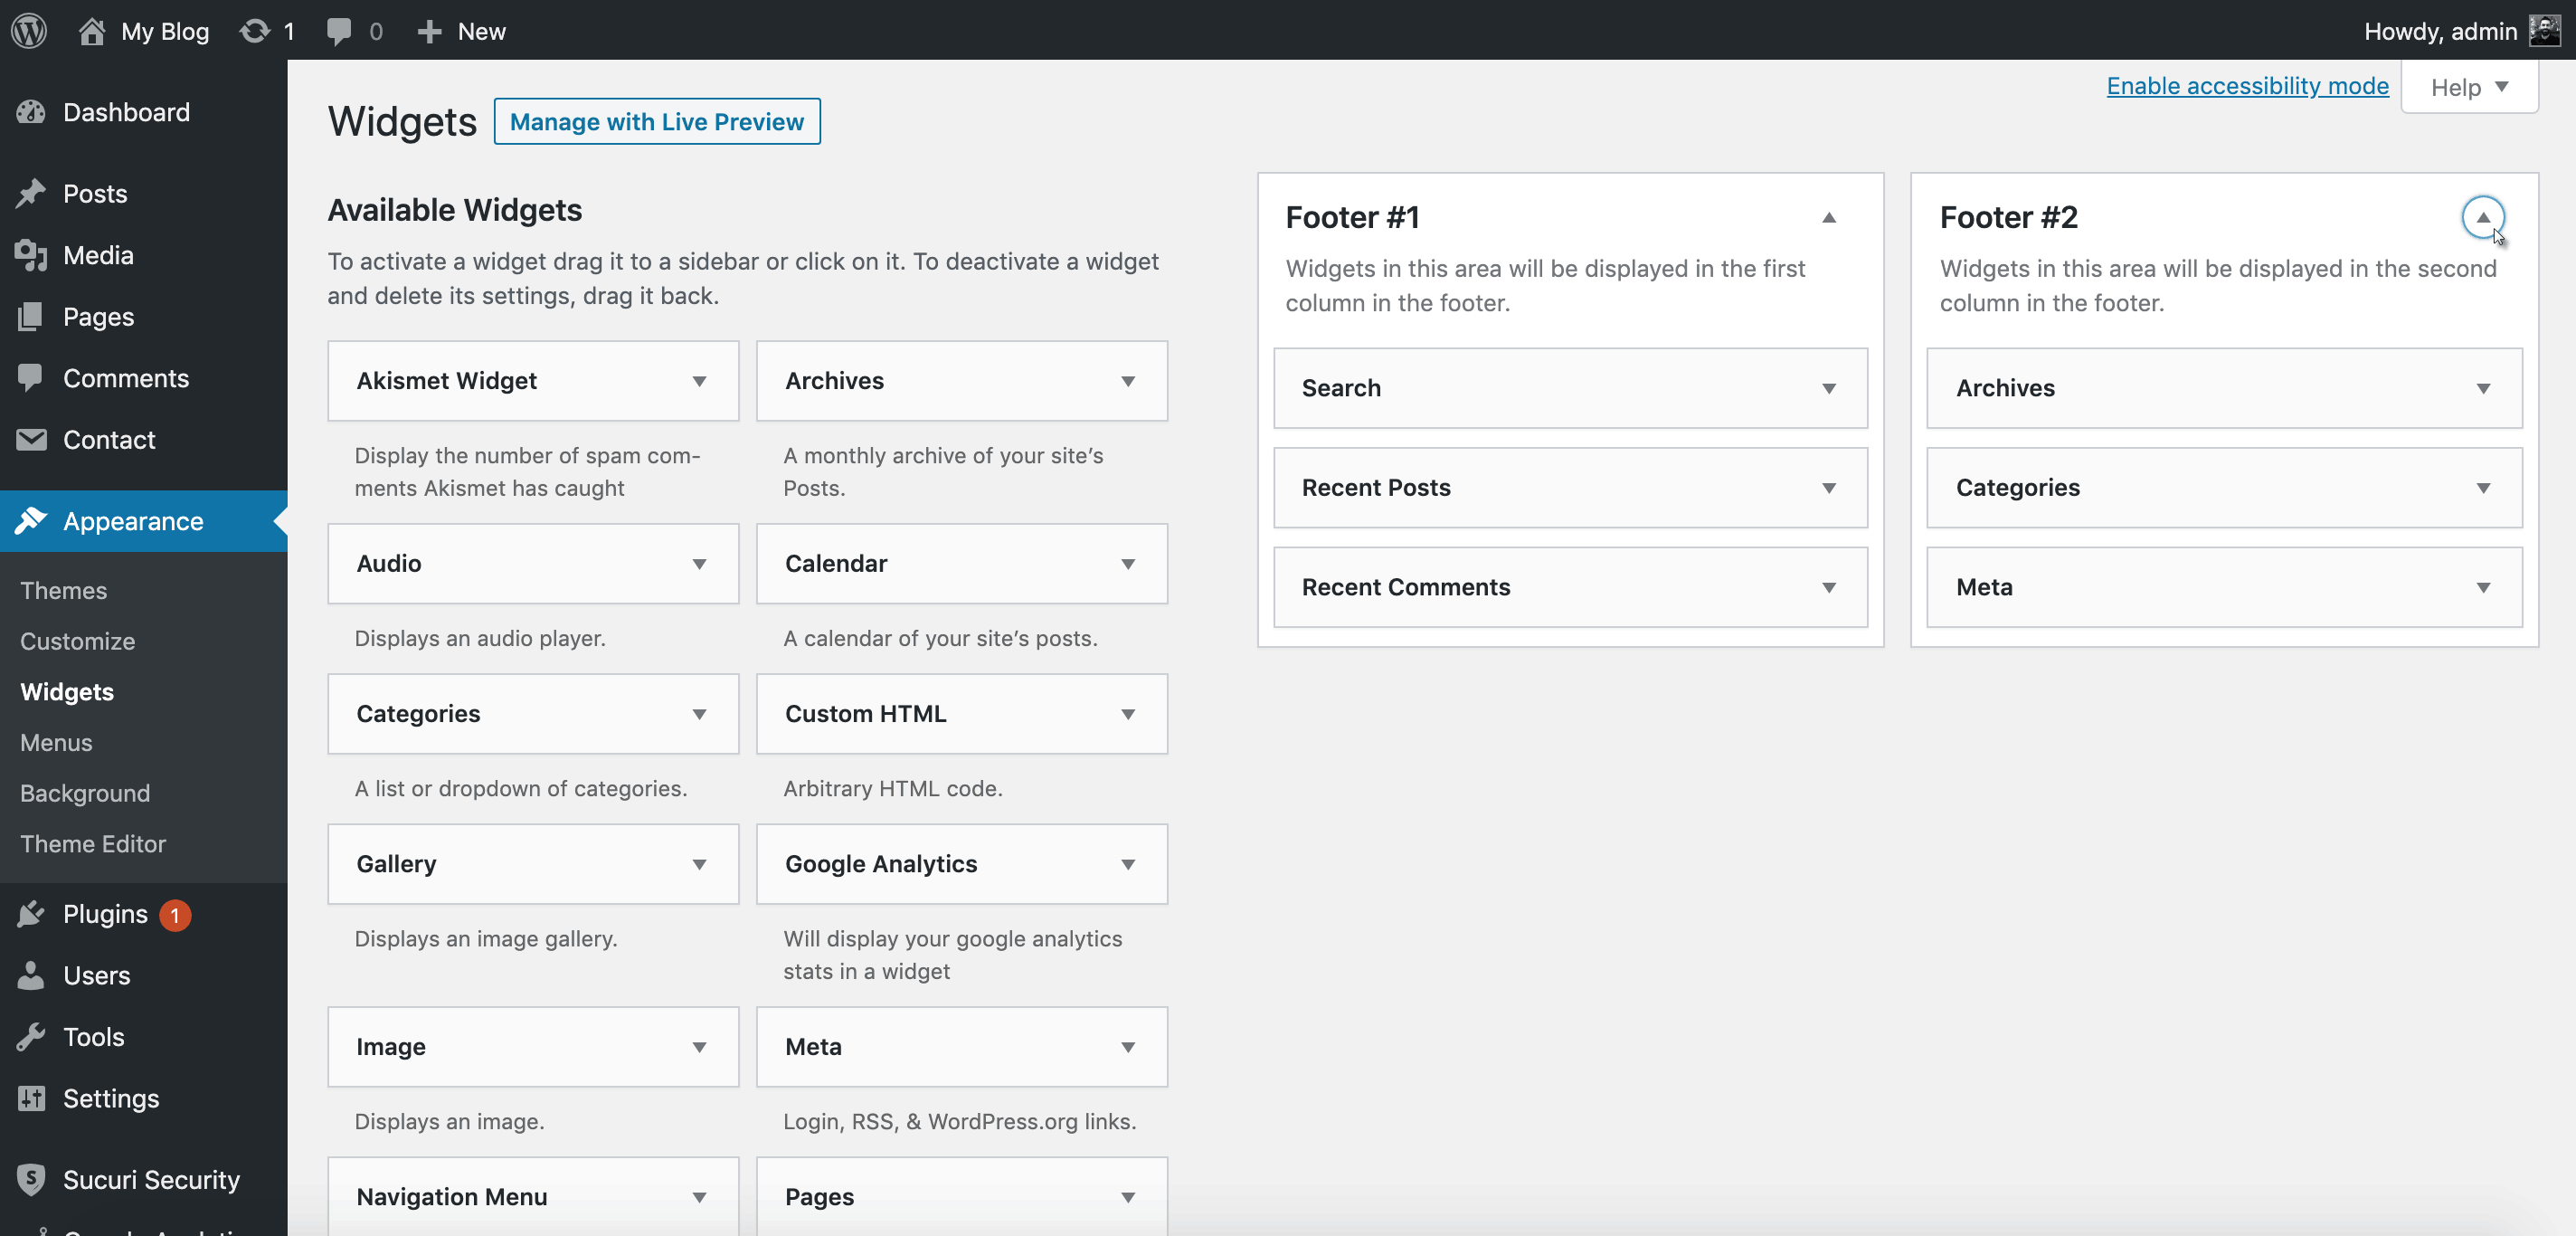
12.) Most WordPress themes by default include widget elements that you may not want to display. For example, here’s what you’ll see in the ‘Twenty Twenty’ theme default footer area:

To remove these elements, go to Appearance > Widgets, then click on the arrow next to Footer #2 to expand:
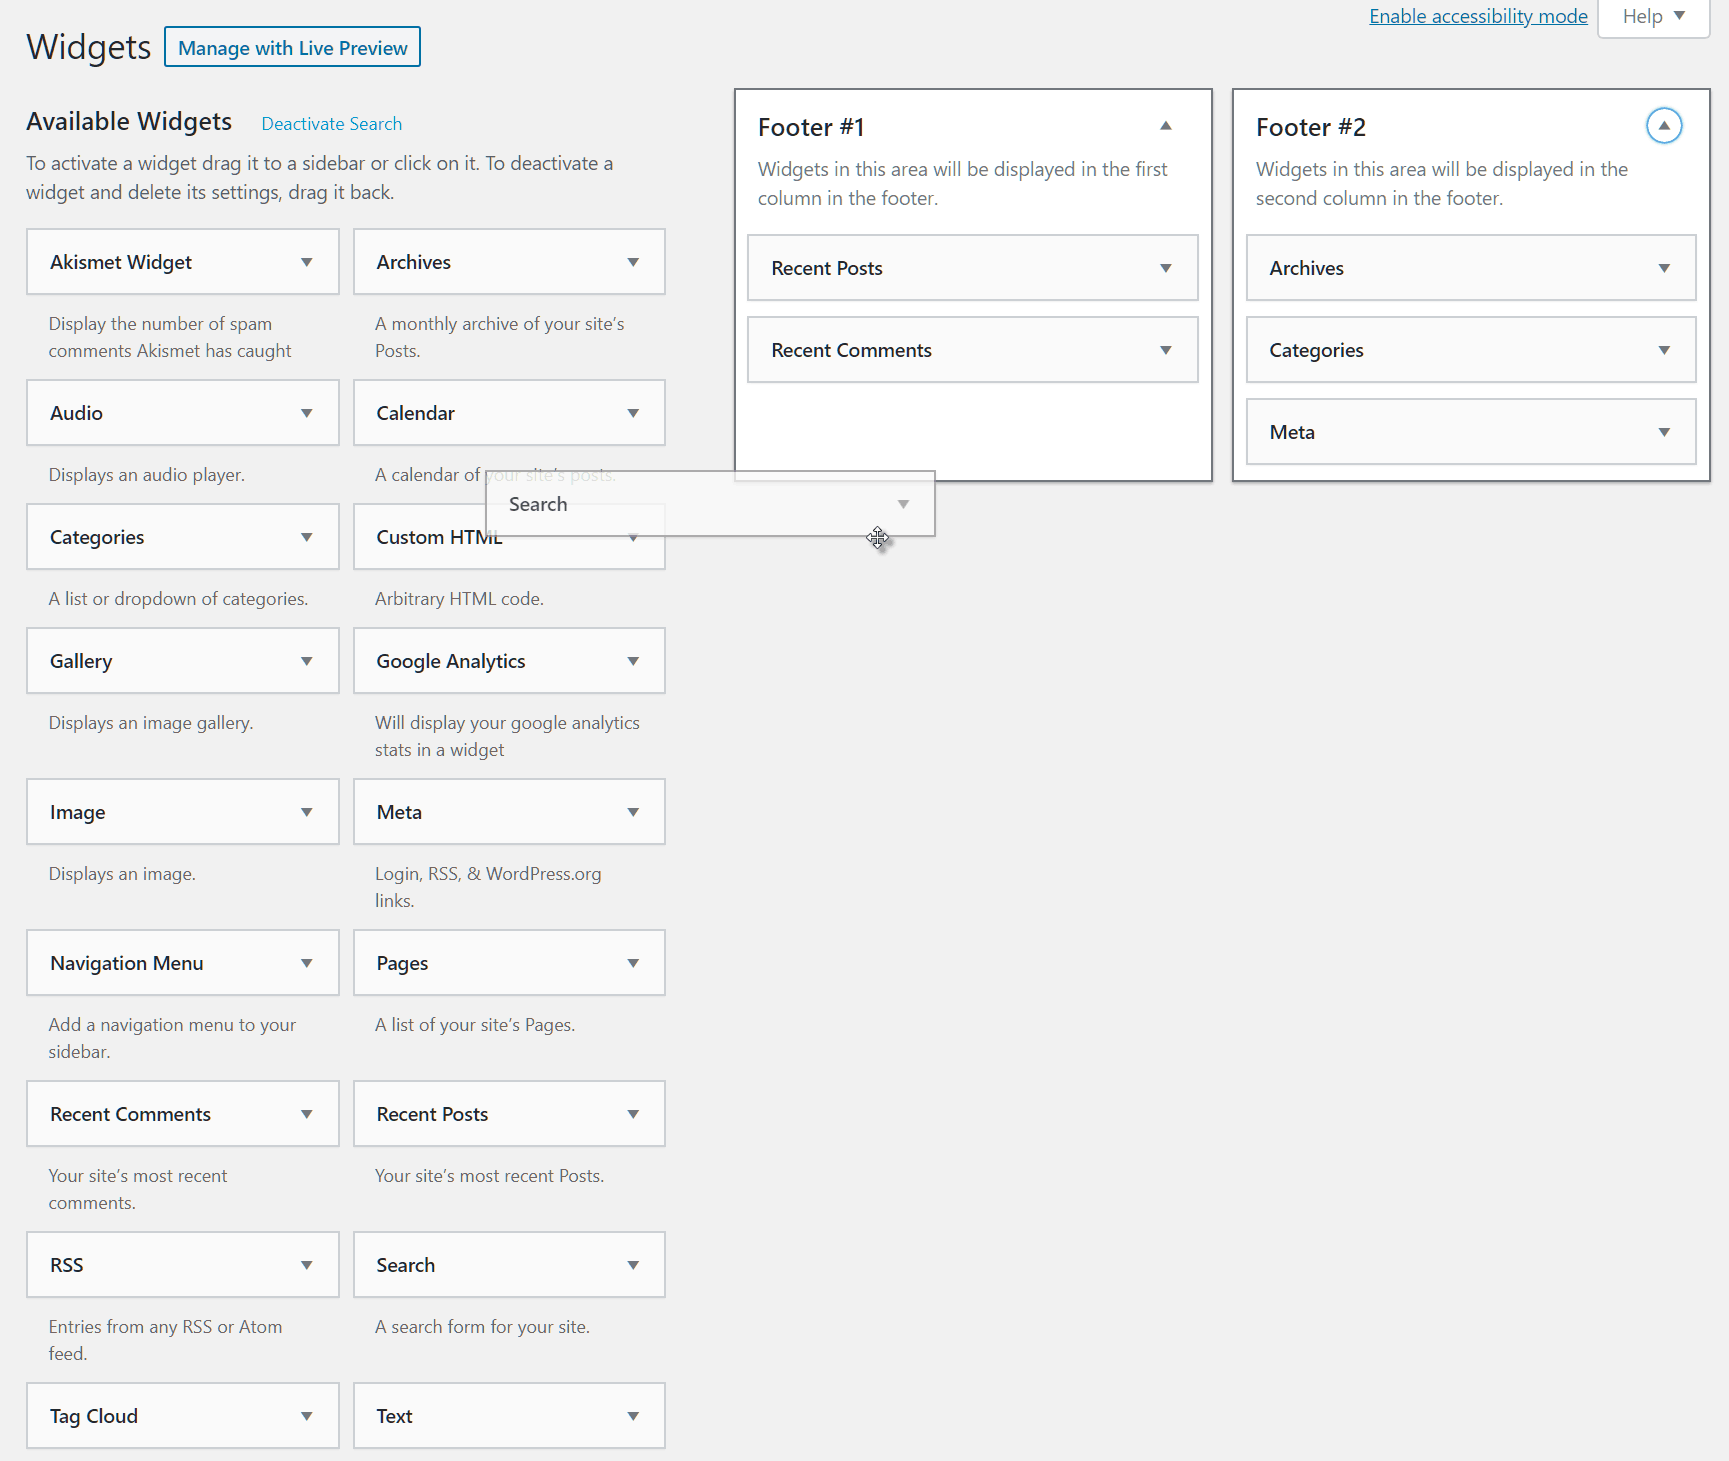
Click and drag each widget to the ‘Available Widgets’ area in order to remove them. If you want to put anything back, simply locate the widget on the left hand side and drag it back:
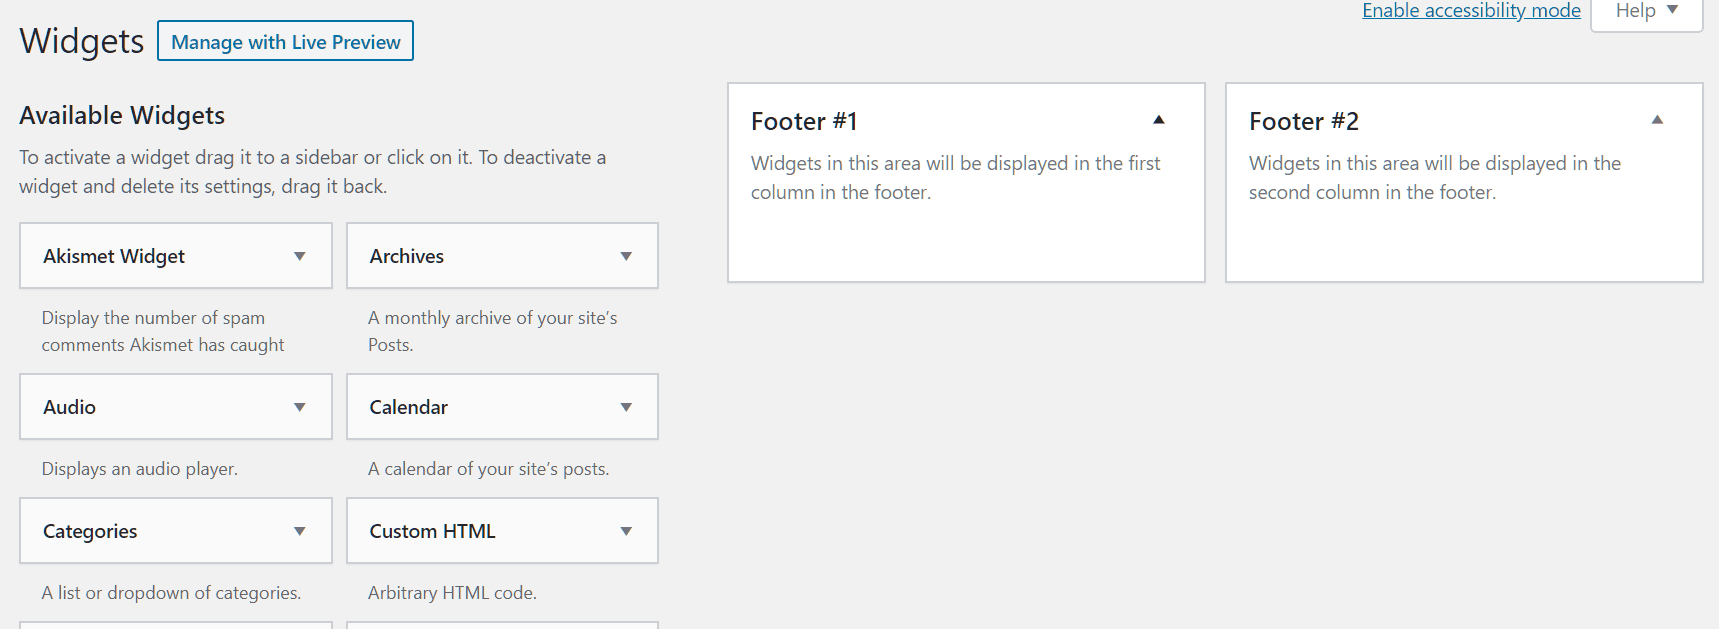
Here’s how your footer #1 and #2 should look like after removing all the widget elements:
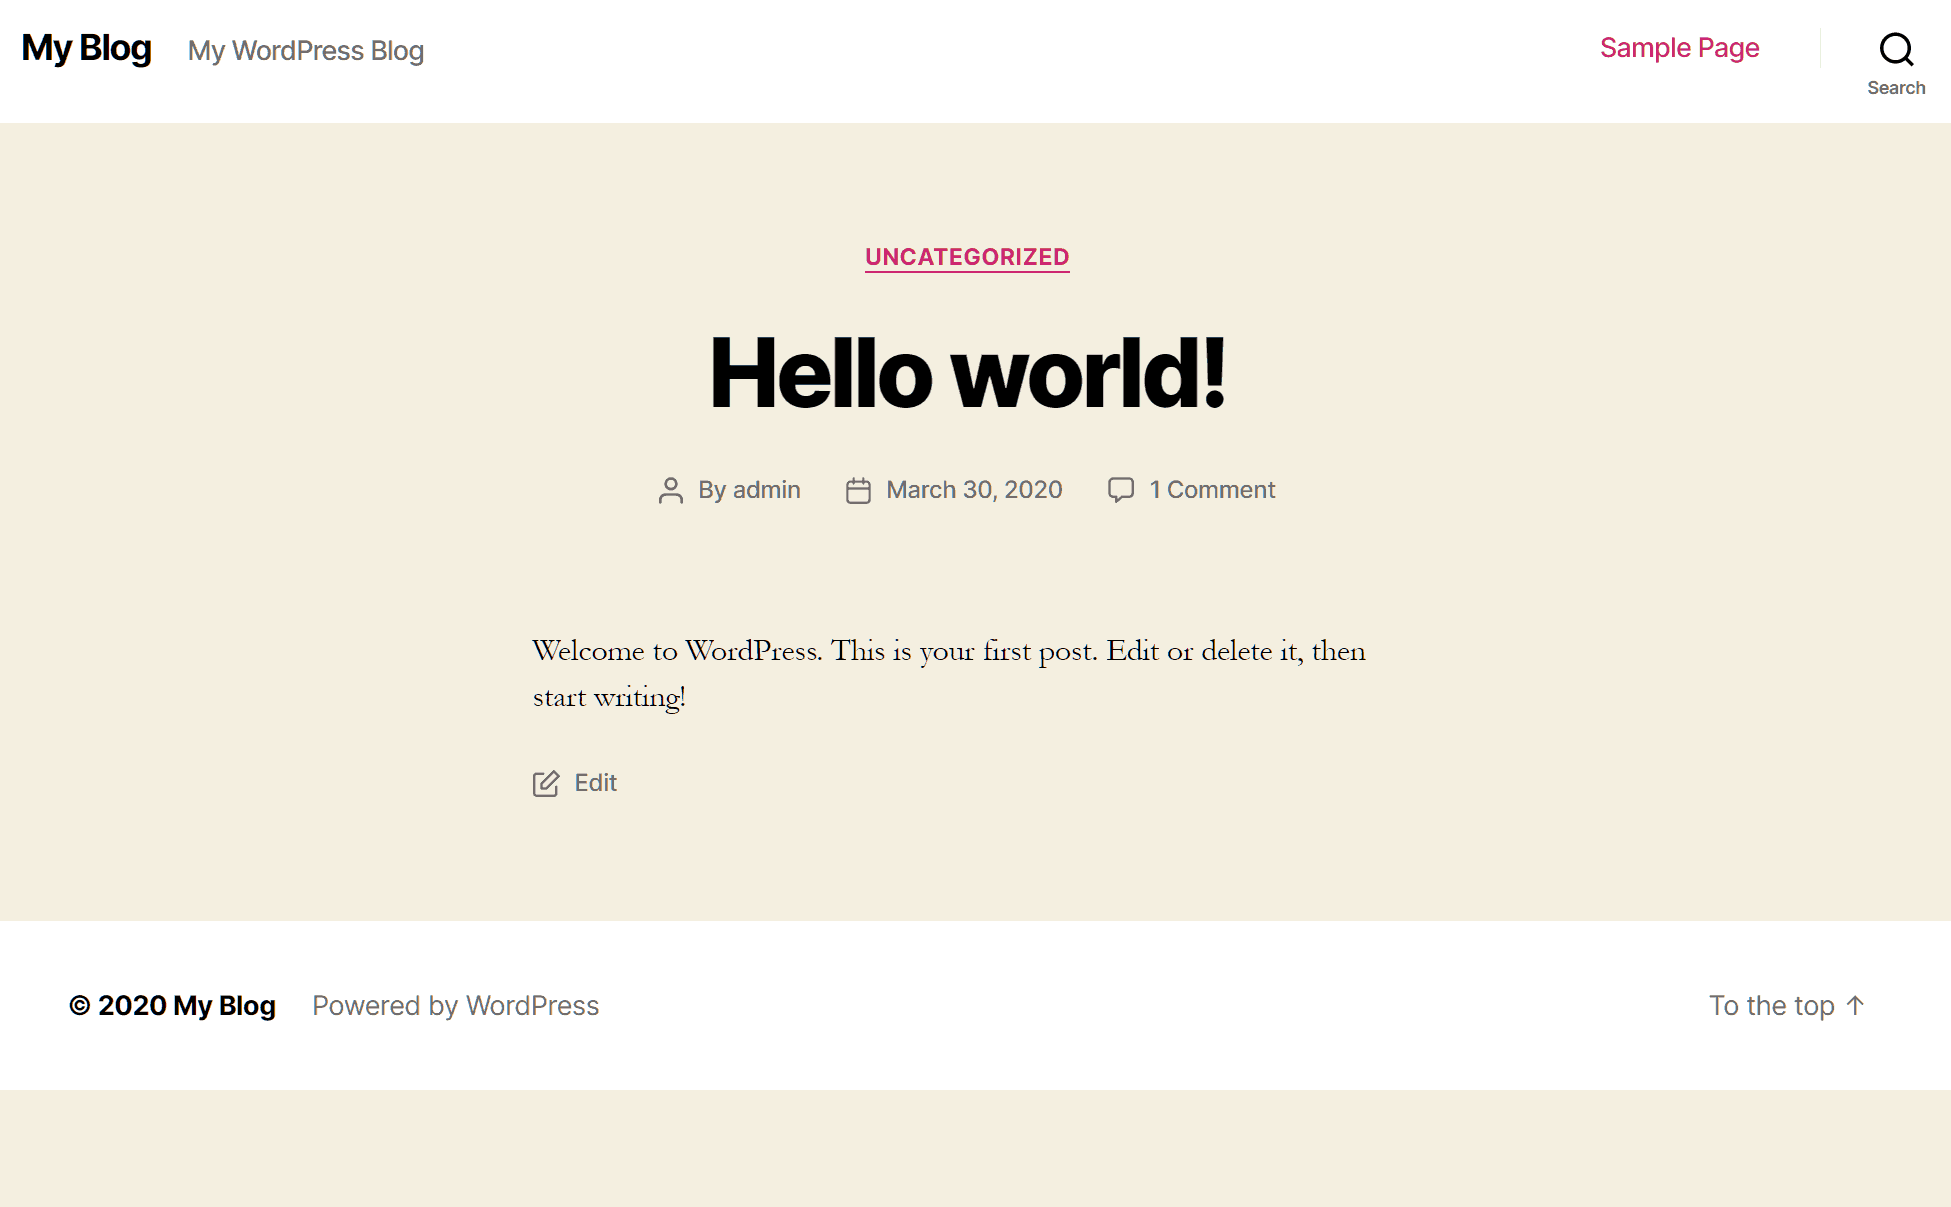
And this is how your ‘Twenty Twenty’ homepage should look like afterwards:
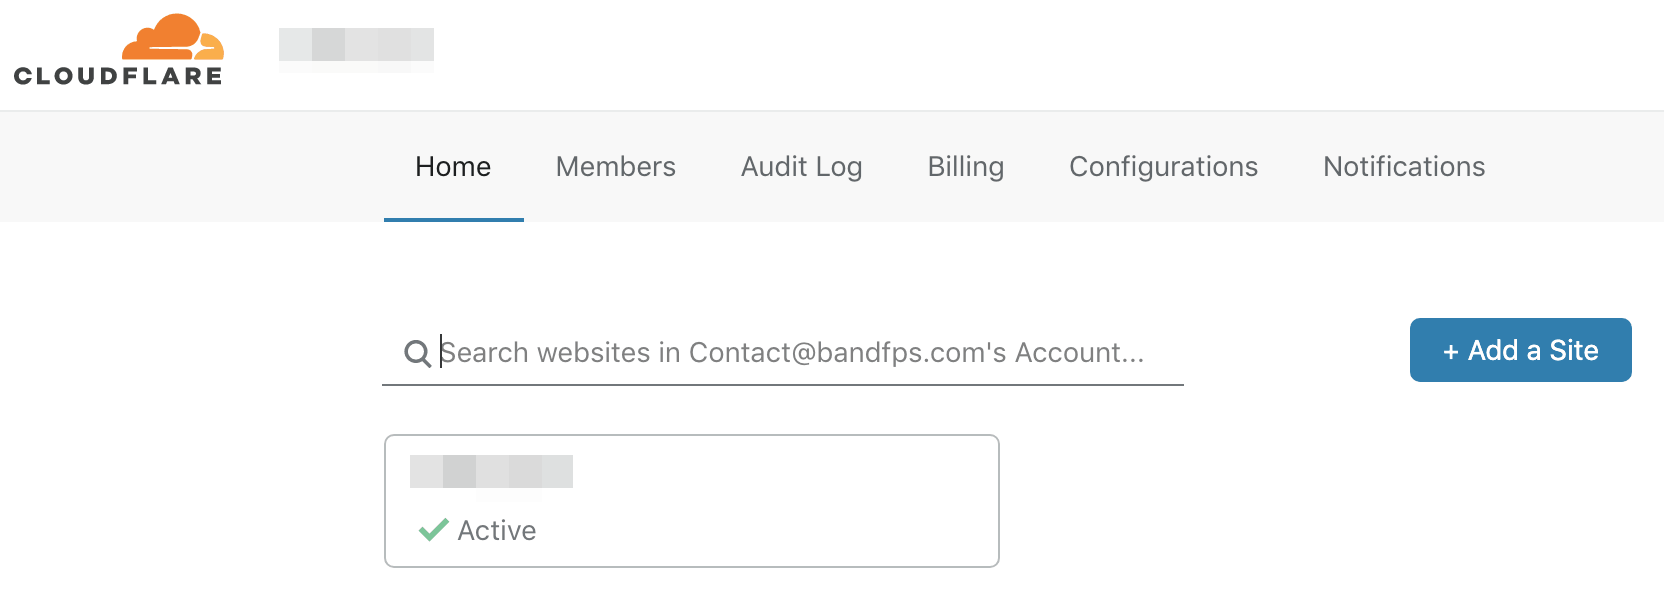
13.) Visit Cloudflare to check if your domain is showing as ‘Active’ on your account:
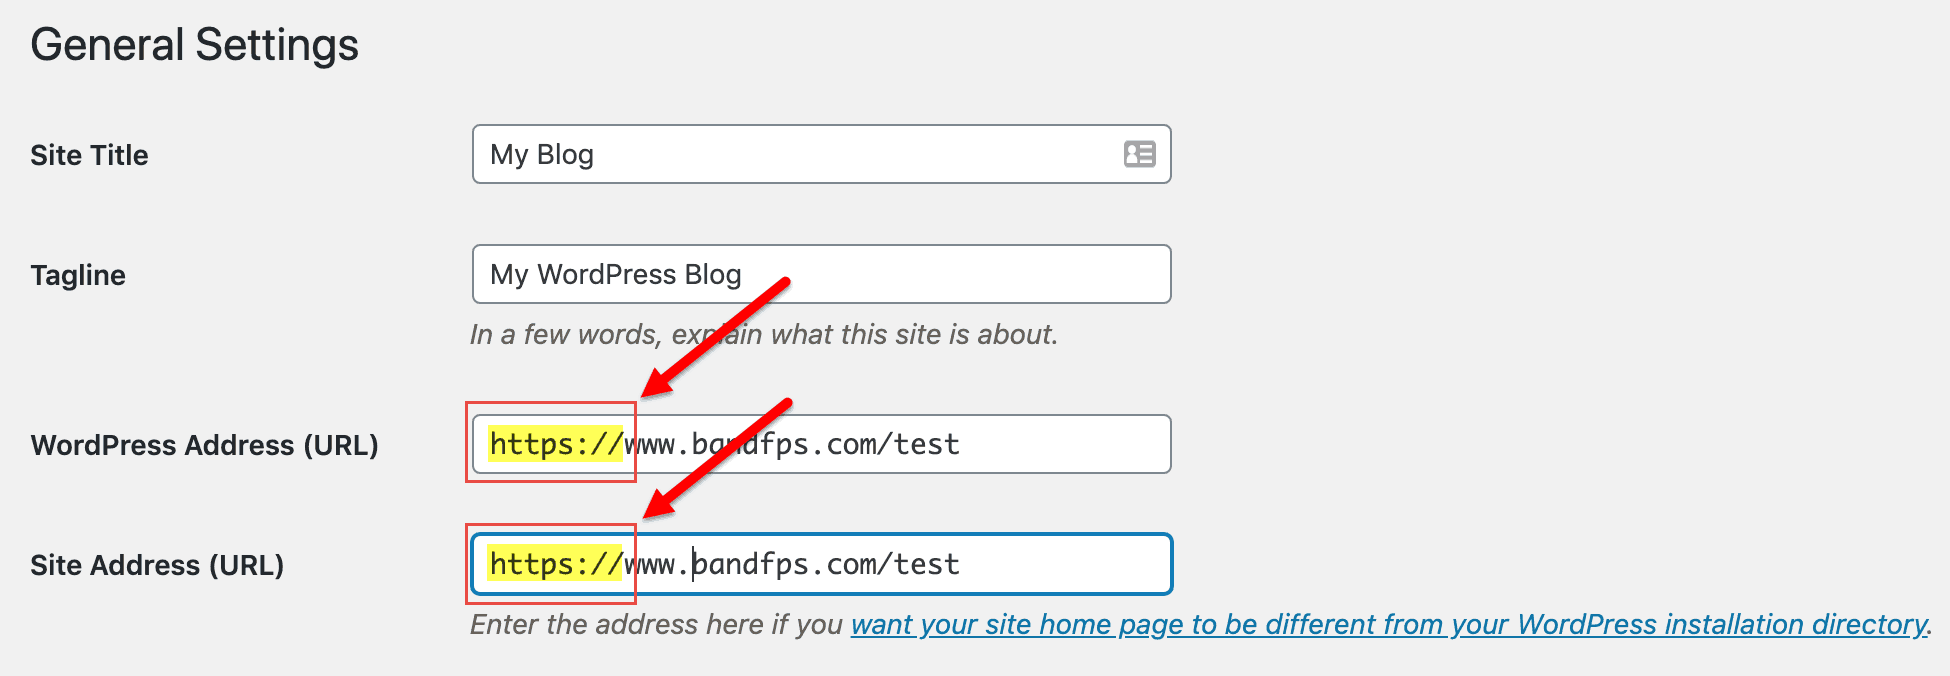
Go back to your website, visit Settings > General, change both URL prefixes to ‘https://’ and click on ‘Save Changes’:
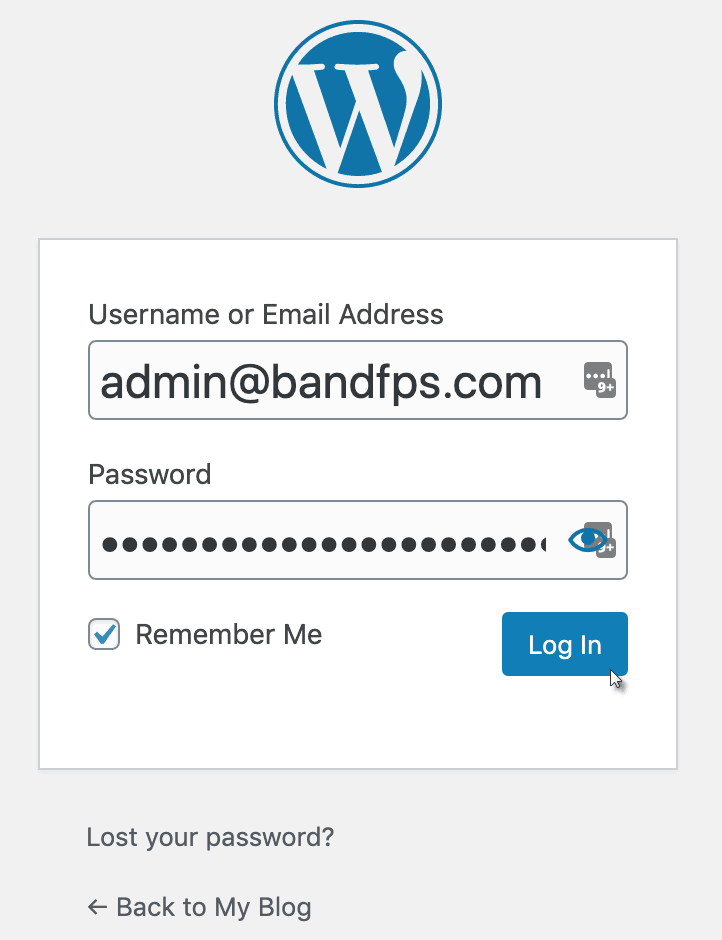
You’ll be immediately logged out of your account. Make sure that the ‘https://’ URL prefix is now showing in your browser address bar and log back in (you may need to do a hard page refresh by pressing Ctrl+F5):
💡 If Ctrl+F5 doesn't help, download CCleaner to help clear all your browser cache/cookies.
Once you’re logged in, you should see a solid padlock icon 🔒 to the left of your domain indicating that your website’s connection is now encrypted:
![]()
14.) Let’s configure your Yoast SEO settings by going to Yoast > General:
Since your website’s currently under construction, choose ‘Option B’ for now (remember to change this setting once your website goes live!). Click the ‘Next’ link:

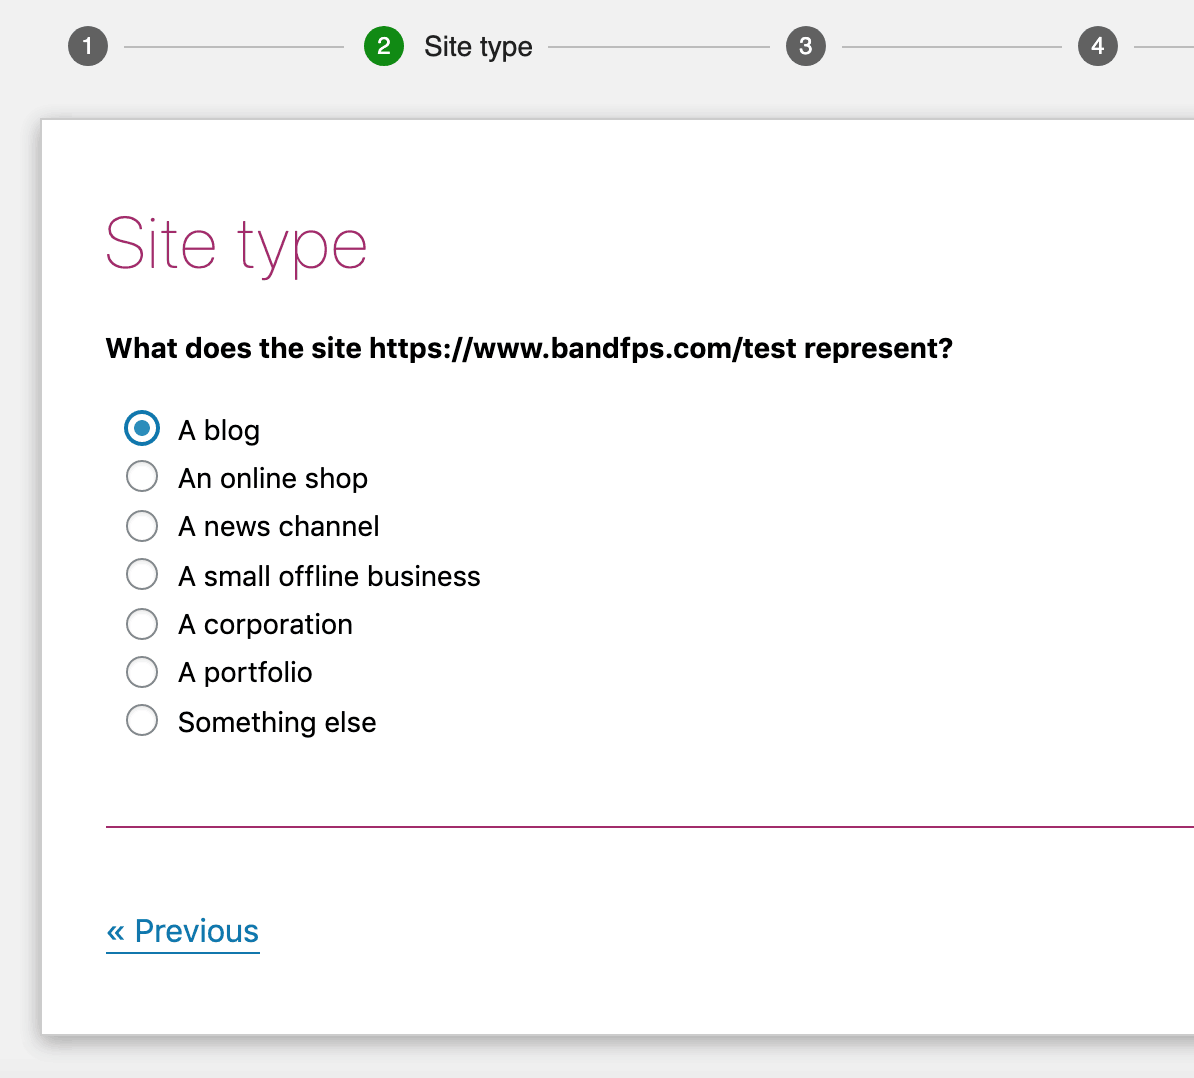
Choose your website type by selecting it’s ‘Site type’, then click ‘Next’:
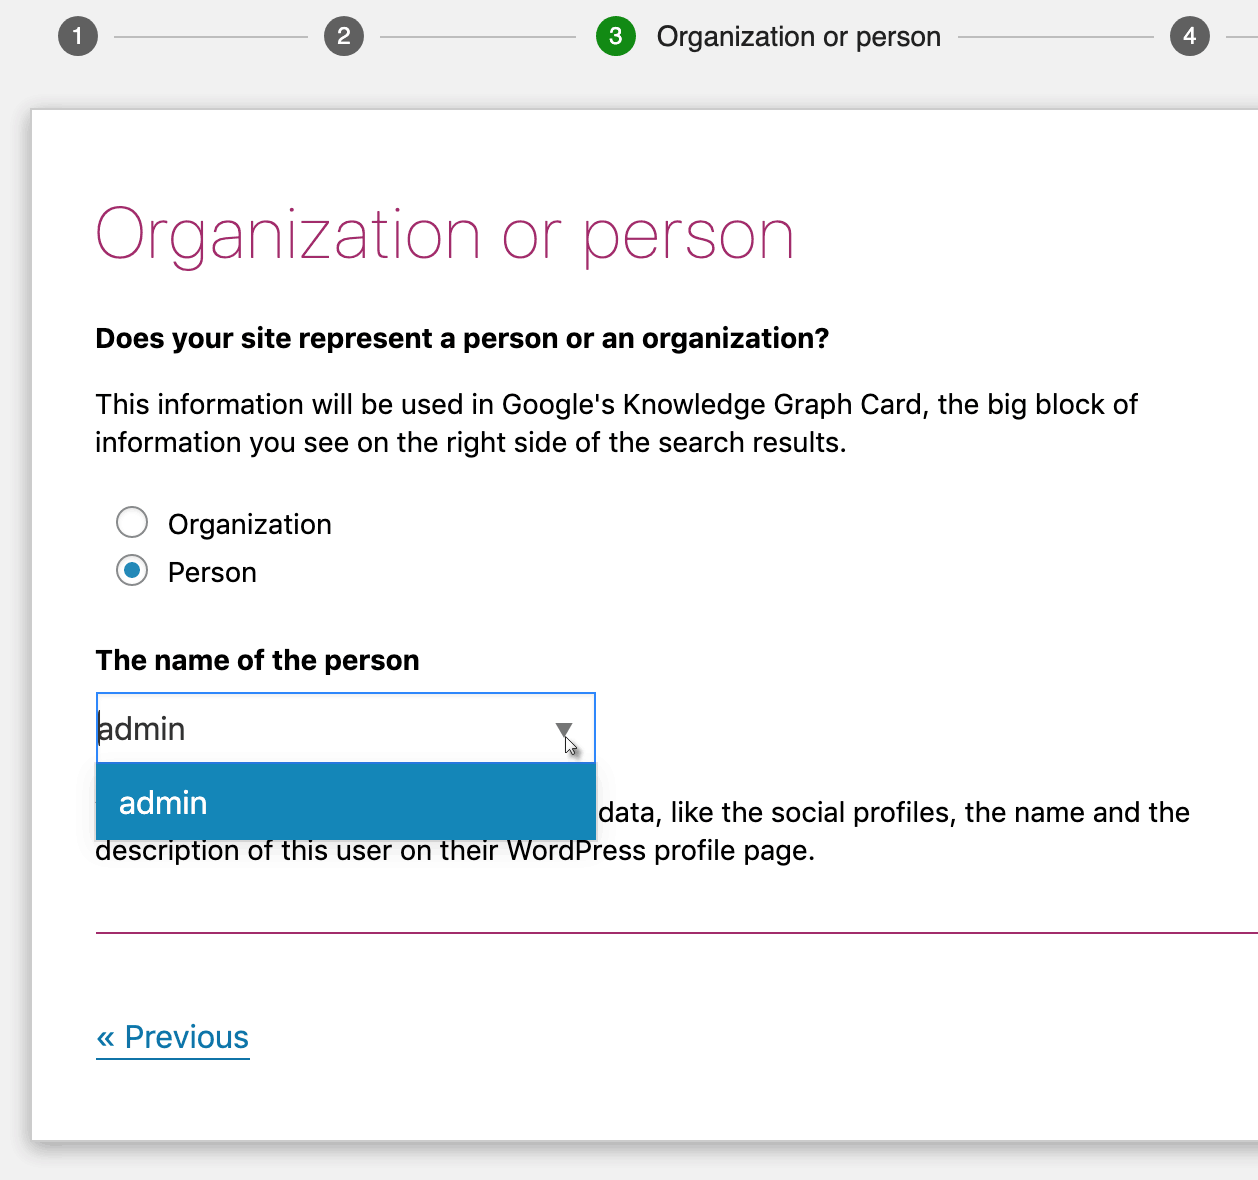
Choose whether your website represents a person (you or someone else), or a business/organization. Then select the name of the person by clicking the drop-down menu and click ‘Next’:
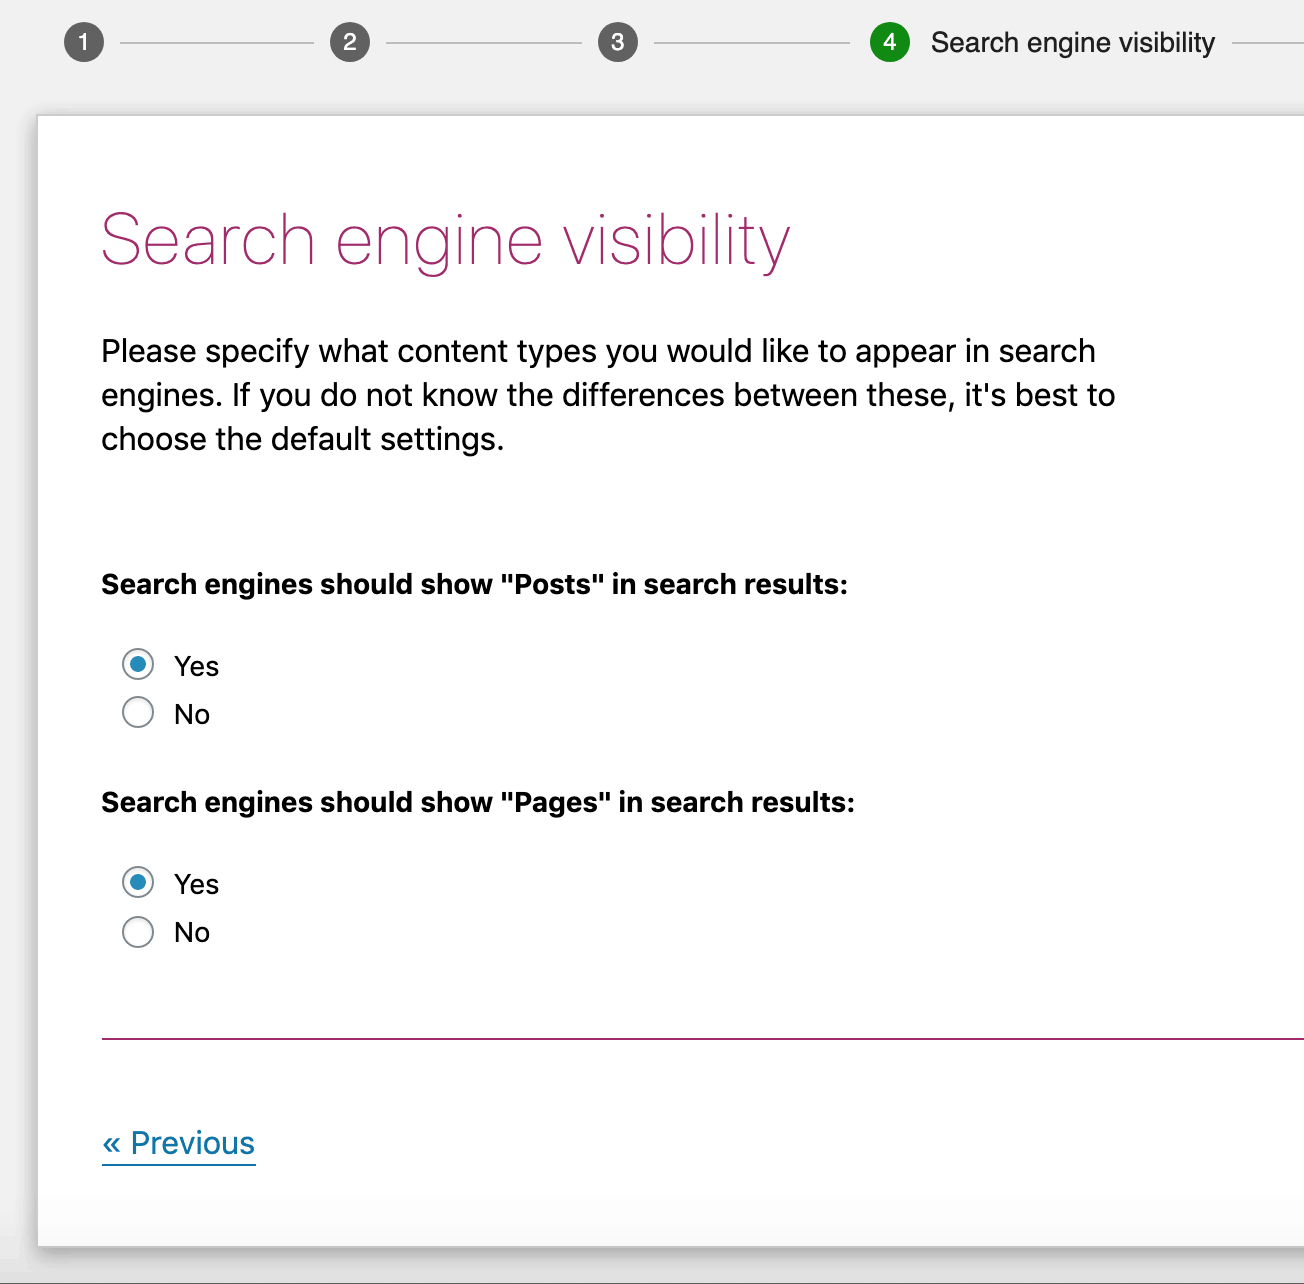
We recommend leaving the ‘Search engine visibility’ settings on default. Click on ‘Next’:
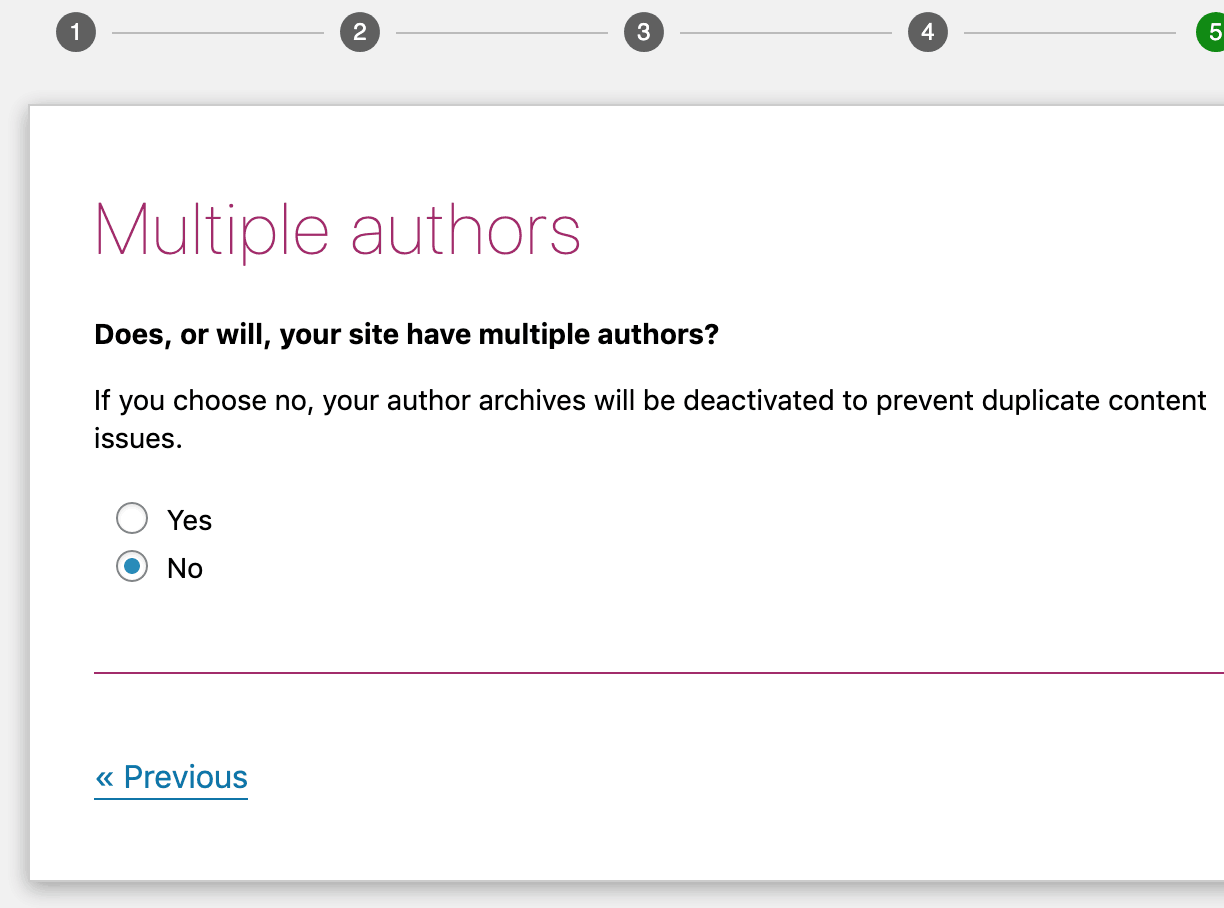
Will you have more than one author for your blog? Make your selection and click on ‘Next’:
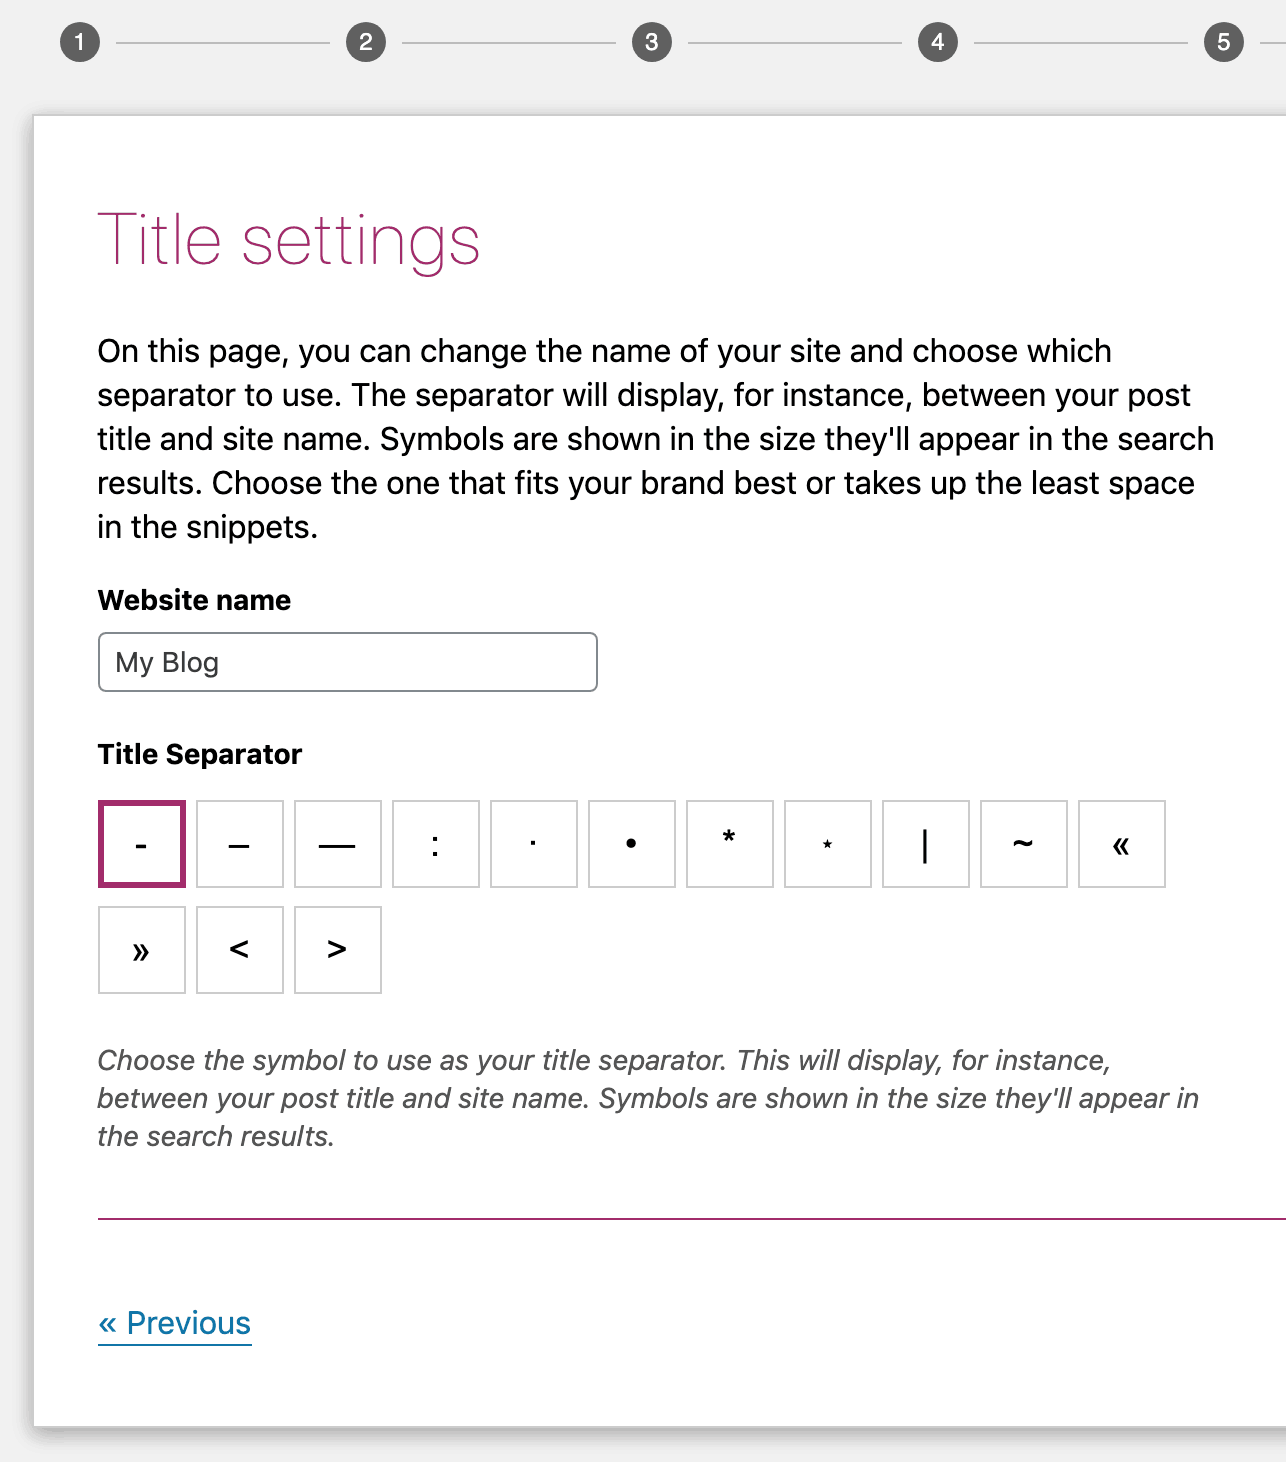
For ‘Title settings’, choose your preferred separator symbol and click on ‘Next’ (leave ‘Website name’ alone for now):
OPTIONAL: This page offers information on Yoast Premium and a brief keyword research video. Click ‘Next’ once you’re finished:
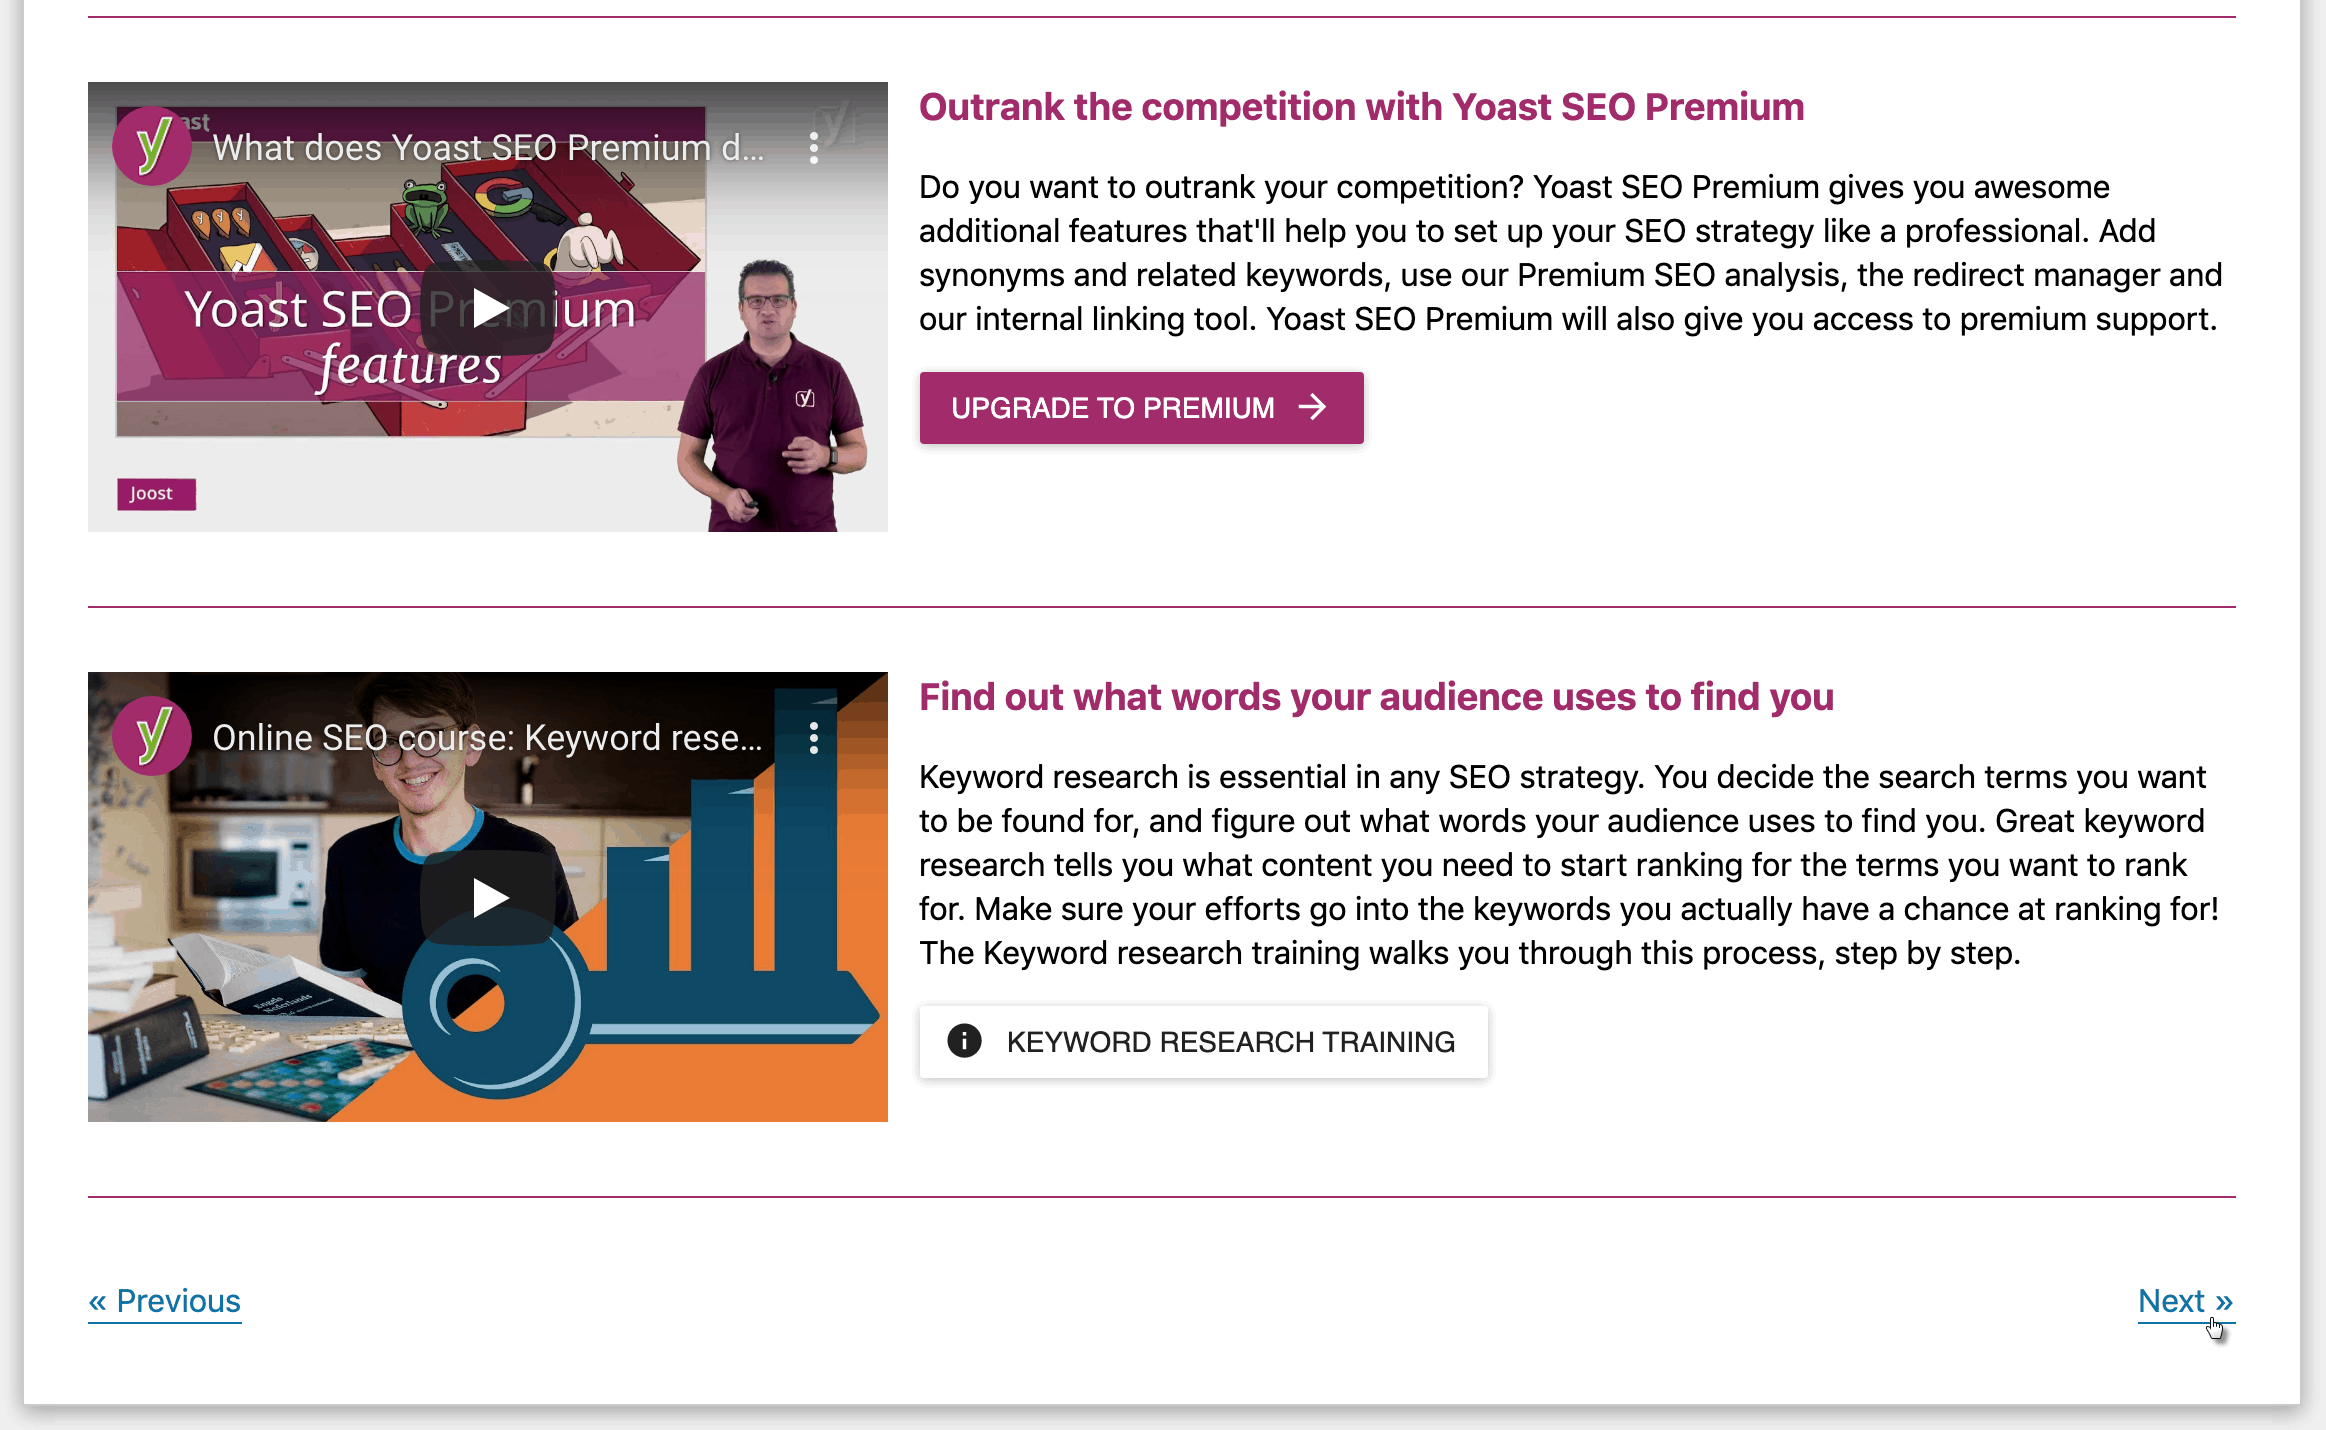
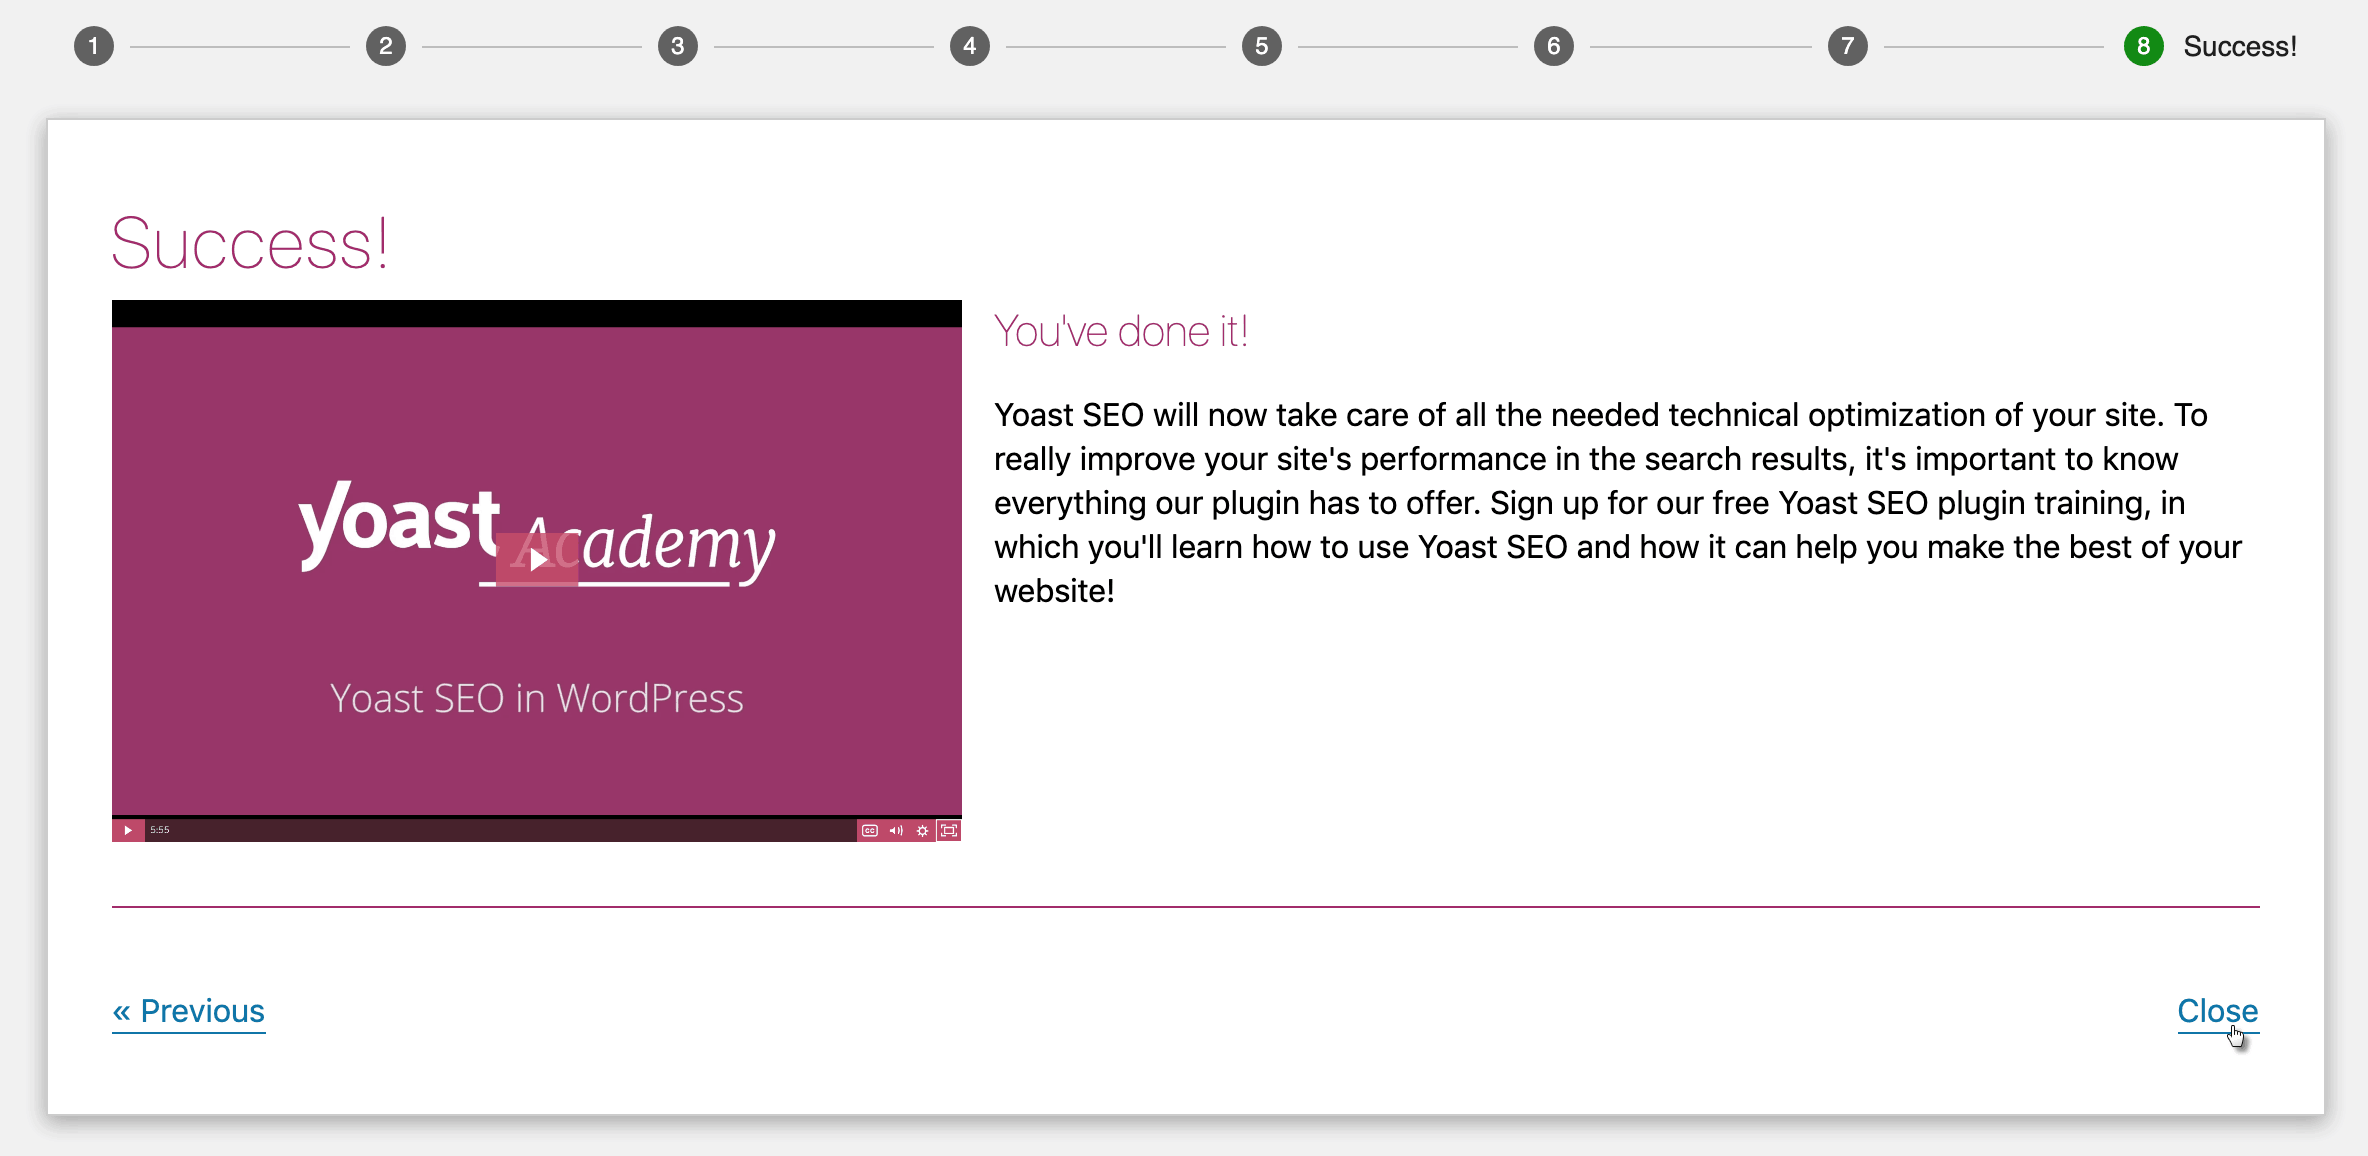
This last page gives a little more information about Yoast Academy. If you’re serious about learning keyword research and other digital marketing topics beyond the scope of Yoast’s training, we recommend the following learning resources:
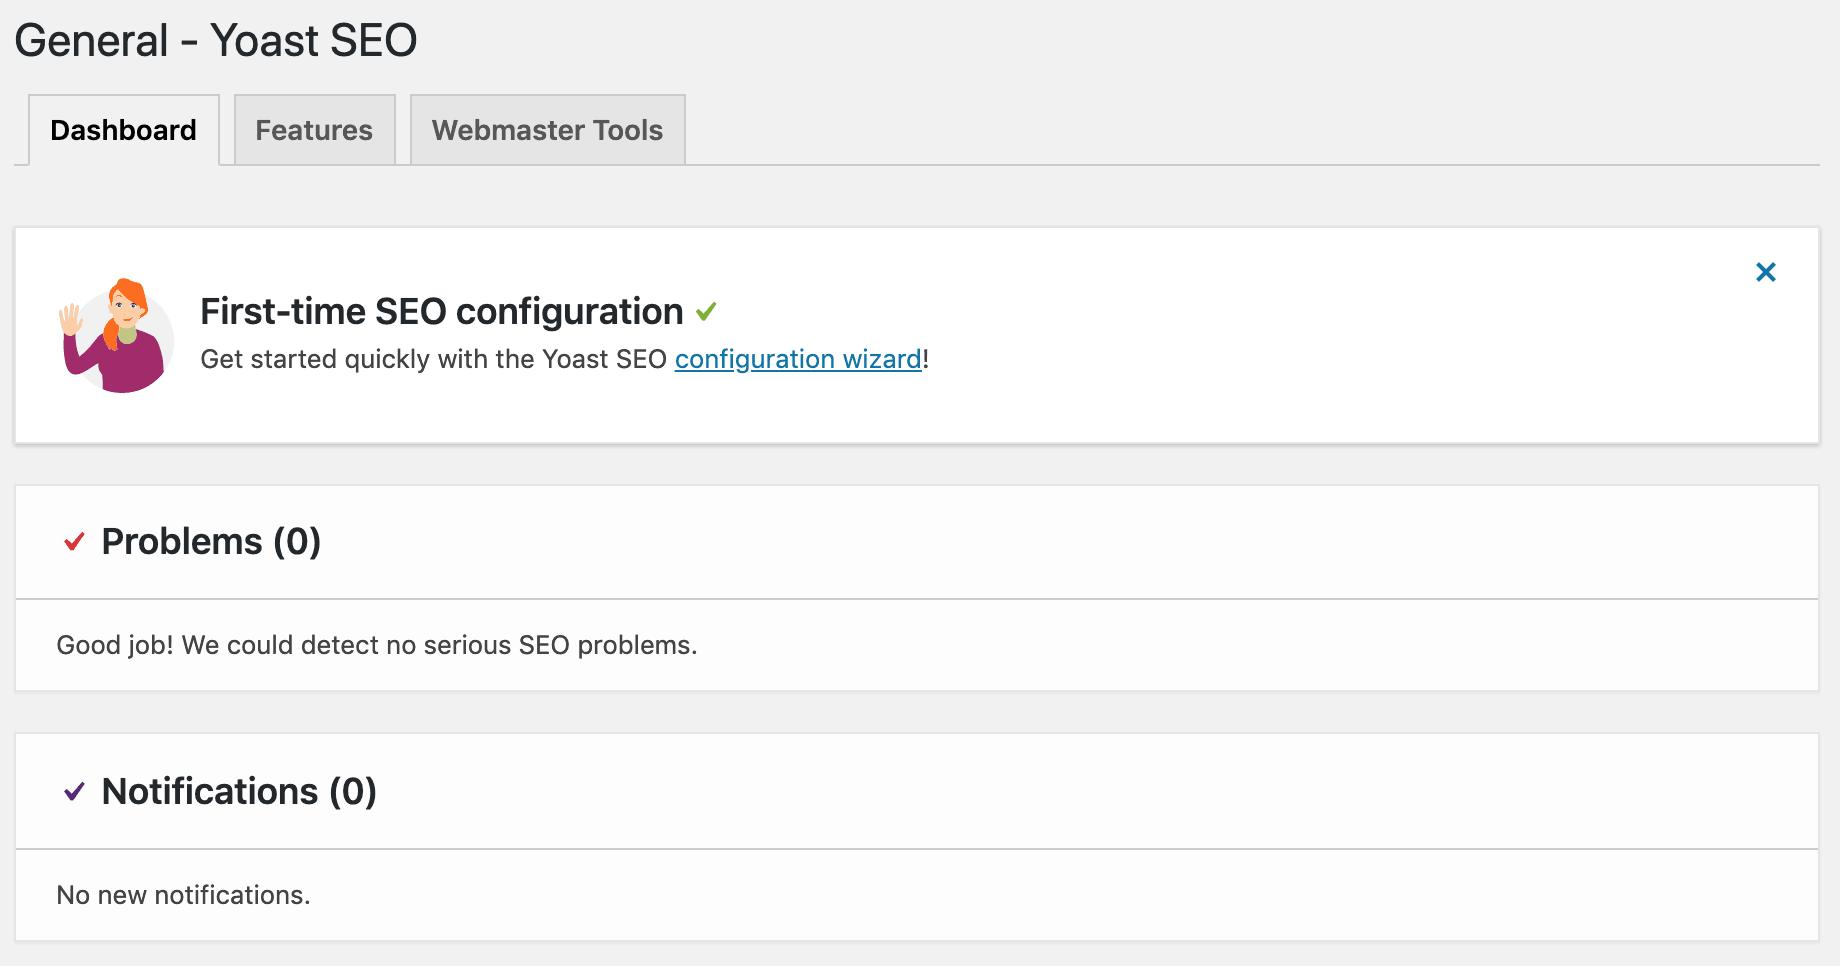
The Yoast SEO dashboard should now indicate that your SEO settings have been configured. Continue if you see the error listed below; if not, skip ahead to the next section.
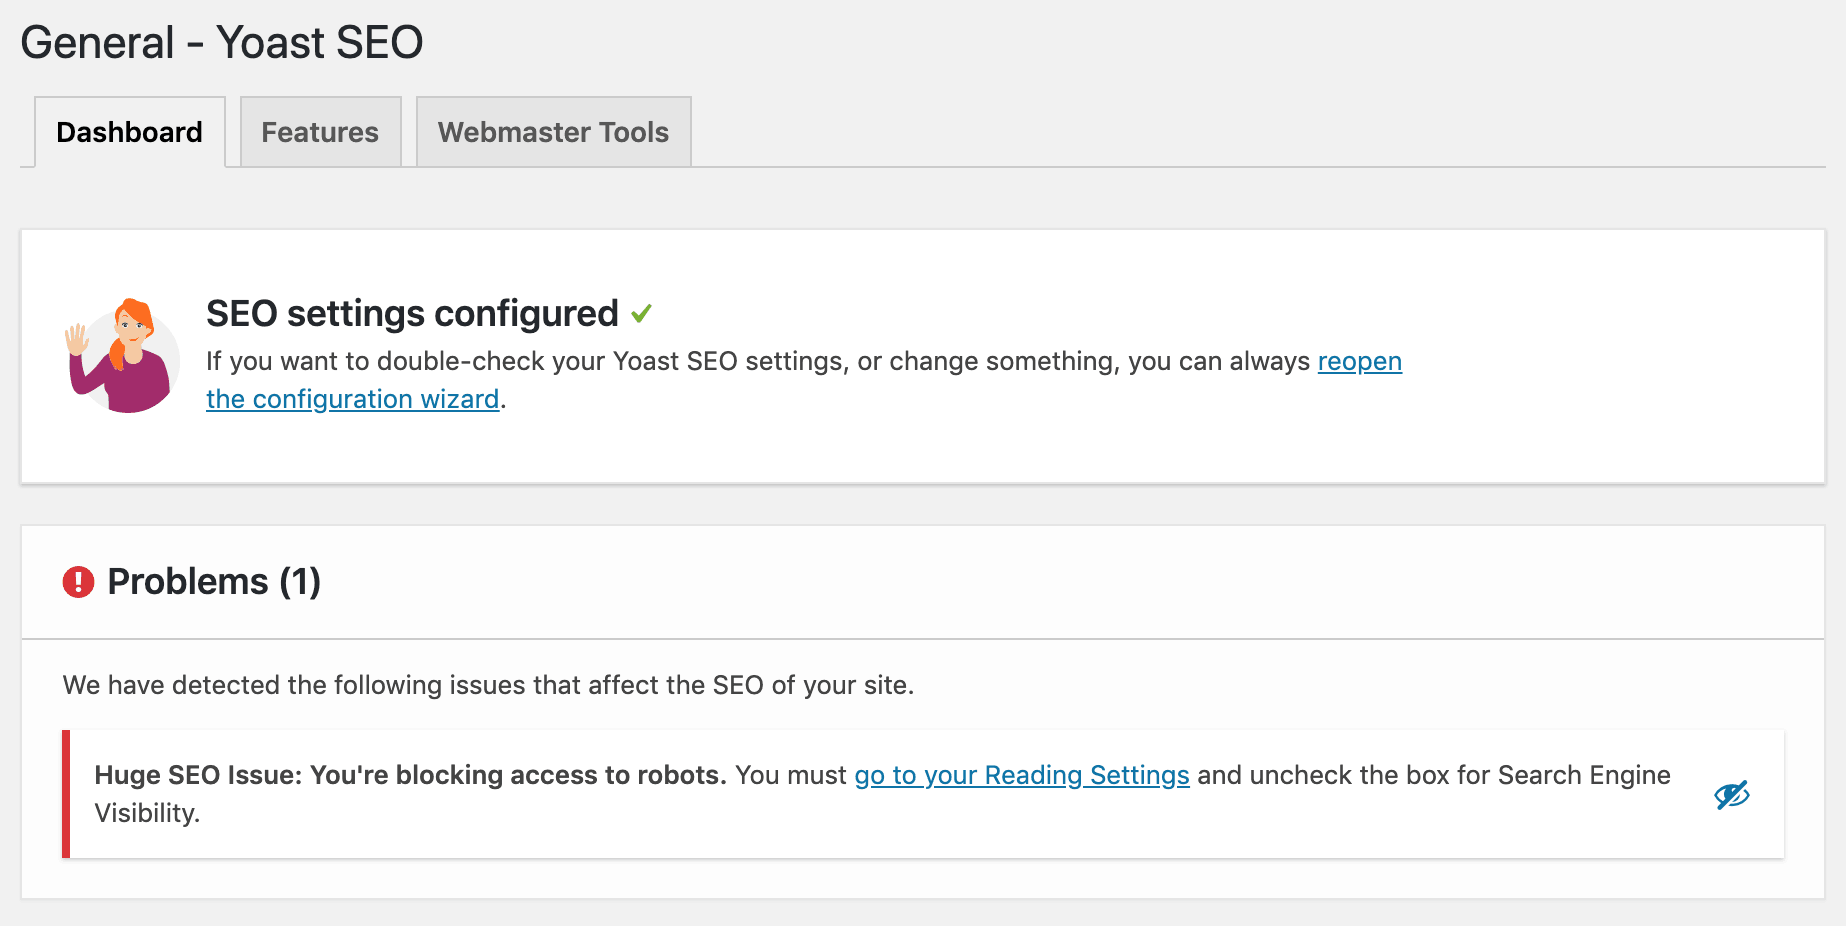
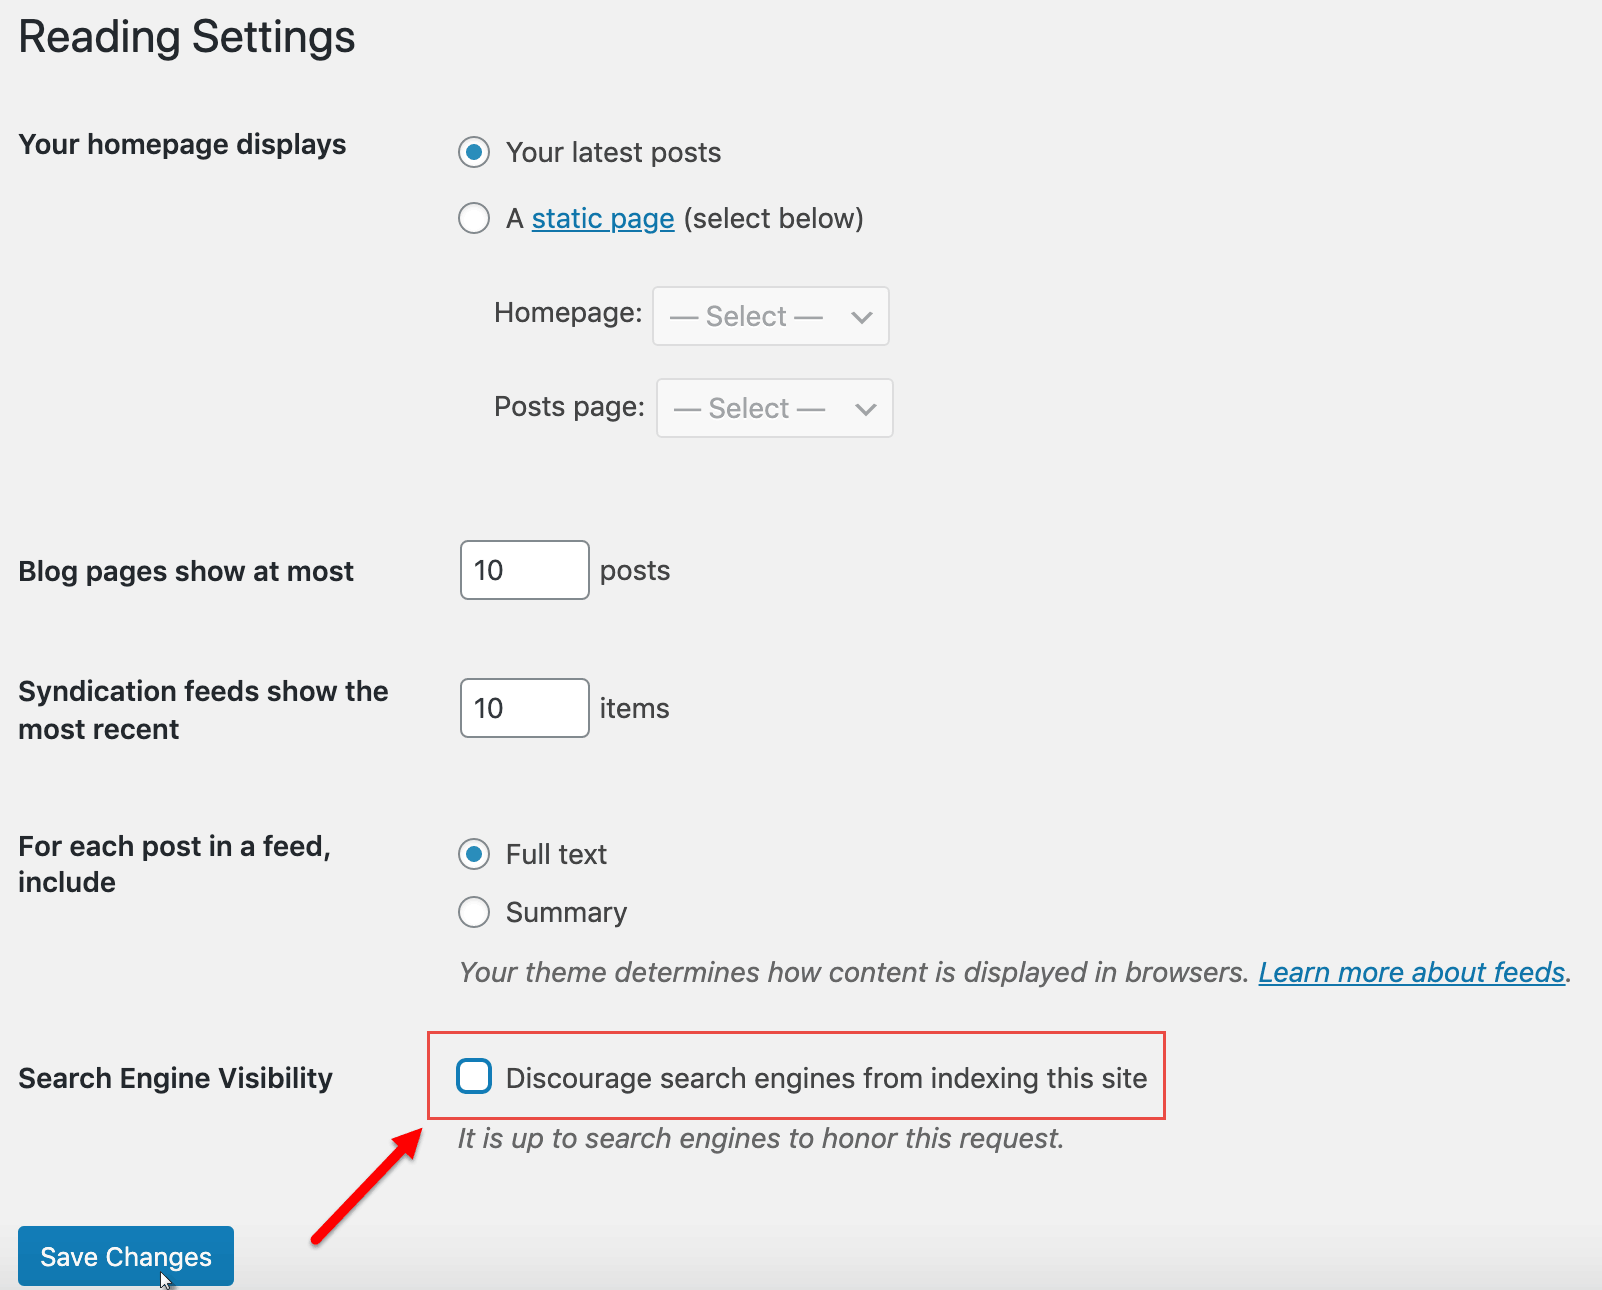
Go to Settings > Reading, uncheck the box next to ‘Search Engine Visibility’ and click on ‘Save Changes’:
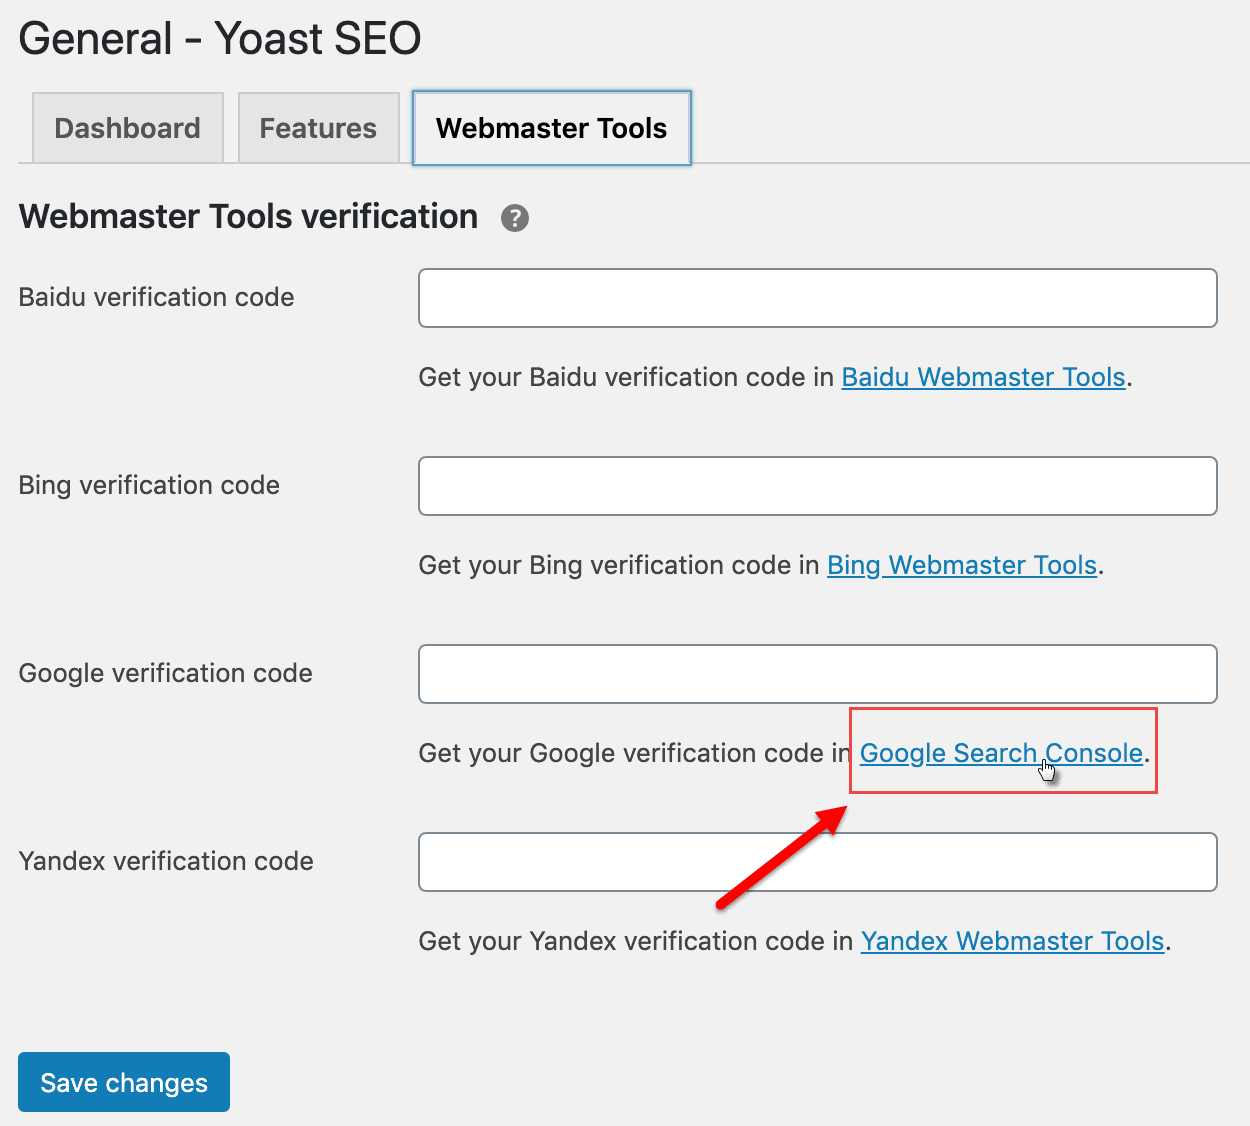
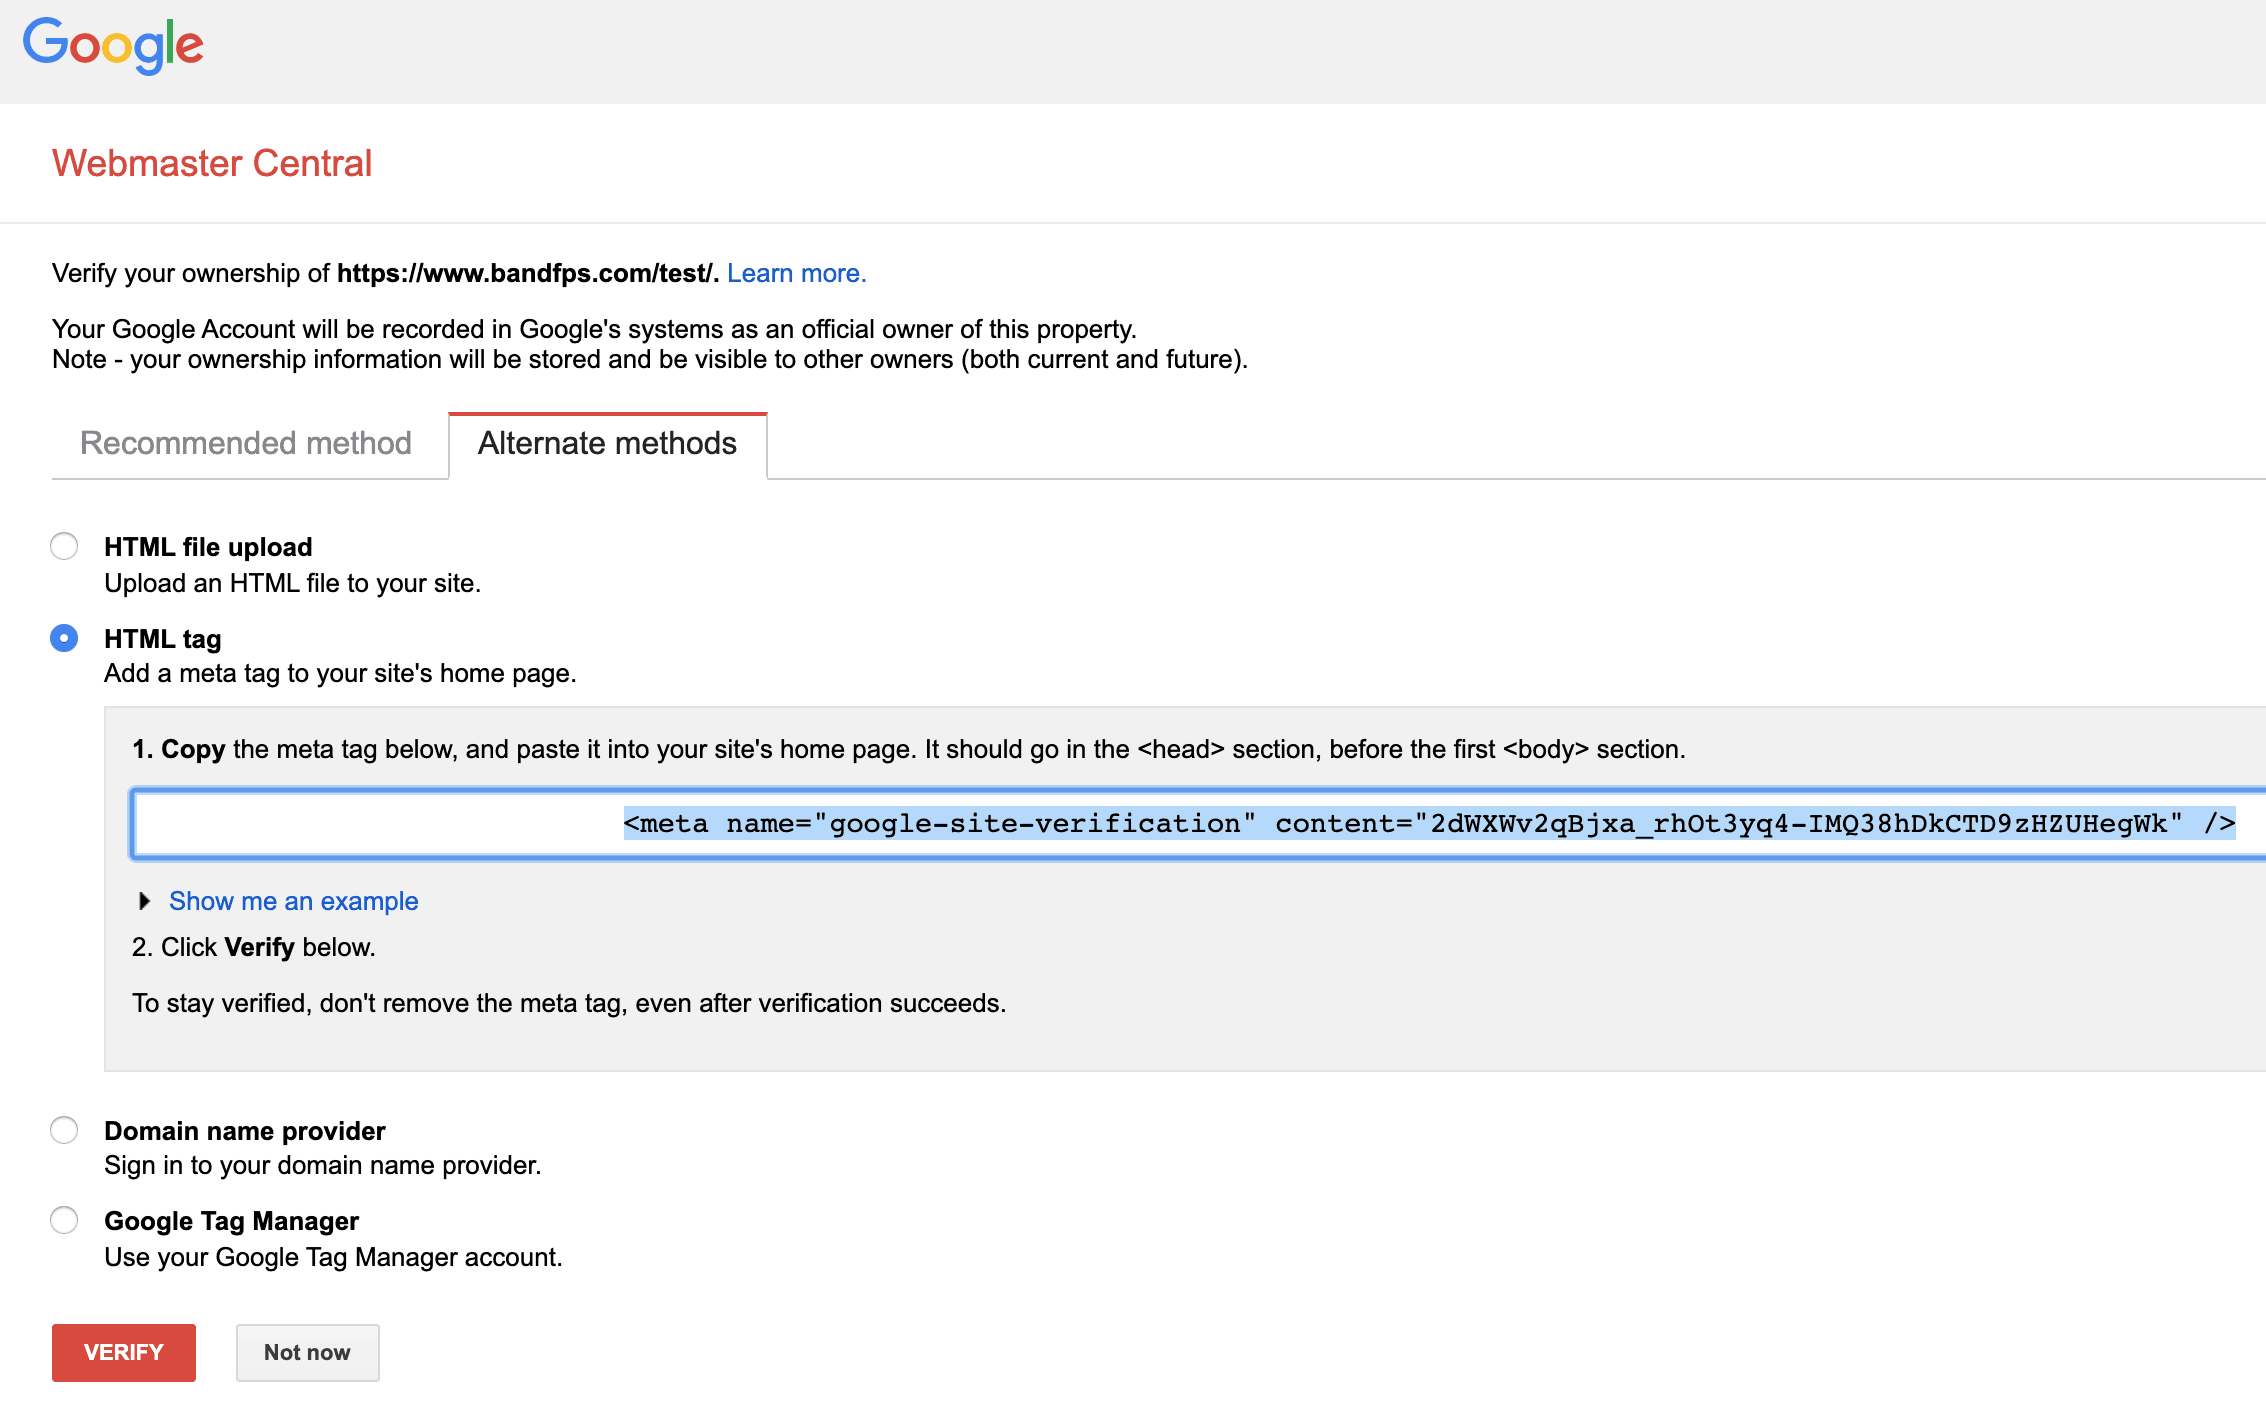
Now go back to the Yoast General settings page, click on the ‘Webmaster Tools’ tab, then on the ‘Google Search Console’ link:
You’ll be taken to a page where you’ll need to verify ownership your website. Click the radio button next to ‘HTML tag’:
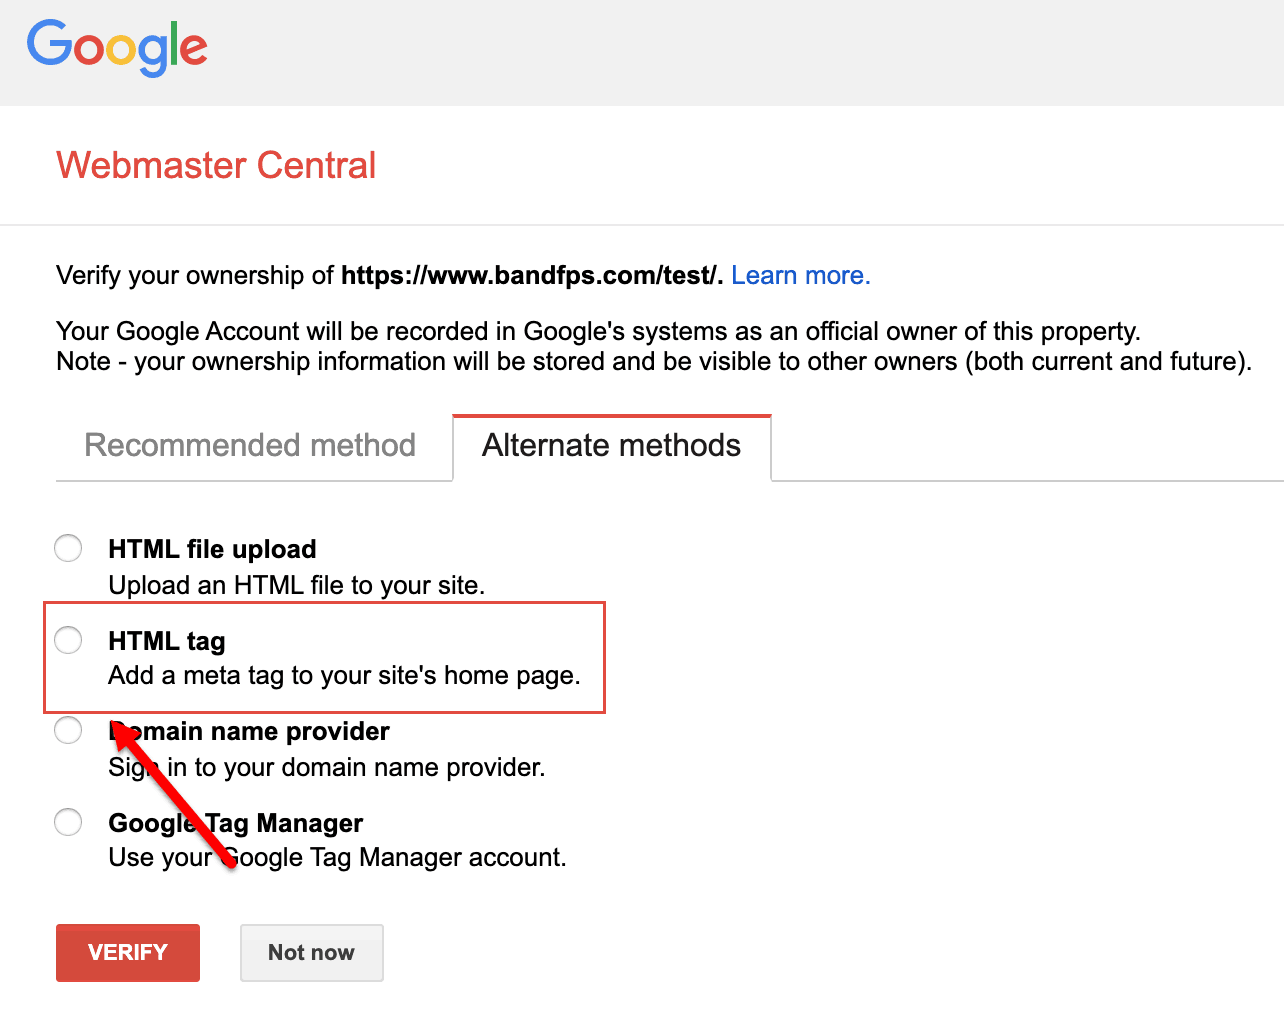
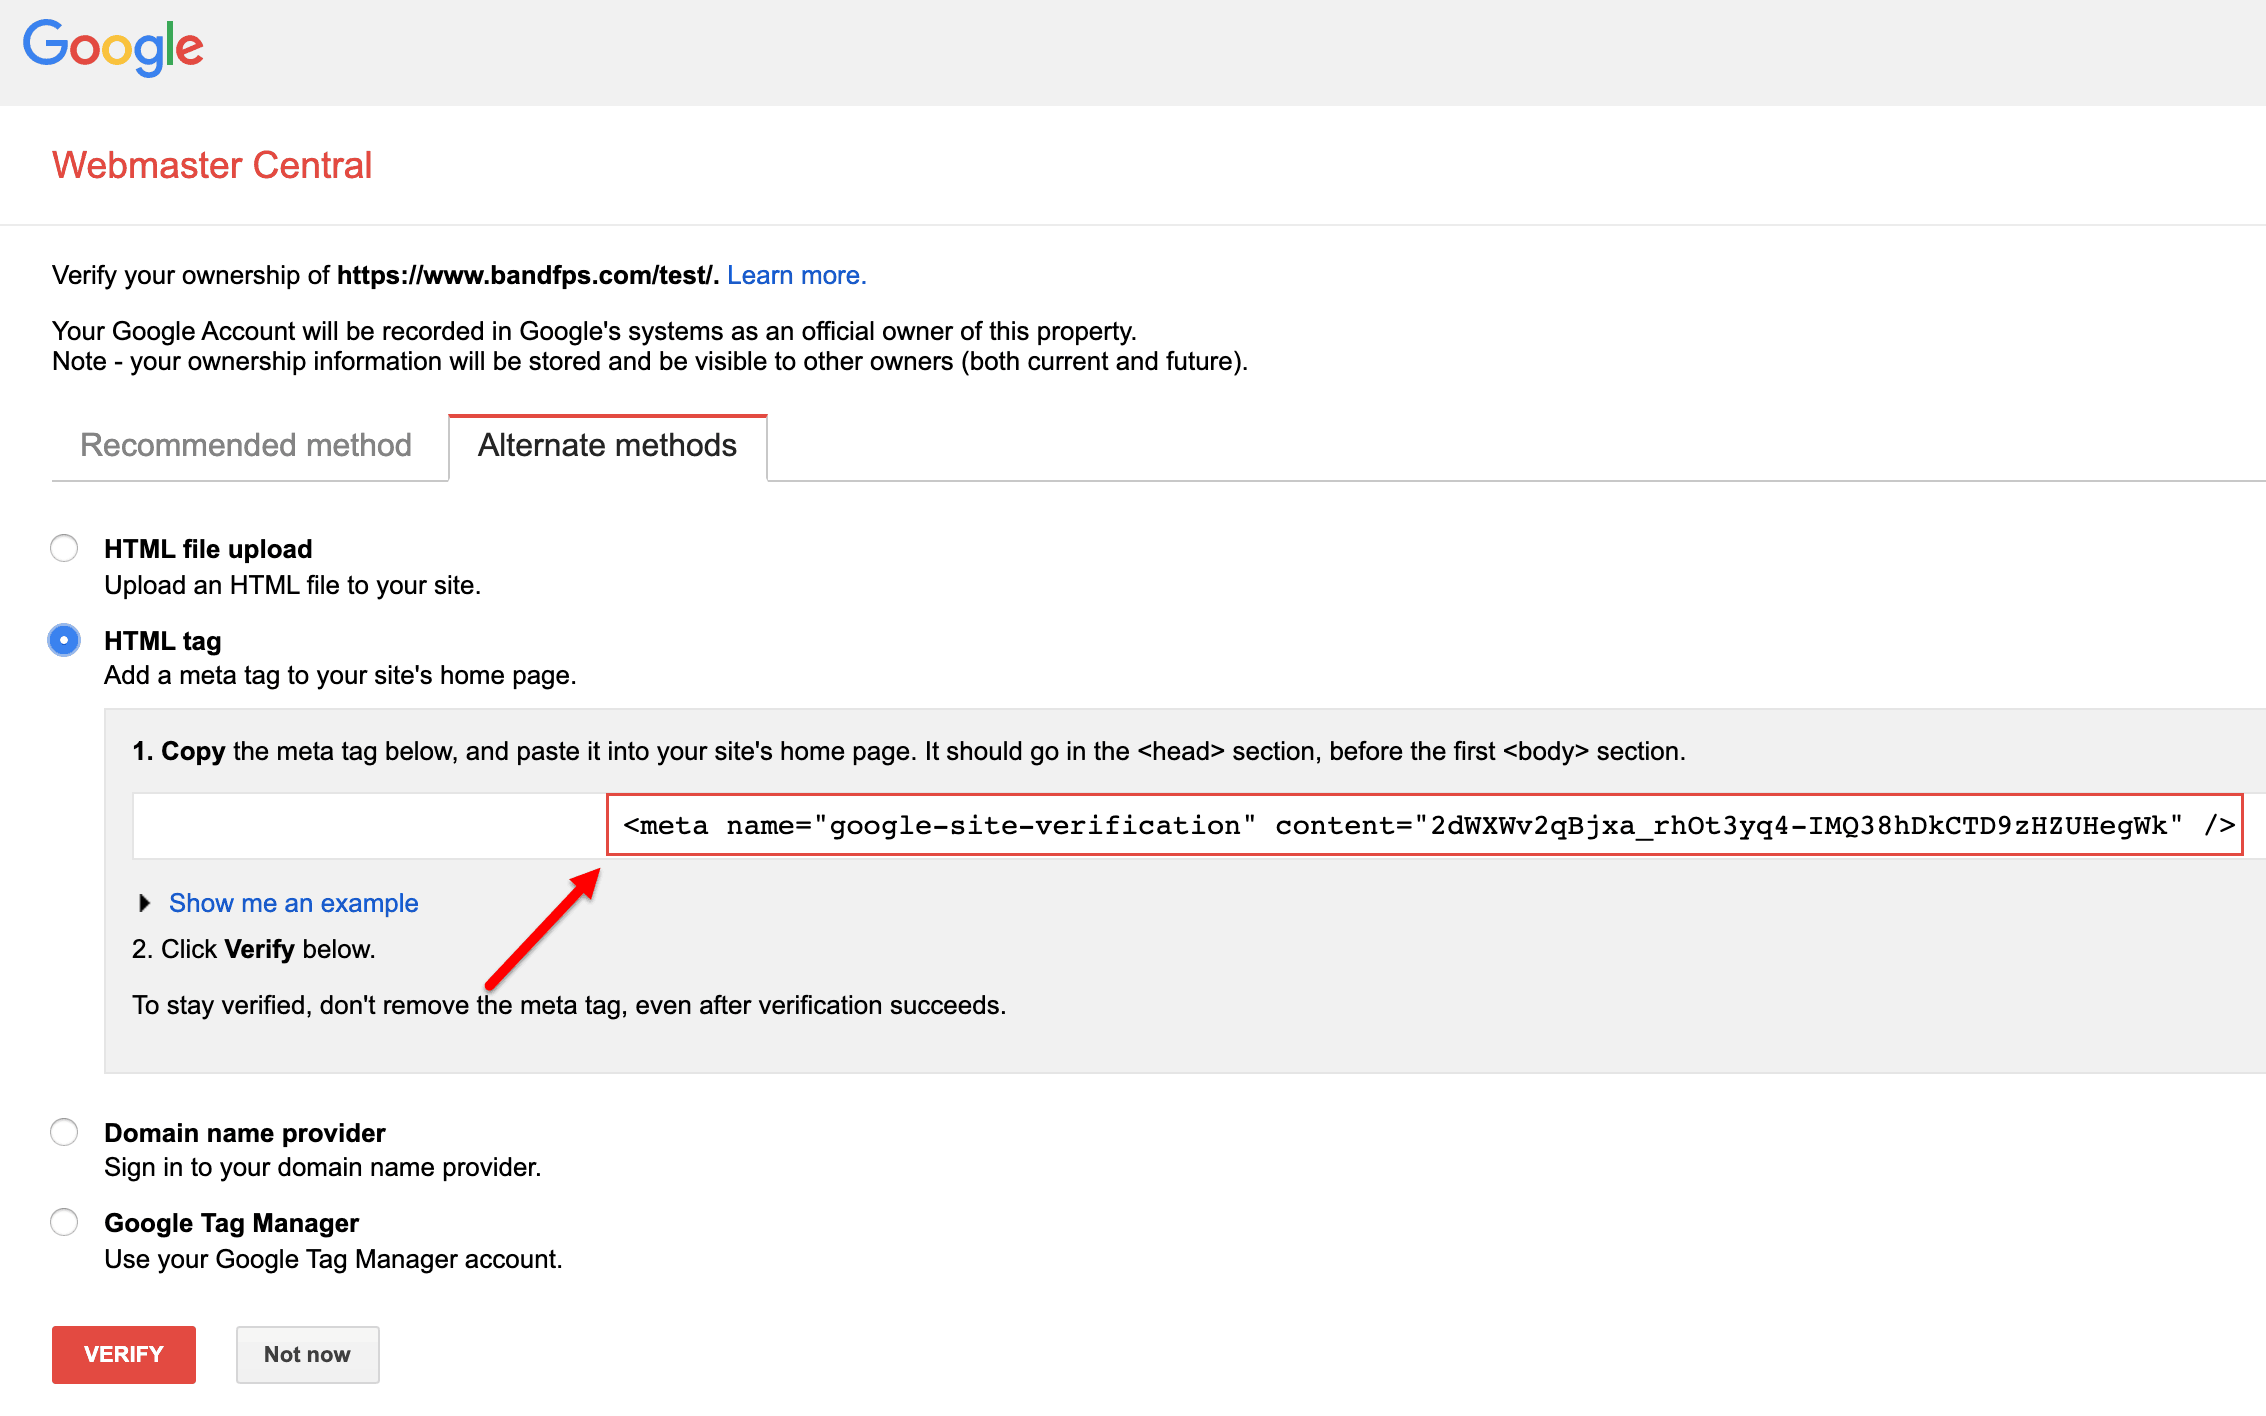
A Google site verification meta tag code should appear. Leave this page open and go back to your WordPress website.
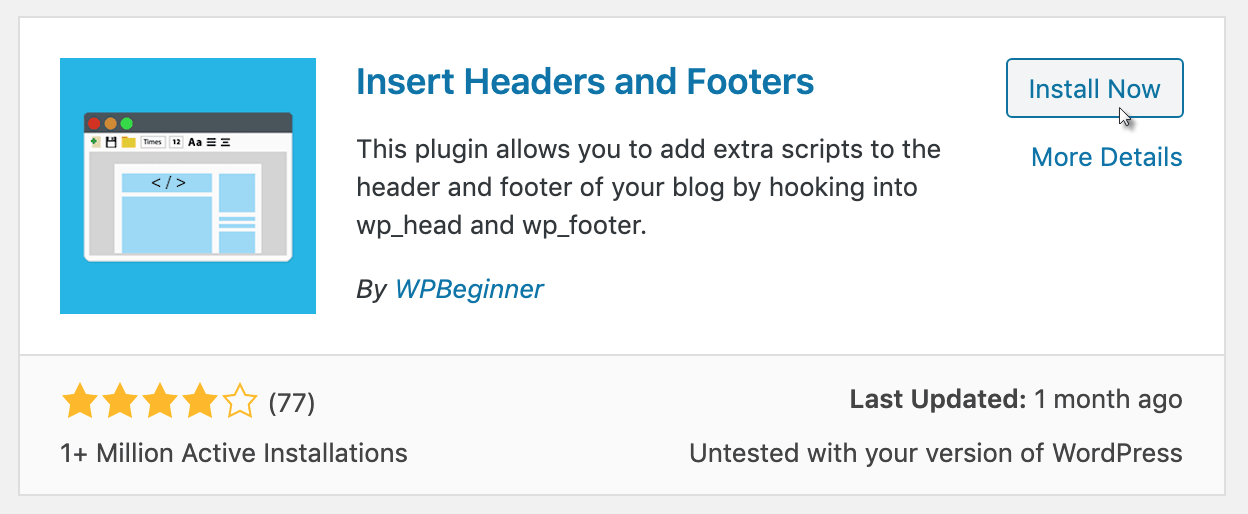
Install and activate the ‘Insert Headers and Footers’ plugin:
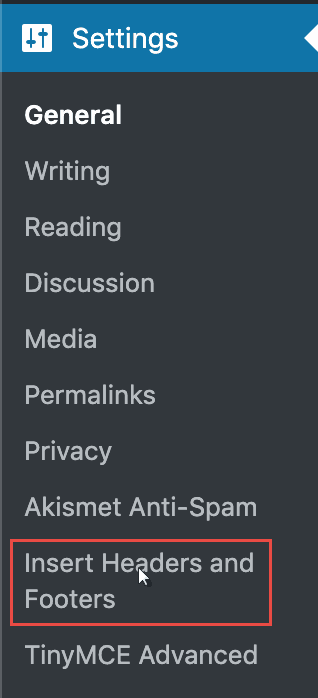
Then go to Settings > Insert Headers and Footers:
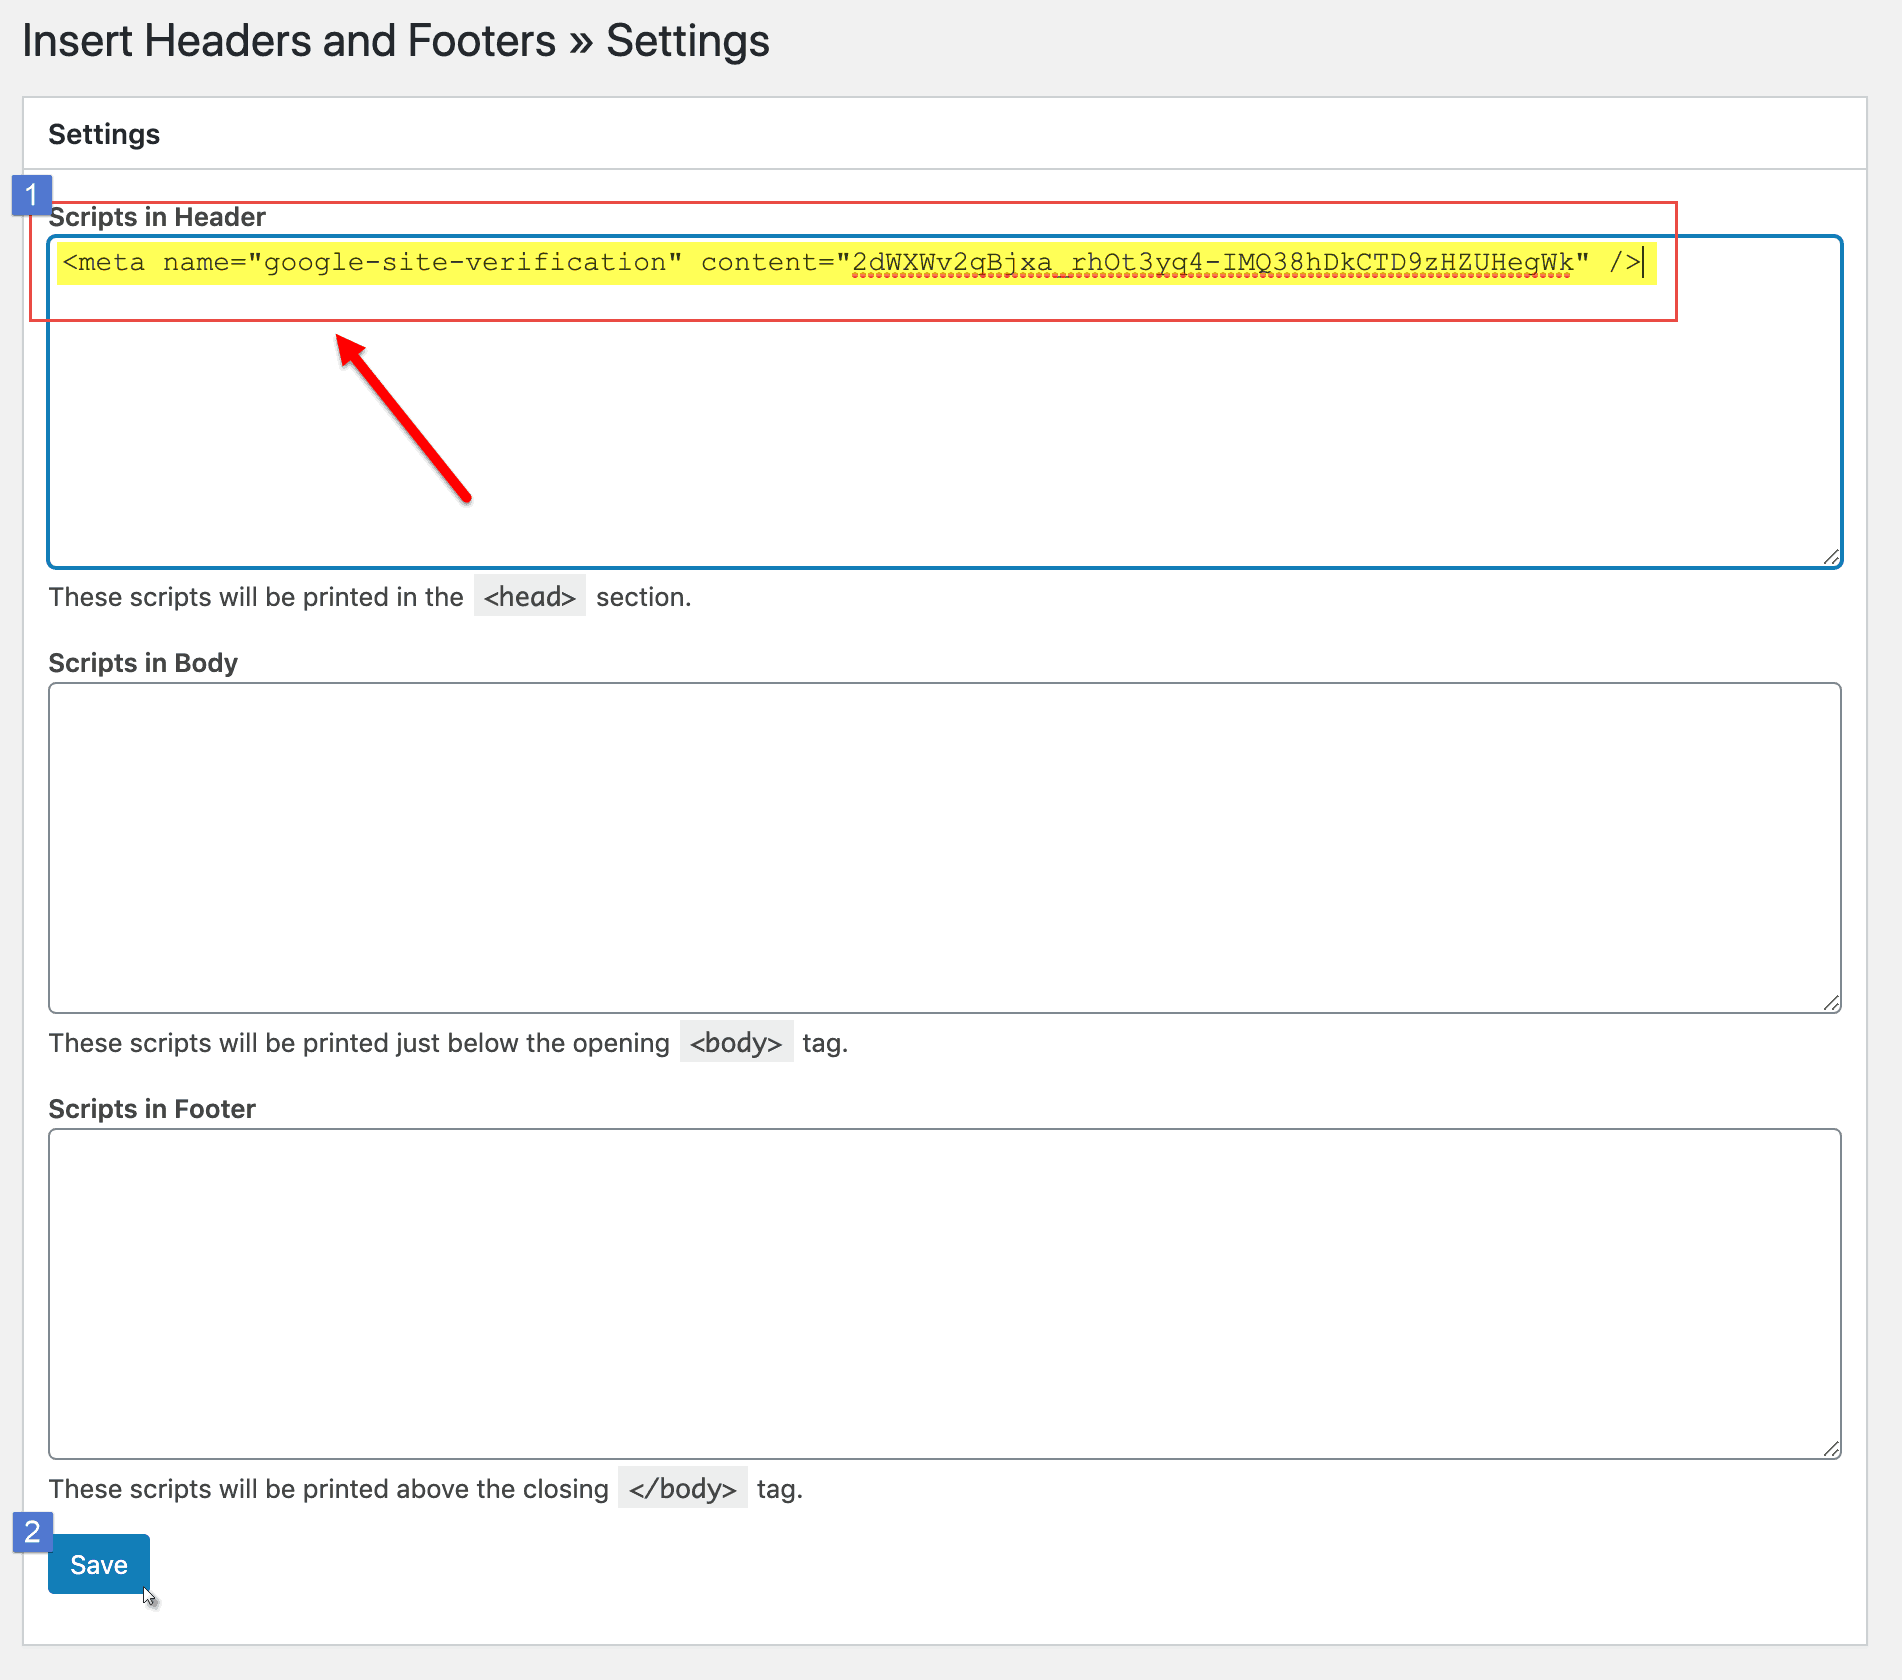
Go back and copy the Google site verification meta tag code:
Paste the code inside of the ‘Scripts in Header’ section of your website and click on ‘Save’:
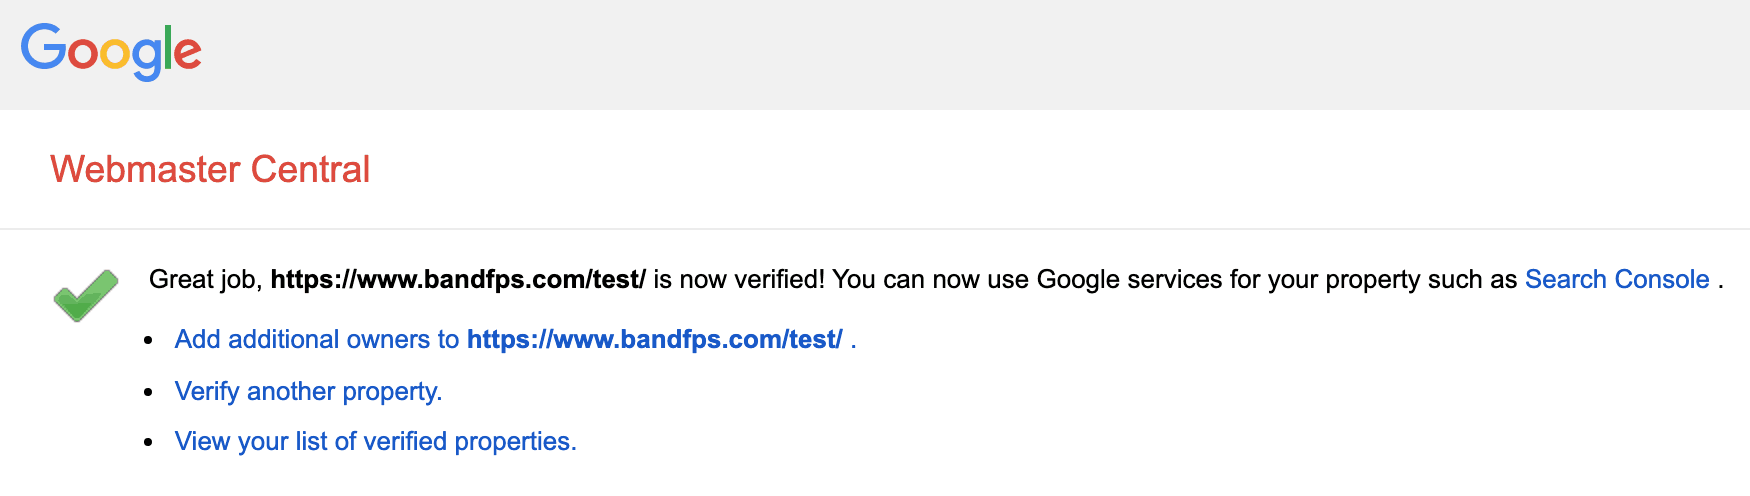
Go back to the Google Webmaster Central website and click on ‘VERIFY’. Your website should now be verified:
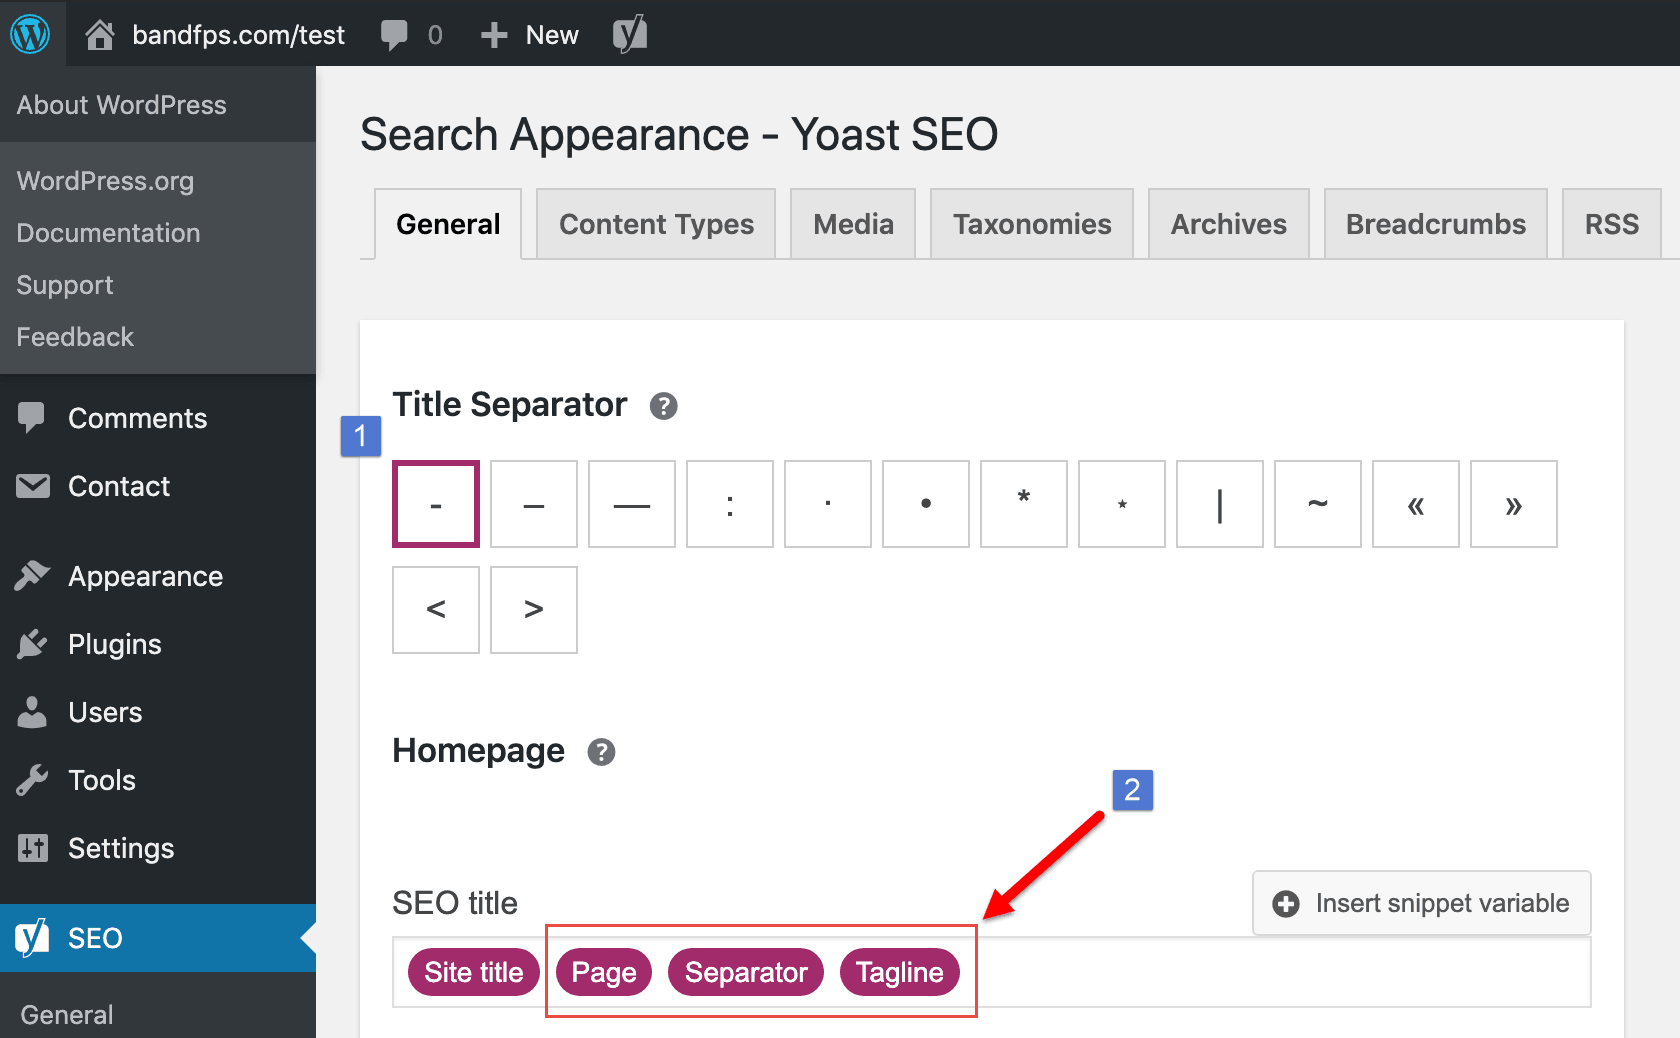
Visit Yoast > Search Appearance. Here you’ll have the option of changing the title separator.
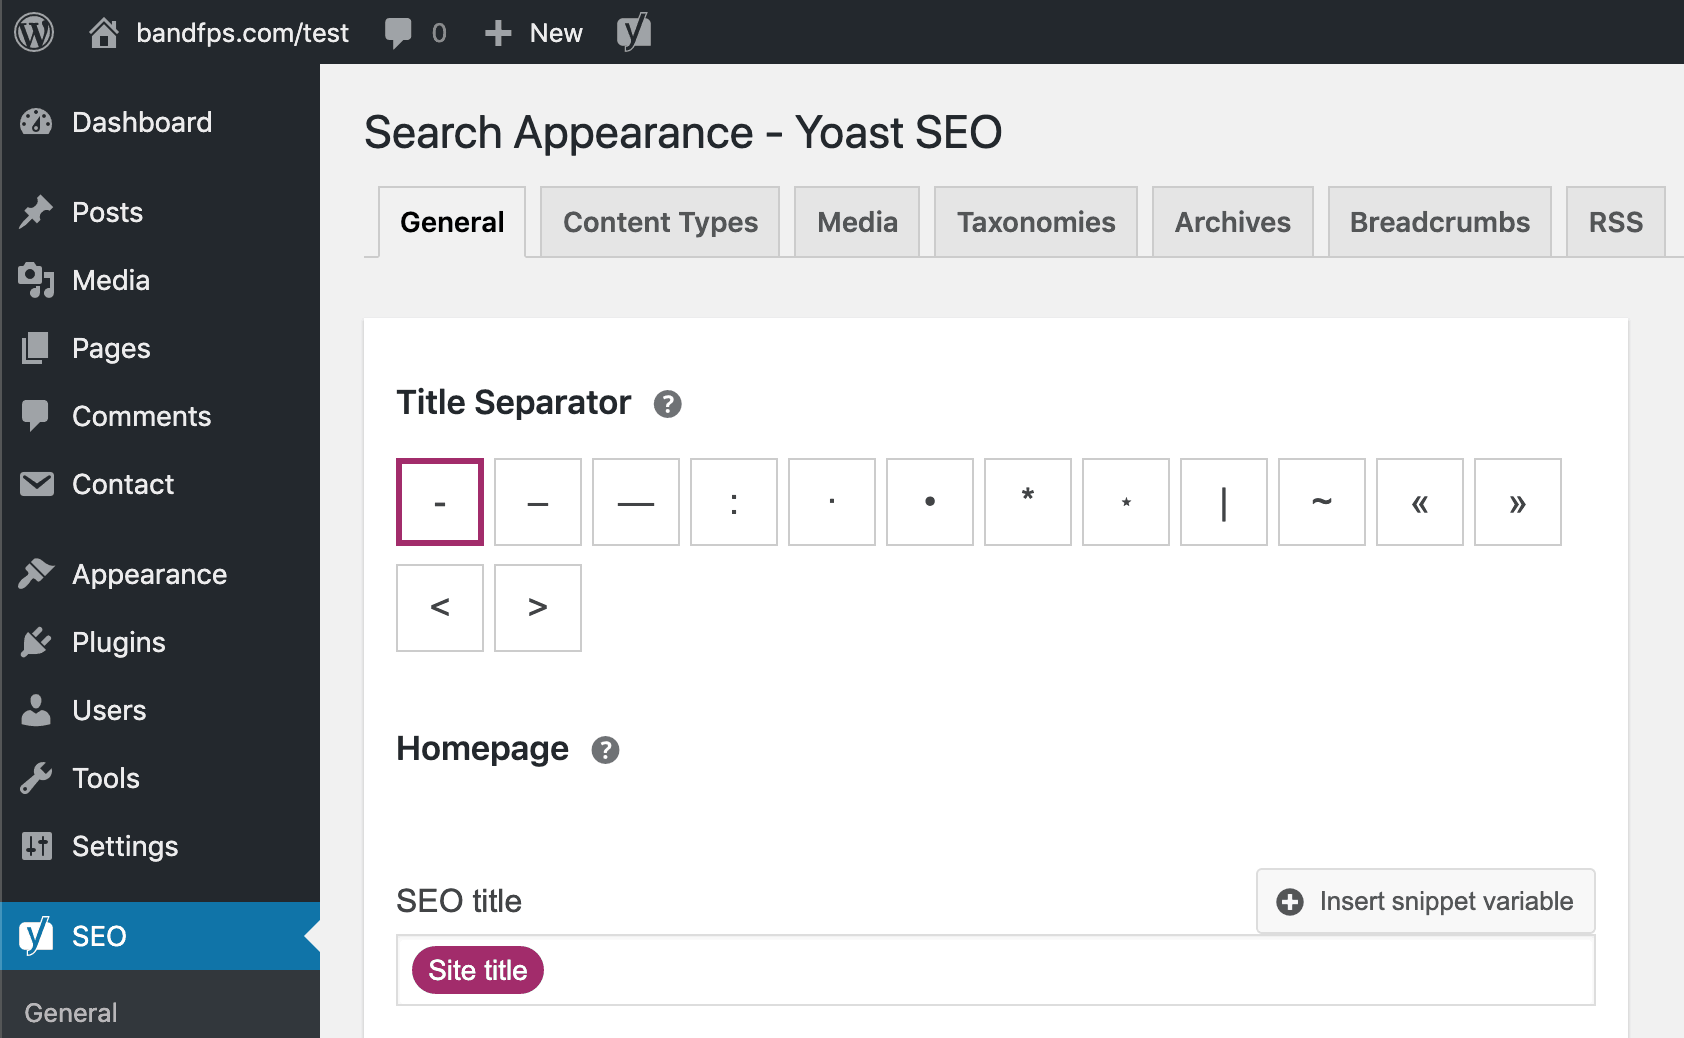
Under the ‘Homepage’ section, place your mouse cursor at the end of ‘SEO title’ and click backspace until you’ve removed ‘Page’, ‘Separator’, and ‘Tagline’. Click ‘Save changes’:
15.) It’s time to upload your logo! You can download and use a royalty free stock image and edit it yourself, or hire a professional designer on DesignCrowd or Fiverr.
Make sure to check the box next to ‘Retina logo’, then click on ‘Select logo’:
![]()
Click ‘Select Files’ on the image upload pop-up window:
![]()
Choose your file and it’ll get uploaded automatically. Enter an image description under ‘Alt Text’, then click on ‘Select’:
![]()
Crop your image (or you can choose to skip this step):
![]()
Click on ‘Publish’ to save your logo:
![]()
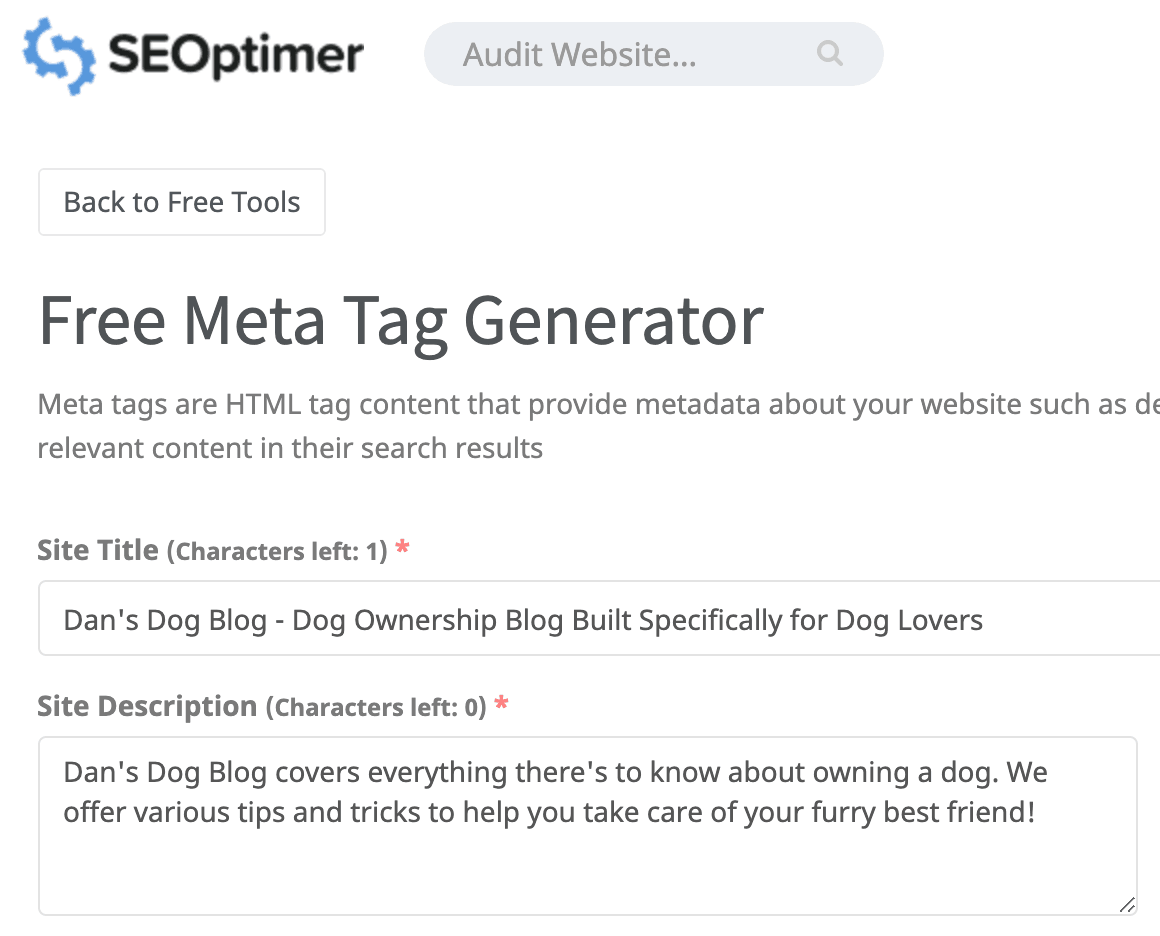
Next, visit SEOptimer’s Free Meta Tag Generator tool for help on writing your site title/description and staying within the recommended character limits. Here’s the title/description we came up with for our sample blog:
Copy and paste the title/description into the corresponding fields, then click ‘Select site icon’ to upload an icon. If you don’t have an icon ready, keep reading:
![]()
Create a new account on Canva:
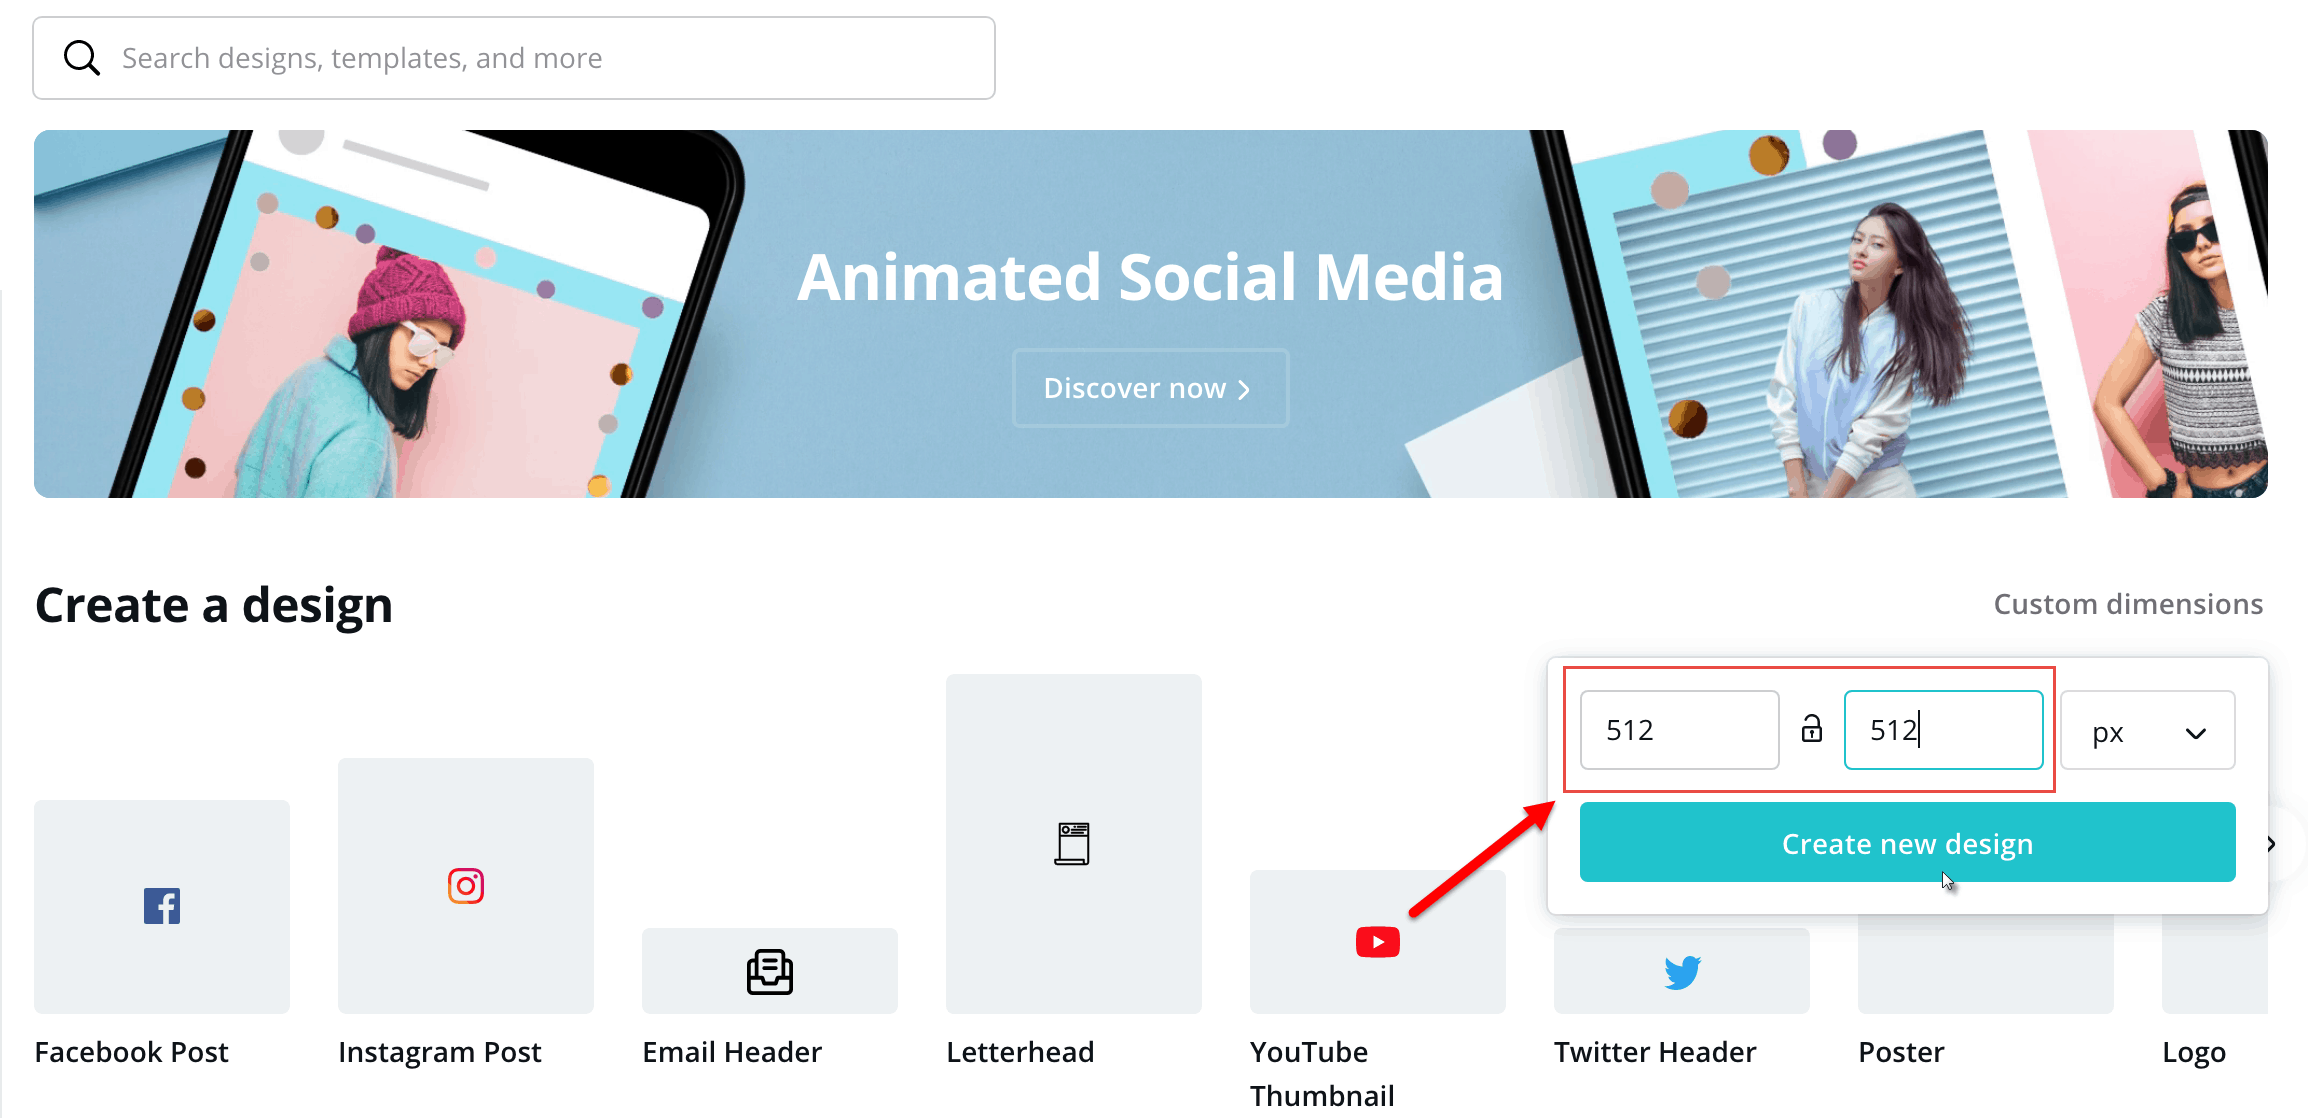
Once you confirm and sign into your account, select ‘Custom dimensions’, enter 512 for both height and width, and then click on ‘Create new design’:
Choose ‘Upload an image or video’ and select your logo. After it finishes uploading, drag the image over to the design area and stretch the two corners as illustrated below:
![]()
![]()
Click the download icon on the upper-right hand side, then click on ‘Download’:

Finally, upload the site icon and click on ‘Publish’ to save:
![]()
Conclusion
Properly configuring your WordPress settings gives your website a solid foundation to stand on. While it’s impossible to go over everything in just one article, we wanted to identify the best WordPress settings to get you started off right.
If you need help building your WordPress website, something custom-built from the ground up, or you’re looking to market an already-existing site, let’s work together!
Our next tutorial will teach you how to write your first blog post on WordPress and share it with the world. Don’t forget to subscribe below!
We hope you learned something today about how to best configure your WordPress settings. Visit our blog for more articles and subscribe to our email list to keep learning more about digital marketing!